Article

The Tastiest Chicken Curry for Kids Recipes in One Place
Chicken curry for kids doesn’t have to mean bland or boring. And yes, even fussy eaters might surprise you with a clean plate after this one.Kids love flavour, just not heat. That's where a mild, creamy chicken curry comes in. It’s warm, comforting and packed with familiar ingredients like tender chicken, potato and carrots, all in a lightly spiced, coconutty sauce. According to research, repeated exposure, for instance to herbs and spices, can actually help children develop a broader taste palate. So a chicken curry is doing more than just filling hungry bellies.These versions skip the chilli but keep the flavour, using kid-friendly ingredients like tender chicken, potato and a splash of coconut milk. It’s comforting, nourishing, and packed with gentle spices that add depth without heat, perfect for busy weeknights when you want to serve up something wholesome (and hopefully complaint-free).Ready to see your kids enjoy curry night? Keep reading for the recipes and a few easy tips to make them even more nutritious.Spice Up Mealtimes the Easy Way. Grab This Fussy Eating FixIntroducing bold flavours like chicken curry to kids can be tricky, but Healthy Parents, Healthy Kids by Dr Nick Fuller is here to help. Backed by science and packed with practical tips, this guide gives you the tools to navigate fussy eating without stress. From first bites to full plates, it’ll help your child explore new foods with confidence.Get your copy of Healthy Parents, Healthy Kids today and make dinner a win, even on curry night.Benefits of Chicken Curry for KidsChicken curry isn’t just tasty. It’s also packed with goodness that growing kids can benefit from.Good source of protein for growth: Chicken is rich in protein, which helps support muscle development and tissue repair, especially important during growth spurts.Can include hidden veggies for extra nutrition: From grated zucchini to blended pumpkin or carrots, curry sauce is perfect for sneaking in extra veggies without the fuss. A win for fussy eaters.Warm and comforting meal: The gentle warmth of a mild curry makes it the ultimate comfort food. It’s a familiar texture with just enough flavour to keep things interesting.Easy to digest when made mild: When you skip the heat and keep the ingredients simple, chicken curry becomes a soothing option that’s easy on little tummies.Pairs well with rice or soft breads: Soft rice, roti or flatbreads make great sides for dipping and scooping, turning dinner into a hands-on experience kids actually enjoy.Can support immune health with spices like turmeric and garlic: Turmeric has natural anti-inflammatory properties, while garlic is known to act as an antidote against several illnesses. Even in small amounts, these gentle spices can give your dish a healthy edge.Top 5 Tasty Chicken Curry Recipes For KidsNot all curries are created equal, especially when cooking for little ones! These kid-approved chicken curry recipes are big on flavour but gentle on spice.Chicken and Lentil Green CurryThis kid-friendly green curry is a great way to introduce gentle spice and extra nutrition. Packed with protein-rich chicken and fibre-filled lentils, it’s a quick, healthy weeknight dinner the whole family can enjoy. We’ve kept it mild for younger tastebuds, and used a simple curry paste to save time, perfect for busy nights when you still want something nourishing on the table. Type: Contains Chicken, Gluten Free, Lactose Free, Nut FreeServes 4Prep Time: 5 minutesCooking Time: 20 minutesIngredients1 cup brown rice4 tablespoons good quality store-bought green curry paste1x 400g can light coconut milk200g chicken breast, sliced into bite sized pieces¼ butternut pumpkin, sliced into small pieces1 zucchini, chopped½ red capsicum, chopped1 carrot, sliced into small pieces1x 400g tin lentils, drained and rinsed100g shelled edamame Recipe1. Cook the brown rice according to packet directions.2. Whilst the rice is cooking, heat a large pot or saucepan over high heat and add the green curry paste. Fry for a couple of minutes until fragrant, then add the coconut milk and bring to a boil.3. Add in the chicken breast and allow to cook for 3-4 minutes until white. Return the heat to medium and add in all vegetables. Cover the pot and allow it to cook for 5 minutes. Add in the lentils and edamame and cook for another 5 minutes. Ensure the vegetables are cooked through. 4. Serve the curry with the brown rice and enjoy!Pumpkin Chicken CurryThis creamy pumpkin chicken curry is perfect for kids, with its naturally sweet flavour, smooth texture and gentle spices. It’s ideal for meal prep too, so you can double the batch and stash some in the freezer for an easy, fuss-free dinner. Feel free to mix in kid-approved veggies like carrots or peas, and keep the toppings simple. Add a dollop of yoghurt or a sprinkle of soft herbs like coriander. Save the chilli and cashews for the grown-ups.Type: Contains Chicken, Gluten FreeServes 4Prep Time: 10 minutesCooking Time: 25 minutes Ingredients2 tablespoons olive oil1 onion, chopped4 medium sized chicken thigh fillets, chopped into large pieces1 teaspoon garam masala1 teaspoon turmeric1 teaspoon cumin1x 375ml can light evaporated milk½ of a small pumpkin, chopped1 small eggplant, chopped1 zucchini, chopped1x 400g tin lentils, drained and rinsed1 bunch bok choyHandful fresh coriander leavesCooked quinoa, to serveRecipe1. Heat the olive oil in a large pan over medium to high heat. Add in the onion and chicken and cook, turning often, for 4-5 minutes. 2. Stir in the garam masala, turmeric and cumin. Then pour in the evaporated milk. 3. Add in the pumpkin, eggplant and zucchini. Cover and simmer for 5-10 minutes until the vegetables have softened and the chicken is cooked through. 4. Stir in the lentils, bok choy and coriander. Allow to cook for a further 5 minutes until heated through. 5. Serve the curry alongside the quinoa. Serve immediately and enjoy!One Pot Creamy Chicken RisoniThis mild, curry-inspired risoni dish is perfect for kids who aren’t quite ready for traditional curries. It’s creamy, comforting and cooks up in just one pot, ideal for busy weeknights. Using simple ingredients and pantry staples, it’s a great way to introduce gentle spices while keeping things familiar and fuss-free for little eaters.Contains: ChickenServes 4-5Prep Time: 5 minutesCooking Time: 25 minutes Ingredients2 tablespoons olive oil1 onion, choppedSprinkle of smoked paprikaSprinkle of fennel seeds3 large chicken breasts, chopped into large pieces1 clove garlic, minced1 ¼ cups risoni pasta2 cups chicken stock1 bag baby spinachJuice of 1 lemon½ cup Greek yoghurtRecipe1. Heat a large deep saucepan over medium to high heat. Add in the olive oil and swirl to coat the pan. 2. Add in the onion, as well as the paprika and fennel seeds. Cook, stirring regularly, for 5 minutes until lightly browned. 3. Add the chopped chicken breast to the pan, along with the garlic. Fry for 3-4 minutes, stirring often. The chicken will still be slightly pink, which is ok as it will continue cooking further. 4. Stir in the risoni, then pour over the chicken stock. Stir gently to combine, then cover the pot with a lid. Increase the heat to high – as soon as the liquid boils, reduce the heat to low and simmer for 10-15 minutes until the risoni has absorbed most of the liquid. 5. Add in the baby spinach, lemon juice, and yoghurt. Mix gently to combine, then once it is heated through remove it from the heat. 6. Serve immediately and enjoy!One Pot Asian-Style ChickenThis kid-friendly take on Asian-style chicken brings all the flavour without overwhelming little tastebuds. It’s a mild, saucy dish that comes together in one pot, perfect for weeknights when you want something quick, wholesome and easy to clean up. Serve with soft rice or noodles for a comforting dinner the whole family can enjoy. Type: Contains Chicken, Lactose FreeServes 4-6Prep Time: 5 minutesCooking Time: 30 minutes Ingredients2 tablespoons olive oil1 garlic clove, minced1 teaspoons ginger, minced4 large chicken thighs2 tablespoons soy sauce1 tablespoon rice wine vinegar1 teaspoon sesame oil1 cup Jasmine rice200g button mushrooms, sliced4 spring onions, sliced, plus extra to serve1 ½ cups chicken stockChili oil, to serveRecipe1. Heat a large deep saucepan over medium to high heat. Add in the olive oil and swirl to coat the pan. 2. Add in the garlic, ginger, and chicken thighs. Cook for 5 minutes on each side until golden, then remove from the pan. 3. To the saucepan add in the soy sauce, rice wine vinegar, sesame oil, rice, mushrooms and spring onion. Stir everything to combine, then pour over the chicken stock. Ensure that the rice is covered by the liquid. 4. Return the chicken thighs to the pan, and place them on top of the rice. Cover the pan and continue cooking until the liquid is bubbling. Once the liquid bubbles, reduce the heat to low and simmer for 10-15 minutes until all of the liquid is absorbed. 5. Remove the pan from the heat, keep the lid on, and set aside to rest for 10 minutes. The rice will steam and finish cooking. 6. Scatter the extra sliced spring onion over the top, and drizzle with chili oil. Serve immediately and enjoy! One Pot Italian Style ChickenWhile not your typical curry, this Italian-inspired chicken dish is just as comforting and full of gentle flavour, perfect for kids easing into more adventurous meals. It’s a one-pot wonder that’s easy to prepare, packed with veggies, and ideal for busy nights when you want something nourishing on the table with minimal fuss.Type: Contains Chicken, Gluten Free, Lactose FreeServes 4Prep Time: 5 minutesCooking Time: 35 minutes Ingredients3 large chicken breasts2 tablespoons olive oilSprinkle of smoked paprika1 onion, chopped1 clove garlic, mincedSprinkle of oregano 2 bunches broccolini, chopped2 tablespoons tomato paste1 punnet mini truss tomatoes 1 cup vegetable stock1 bag baby spinach1 bunch of fresh basil leavesRecipe1. Heat a large deep saucepan over medium to high heat. Add one tablespoon of the olive oil and swirl to coat the pan. 2. Add the chicken breasts to the pan and sprinkle with paprika. Cook the chicken for 5-6 minutes on each side until golden. Remove from the pan and set aside.3. Add the remaining olive oil to the pan, then add in the onion, garlic, and oregano. Cook, stirring often for 5 minutes until softened. Add in the broccolini and sauté for a further 5 minutes. 4. Stir in the tomato paste, then slowly pour in the vegetable stock. Return the chicken breasts to the pan, along with the truss tomatoes. 5. Cover the saucepan with a lid and bring to the boil. Once boiling, reduce the heat to low. Simmer for 5-10 minutes, until the chicken is cooked through. 6. Remove from the heat, then stir in the baby spinach and basil leaves. Serve immediately and enjoy!What to Serve with Chicken Curry for KidsThe right sides can turn a simple curry into a fun, balanced meal for kids. Whether you’re catering to picky eaters or adventurous little foodies, these side options are gentle on the palate and great for dipping, scooping or balancing out flavours.Steamed white or brown rice – A classic base that soaks up all that yummy curry sauce. Brown rice adds extra fibre, while white rice keeps things soft and simple.Soft roti or naan – Tearable, dippable, and super kid-friendly, flatbreads make curry night feel hands-on and fun.Plain yoghurt – A cool, creamy side that balances mild spices and adds a calcium boost.Cucumber sticks – Crunchy and refreshing, perfect for cutting through warm dishes.Mild lentils – Soft and protein-packed, lentils make a great side or mix-in for growing appetites.Mashed sweet potato – Naturally sweet and smooth, this pairs beautifully with spiced curries and adds a veggie boost.Steamed broccoli or peas – Quick, easy, and full of nutrients, these are great ‘green’ options to round out the meal.Fruit slices – Apples, pears or grapes make a fun, sweet contrast to savoury curry and help finish off the plate on a high note.Looking for more clever ways to sneak in extra veggies? Check out our Top Hidden Vegetable Recipes For Picky Eaters for inspiration, perfect to pair with your favourite chicken curry.Final ThoughtsChicken curry doesn’t have to be off the table just because you’re cooking for kids. With a few simple tweaks, like keeping it mild, adding familiar ingredients, and serving it with fun, balanced sides, it can become a family favourite in no time. From hidden veggies to gentle spices, there’s plenty of room to nourish growing bodies and expand their taste buds.Whether you’re making a one-pot wonder or a creamy coconut curry, don’t be afraid to spice things up (just a little). Who knows? Curry night might just become the most requested dinner of the week.Stay informed with fresh tips, expert guidance, unique deals, and tailored support!Click HereMeet Dr Nick FullerMy StoryAs a father, I know first-hand that raising healthy and happy children is tricky. Children are fussy, particularly at the end of the day when they are shattered. We also live in a society where companies seek to profit from what we feed our kids; incorrect and damaging advice is pushed on us and marketed towards our children, and we have no time.But with these recipes and resources, you and your children can enjoy simple and well-founded food and lifestyle choices for lifelong health.

The Best Kids Chocolate Chip Cookie Recipe to Bake Today
Who can say no to a warm, gooey chocolate chip cookie? Especially when it’s homemade and made with the kids! If you’re after an easy, no‑fuss chocolate chip cookie recipe that’s perfect for little hands and big cravings, you’re in the right place.Baking with kids isn’t just about sweet treats. It’s a powerful learning moment. A 2014 study found that children aged 6–10 who helped prepare meals at home ate significantly more vegetables and consumed more calories overall compared to those who didn’t cook with a parent. They also reported feeling more positive about the food they prepared themselvesBeyond nutrition, baking supports physical development too. A 2025 observational study revealed that preschoolers who engaged in cooking tasks like stirring and mashing showed stronger fine motor skills, which is an important foundation for writing, dressing, and other daily tasks.And let’s not forget the joy. Measuring, mixing, and sneaking a few chocolate chips from the bowl creates memories and teaches early maths, sequencing, and independence. It’s the kind of hands-on, messy learning every child can get behind.Ready to stir up some fun and sweet learning? Let’s get baking! Bake the Joy Back Into Mealtimes. Start with This Parenting Must-ReadIf your child’s food choices start and end with sweets, Healthy Parents, Healthy Kids by Dr Nick Fuller offers practical, science-backed strategies to help broaden their tastes, without taking the fun out of food. Whether you're baking chocolate chip cookies together or encouraging balanced meals, this book can help make food less of a fight and more of a joy.Get your copy of Healthy Parents, Healthy Kids today and enjoy more happy moments in the kitchen.Why Kids Love Chocolate Chip CookiesIt’s no mystery that chocolate chip cookies are a childhood classic for a reason. Here’s why they’re always a hit with little ones:Sweet and soft texture: That perfect combo of crisp edges and a soft, chewy centre makes every bite satisfying for kids (and let’s be honest, adults too!).Melty chocolate chips: Warm, gooey chocolate is hard to beat. Watching the chips melt straight from the oven is half the fun, and the flavour payoff is real.Fun to help make: From measuring flour to sneaking chocolate chips when no one’s looking, baking cookies is full of kid-friendly tasks that feel like play.Easy to eat and hold: No cutlery, no crumbs everywhere. Just grab and go. Perfect for little hands and busy snack times.Familiar and comforting flavour: There’s something about the smell and taste of a classic choc chip cookie that feels like home, making them a comforting favourite.Great as a snack or treat: Whether it’s packed in a lunchbox, served after school, or offered as a reward, cookies tick all the boxes for a kid-friendly treat.Choc chip cookies a hit? Check out our 6 Healthy Indulgent Desserts for Children for more sweet treats kids will love, minus the sugar overload.Here’s Your New Favourite Healthy Chocolate Chip Cookie Recipe for KidsThis simple recipe is perfect for baking with kids. It’s quick, fun, and uses ingredients you probably already have at home. Best of all, it delivers that classic chocolate chip flavour with a few better-for-you tweaks.Tahini Chocolate CookiesThese cookies are a fun twist on the classic chocolate chip variety. Perfect if you're looking to mix things up after trying our go-to kids’ cookie recipe. The tahini adds a rich, nutty flavour that pairs beautifully with chocolate, and they come together in no time. Try freezing them individually to help with portion control. They're seriously moreish!Type: Vegetarian, Gluten Free, Lactose Free, Contains Nuts, SnacksMakes 16Prep Time: 5 minutesCooking Time: 10-15 minutesIngredients½ cup tahini1 egg3 tablespoons honey3 tablespoons olive oil1/3 cup cocoa powder2 tablespoons almond mealSprinkle of salt½ teaspoon bi-carb soda1/3 cup 70% dark chocolate, cut into small chunks or chipsRecipe1. Preheat the oven to 180°C and line a baking tray with baking paper. Add the tahini, egg, honey and olive oil to a mixing bowl and use a whisk to combine. 2. Add the cocoa powder, almond meal, a sprinkle of salt and the bi-carb soda. Fold slowly and gently to combine. Fold in the dark chocolate chips. 3. Spoon tablespoons of the mixture onto the baking tray and flatten slightly. 4. Bake for 10-12 minutes. The outside should be crisp, but the centre of the cookie will still be slightly soft. 5. Allow cookies to cool slightly on the tray then enjoy!Easy, Fun Serving Tips for Your Chocolate Cookie BatchOnce your cookies are baked and cooled (or slightly warm—yum!), there are plenty of fun and creative ways to serve them to kids. Not only do these tips make snacks more exciting, but they can also support healthier eating habits and sensory engagement.Serve with a Glass of MilkA classic combo! Cold milk and warm cookies are a match made in snack heaven. Plus, adding milk gives a calcium and protein boost, two key nutrients essential for growing kids.Add to Lunchboxes as a SurprisePop one into your child’s lunchbox for a sweet little treat. They’ll love the surprise. Research shows that children, on average, eat around 68% of what's packed in their lunchbox. So, including a small favourite can increase overall lunchtime consumption and satisfaction.Pair with Fruit Slices for BalanceBalance out the sweetness with fresh apple slices, strawberries or banana on the side. Making fruit a regular part of their diet may help improve insulin sensitivity and lower their risk of diabetes. Crumble Over Yoghurt or Ice CreamTurn dessert into a DIY sundae by crumbling cookies over vanilla yoghurt or ice cream. It adds texture, fun, and a bit of sensory variety that kids love.Warm Slightly Before ServingA quick 10-second zap in the microwave makes the chocolate chips melty and irresistible, perfect for sensory delight.Decorate With Extra Chips Or SprinklesLet the kids have fun with the final touch. Extra chocolate chips, colourful sprinkles, or a light dusting of cinnamon make it feel extra special.Final BiteThere’s something timeless about baking chocolate chip cookies with kids. Mixing the dough, sneaking a few choc chips, and watching them light up when the warm tray comes out of the oven. This simple recipe is more than just a treat. It's a chance to connect, teach, and create lasting kitchen memories. Whether you're whipping up a batch for the lunchbox, after-school snack time or just because, this kid-friendly cookie delivers on both flavour and fun.Stay informed with fresh tips, expert guidance, unique deals, and tailored support!Click HereMeet Dr Nick FullerMy StoryAs a father, I know first-hand that raising healthy and happy children is tricky. Children are fussy, particularly at the end of the day when they are shattered. We also live in a society where companies seek to profit from what we feed our kids; incorrect and damaging advice is pushed on us and marketed towards our children, and we have no time.But with these recipes and resources, you and your children can enjoy simple and well-founded food and lifestyle choices for lifelong health.
Easy and Healthy Pasta for Kids They’ll Actually Eat
Pasta night is basically a childhood rite of passage. Ask any parent and they'll tell you it's one of the few meals their kids will eat without complaint (sometimes even with joy!). And it’s no surprise. Pasta is warm, comforting, endlessly customisable, and ridiculously easy to whip up on a busy weeknight.But it’s not just convenient. Pasta has real nutritional upside, too. An analysis of randomised trials found that pasta leads to a significantly lower post-meal blood sugar spike compared to bread or potatoes, likely due to its low glycaemic index. That slow-release energy can help keep little tummies settled and moods steady. Another study found that pasta eaters had higher intakes of fibre, folate, iron, magnesium and vitamin E, and lower saturated-fat consumption, plus better overall diet quality, all compared with non-pasta eaters.So whether you’ve got a toddler with texture issues, a school-aged carb lover, or just need a dinner that won’t end in tears (yours or theirs), we’ve got you covered. Read on for simple, wholesome, and kid-approved pasta ideas that’ll make your weeknights way easier.Turn Pasta Night Into a Win. Grab This Must-Have Parenting GuideStruggling to get your child on board with anything other than plain pasta? Healthy Parents, Healthy Kids by Dr Nick Fuller is packed with simple, research-backed tips for tackling fussy eating without turning the dinner table into a battleground. From sneaky veggie sauces to pasta twists even picky eaters will try, this book gives you smart, doable ideas the whole family can try. Get your copy of Healthy Parents, Healthy Kids now and make pasta night (and every night) a little easier.What Makes Pasta Good for KidsPasta isn’t just a dinnertime classic. It’s practically built for little eaters. Here’s why it’s a winner for families, especially when you’re juggling fussy appetites and tight schedules:Soft and easy to chew: Cooked pasta has a gentle texture that’s perfect for toddlers and younger kids still getting used to chewing. No hard edges or tricky bites.Quick to prepare: Most pasta dishes are quick and easy to make, making it a lifesaver on busy weeknights or when you’ve got a hangry kid on your hands.Works well with mild flavours: Whether it’s a light cheese sauce, tomato, or just butter and herbs, pasta pairs beautifully with gentle flavours that kids are more likely to accept.Can be served hot or cold: Leftovers? No problem. Pasta dishes taste great straight from the fridge or warmed up, making them perfect for lunchboxes or next-day meals.Easy to hide veggies: Blend some pumpkin into the sauce or grate zucchini into the mince. Pasta’s the ultimate disguise for adding extra nutrition without a fight.Great for batch cooking: Make a big batch on Sunday and you’ve got lunch or dinner sorted for the next couple of days. It stores well and reheats beautifully.Loved by picky eaters: There’s just something about pasta. Even the pickiest kids usually have a favourite shape or sauce, meaning fewer dinner-time battles and cleaner plates.Top 6 Pasta Recipes For KidsIf you are looking for pasta dishes that actually get a thumbs-up from your kids, these kid-friendly favourites are tried, tested, and totally fuss-free. Also, they make mealtimes easier and a lot more fun.One-Pot Pesto PastaThis green beauty is packed with flavour and nutrients, perfect for growing kids who need a boost of goodness even if they don’t love veggies. The best part? It’s all made in one pot, so there’s less mess and more time to enjoy dinner. Serve it warm for a cosy family meal or pop the leftovers in the lunchbox as a cold pasta salad the next day. Kids won’t even notice they’re eating something healthy.Type: Vegetarian, Vegan, Lactose FreeServes 4Prep Time: 5 minutesCooking Time: 10 minutesIngredients300g wholemeal pasta (this dish works best with small shell or penne)1 head broccoli½ cup frozen green peas1 cup frozen edamame½ cup homemade green pestoPinch of salt and pepperRecipe1. Fill a large pot approximately half way with water and bring to the boil over high heat. Add the pasta and continue to boil for 5 minutes.2. Whilst the pasta is boiling, chop the broccoli into small pieces including the stem. Measure out the frozen edamame and peas and set aside. 3. Once the pasta has been boiling for 5 minutes, add in the broccoli and bring back to the boil. Once boiling again add the edamame and peas. Boil for another 3 minutes or until the pasta is cooked.4. Reserve ½ cup of the cooking water before draining the pasta and vegetables. Return to the cooking pot (with the heat turned off) and add in the cooking water, pesto and salt and pepper. Mix to combine. Enjoy!Pulse Penne Pasta Looking for a fun twist on the usual spag bol? This legume-based pasta sauce is packed with plant-based protein and fibre, making it a smart pick for growing kids. It’s hearty, tasty and a great way to introduce new flavours and textures without straying too far from what they already love. A simple, nutritious dinner that still ticks the kid-approved box. Type: Vegetarian, Lactose Free, Nut freeServes 4Prep Time: 5 minutesCooking Time: 20 minutesIngredients300g wholemeal penne pasta 1 tablespoon olive oil1 clove garlic, minced1 onion, finely diced2 stalks celery, finely diced1 carrot, finely diced1 teaspoon cumin1 teaspoon paprika1 tablespoon tomato paste1x 400g tin crushed tomatoes1x 400g tin red kidney beans, drained and rinsed1x 400g tin lentils, drained and rinsedSprinkle of salt and pepperBasil leaves, to serveRecipe1. Bring a large saucepan of water to the boil over high heat. Add the penne pasta and cook for approximately 12 minutes until al dente. Drain. 2. Meanwhile, heat the olive oil in a large pot over medium heat. Add garlic clove and onion and sauté for a couple of minutes. Add celery, carrot, cumin and paprika and cook for another 5 minutes, stirring occasionally, until soft. Add tomato paste and crushed tomatoes. Fill up the tomato tin with water and pour into the pot. 3. Stir in the red kidney beans and lentils, and season with salt and pepper. Bring to the boil, then turn the heat down and allow to simmer for at least 15 minutes until thickened.4. Divide cooked pasta between four serving bowls, and top with ladles of the pasta sauce. Scatter torn basil leaves over the top and serve. Enjoy!Pasta with Tahini SauceCreamy, nutty, and totally different from your usual cheese or tomato-based sauces, this pasta is a fun way to introduce new flavours to your child’s plate. Tahini adds a smooth texture and a dose of healthy fats, perfect for little ones who need energy for all that running around. If your kids haven’t tried tahini yet, this dish is a gentle and tasty place to start.Type: Vegetarian, Vegan, Lactose FreeServes 6Prep Time: 10 minutesCooking Time: 15 minutesIngredients500g wholemeal pasta 1 tablespoon olive oil1 cup frozen peas1 cup frozen edamame1x 400g tin chickpeas, drained and rinsedExtra lemon juice, to serveSprinkle of sesame seeds, to serveFor the tahini sauce:½ cup tahini Zest and juice of 1 lemon1 garlic clove, mincedHandful parsley leavesHandful basil leavesHandful mint leaves½ cup water1 tablespoon olive oilSprinkle of salt and pepperRecipe1. Bring a large saucepan of water to the boil over high heat. Add the pasta and cook for approximately 12 minutes until al dente. During the last minute of cooking, add in the frozen peas and edamame and cook until bright green but still crunchy. Reserve ½ cup of the pasta cooking water, then drain the pasta, peas and edamame. 2. Meanwhile, make the tahini sauce. In a small blender add the tahini, lemon zest, lemon juice, herbs and ½ cup of water. Blend until smooth. Stir in the olive oil and season with a good pinch of salt and pepper. 3. Add the pasta, peas and edamame back into the large saucepan but off the heat. Add in the chickpeas, then pour over the tahini sauce and the reserved pasta water. Stir to combine everything together. 4. Serve with an extra drizzle of lemon juice and scatter with sesame seeds. Enjoy!Pantry PastaRunning low on groceries? This kid-friendly pasta recipe is perfect for those ‘what’s for dinner?’ nights when the fridge is looking bare. It uses simple pantry staples and whatever veggies you’ve got on hand, making it both flexible and family-friendly. Quick, comforting and endlessly customisable, it’s a great go-to for feeding hungry kids without the stress. Type: Lactose Free, FishServes 4Prep Time: 5 minutesCooking Time: 15 minutesIngredients300g wholemeal spaghetti2 tablespoons olive oil2 garlic cloves, crushed1 teaspoon chilli flakes, plus extra to serve1 bunch broccolini, sliced into florets½ bunch kale, stems removed, and leaves choppedHandful parsley leaves, choppedJuice and zest of 1 large lemon1 large tin tuna in springwater, drained and flaked into smaller pieces Freshly ground black pepperRecipe1. Half-fill a large saucepan with water and bring to the boil over high heat. Add the spaghetti and cook for approximately 12 minutes until al dente. Reserve a cup of the water that the pasta cooked in before draining. 2. Meanwhile, heat a frying pan over low heat. Add the olive oil, garlic and chilli flakes and heat until fragrant. Keep the heat over low to medium so that the garlic does not start spitting out of the pan. 3. Add the broccolini, kale and parsley to the frying pan and stir through the oil mixture. Add about half of the pasta water to the pan and turn up the heat to medium to high. Allow the vegetables to cook for a couple of minutes. 4. Add in the lemon juice and zest as well as the tuna. Add the drained spaghetti into the frying pan and mix the spaghetti through the sauce mix. Add more pasta water if needed so that everything coats the pasta. 5. Sprinkle with black pepper and extra chilli flakes if desired. Enjoy!Creamy Green PastaThis vibrant green pasta looks indulgent but is secretly packed with veggies, perfect for sneaking some extra goodness into your kid’s dinner without them even noticing. It’s smooth, creamy and full of flavour, making it a hit with little ones who might normally turn up their nose at anything green. Skip the chilli flakes for the kids, or keep them on the side for the grown-ups. Type: VegetarianServes 6-8Prep Time: 10 minutes Cooking Time: 30-35 minutesIngredients400g wholemeal short pasta (shells or spirals work well)1 ½ cups frozen peas, defrosted½ cup frozen shelled edamame, defrosted1 head broccoli, chopped 1 zucchini, chopped1 cup Greek yoghurt 1 garlic clove1 teaspoon seeded mustardHeaped handful fresh parsley leavesCracked black pepper, to serveChili flakes, to serveRecipe1. Bring a medium pot of water to the boil and boil the pasta until cooked. In the final couple of minutes add in 1 cup of the peas, as well as the edamame to heat through. 2. Reserve ½ cup of the pasta water before draining the pasta, peas and edamame.3. Meanwhile, steam the broccoli and zucchini for 10 minutes until tender.4. To make the pasta sauce, blend the yoghurt, garlic, mustard, remaining ½ cup peas, and a sprinkle of parsley leaves until smooth. 5. Add the cooked pasta, peas, edamame, broccoli, and zucchini to a large bowl. Pour over the dressing and add the reserved pasta water. 6. Stir everything gently to combine. 7. Serve immediately sprinkled with extra parsley, pepper, and lots of chili flakes. Enjoy!Simple Ricotta PastaThis must be our most simple pasta recipe yet – only 3 ingredients! This is a great dish to prepare when you are low on time and hungry. As this dish has minimal ingredients, it will taste best with the highest quality ingredients that you have access too. This pasta is best eaten right away, rather than stored and re-heated later. Type: VegetarianServes 6Prep Time: 5 minutes Cooking Time: 15 minutesIngredients500g orecchiette pasta300g fresh ricottaBlack pepper to serve (optional)Recipe1. Heat a large saucepan of water over high heat and bring to the boil. Once boiling add in the orecchiette pasta and cook for approximately 8-10 minutes until al dente. Remove from the heat. 2. Reserve 1 cup of pasta water. Drain the pasta and then return the pasta to the large saucepan. 3. Mash the ricotta in a bowl, then slowly add in some of the reserved pasta water. Add in enough pasta water to reach a thick and creamy sauce consistency. 4. Add the ricotta into the large saucepan with the cooked pasta. Stir well to combine. 5. Serve the pasta immediately, with a sprinkle of black pepper if desired. Enjoy!How to Make Pasta for Kids HealthierPasta is a great base for adding more nutrients without losing flavour. Here are some easy ways to boost the goodness in your kid’s pasta bowl, most of which they won’t even notice.Grated zucchini: Stir it into sauces, it melts right in and adds moisture without changing the taste.Chopped spinach: A handful of finely chopped baby spinach wilts easily into warm pasta for a sneaky iron boost.Steamed broccoli: Lightly mash it and mix through for extra fibre and vitamin C.Mashed pumpkin: Adds natural sweetness and a creamy texture, perfect in cheese or white sauces.Cooked lentils: Great in Bolognese-style sauces for added protein and fibre, especially for meat-free meals.Shredded chicken: An easy way to add lean protein to keep kids fuller for longer.Cottage cheese or ricotta: Mild in flavour and packed with calcium. It is great stirred through or dolloped on top.Sweet corn: Adds colour, crunch and natural sweetness that kids tend to love.Canned beans (rinsed): Butter beans or cannellini beans blend well into sauces and are rich in fibre and protein.Cherry tomatoes (halved): Bursting with flavour and antioxidants, perfect for roasting or adding fresh.Olive oil instead of cream sauces: Swap heavy creams for a splash of olive oil and a sprinkle of parmesan for a lighter, heart-healthy option.Wholemeal or legume-based pasta: Boosts fibre and protein without much change in taste, ideal for growing bodies.Check out this excellent read on Easy Recipes for Family Meal Planning for Picky Eaters, featuring smart ways to build fuss-free meals using family favourites like pasta, complete with tips on sneaking in veggies and keeping dinner stress-free..Wrapping UpPasta really is a parent’s best friend—quick, versatile, and almost always a hit with the kids. Whether you’re sneaking in extra veggies, trying new flavours, or just need a no-fuss dinner everyone will actually eat, pasta’s got you covered. With a few clever swaps and nutritious add-ins, you can turn even the simplest bowl into a balanced, kid-approved meal.So go ahead. Mix, match, and make it your own. Because when pasta night runs smoothly, the whole evening does too.Stay informed with fresh tips, expert guidance, unique deals, and tailored support!Click HereMeet Dr Nick FullerMy StoryAs a father, I know first-hand that raising healthy and happy children is tricky. Children are fussy, particularly at the end of the day when they are shattered. We also live in a society where companies seek to profit from what we feed our kids; incorrect and damaging advice is pushed on us and marketed towards our children, and we have no time.But with these recipes and resources, you and your children can enjoy simple and well-founded food and lifestyle choices for lifelong health.

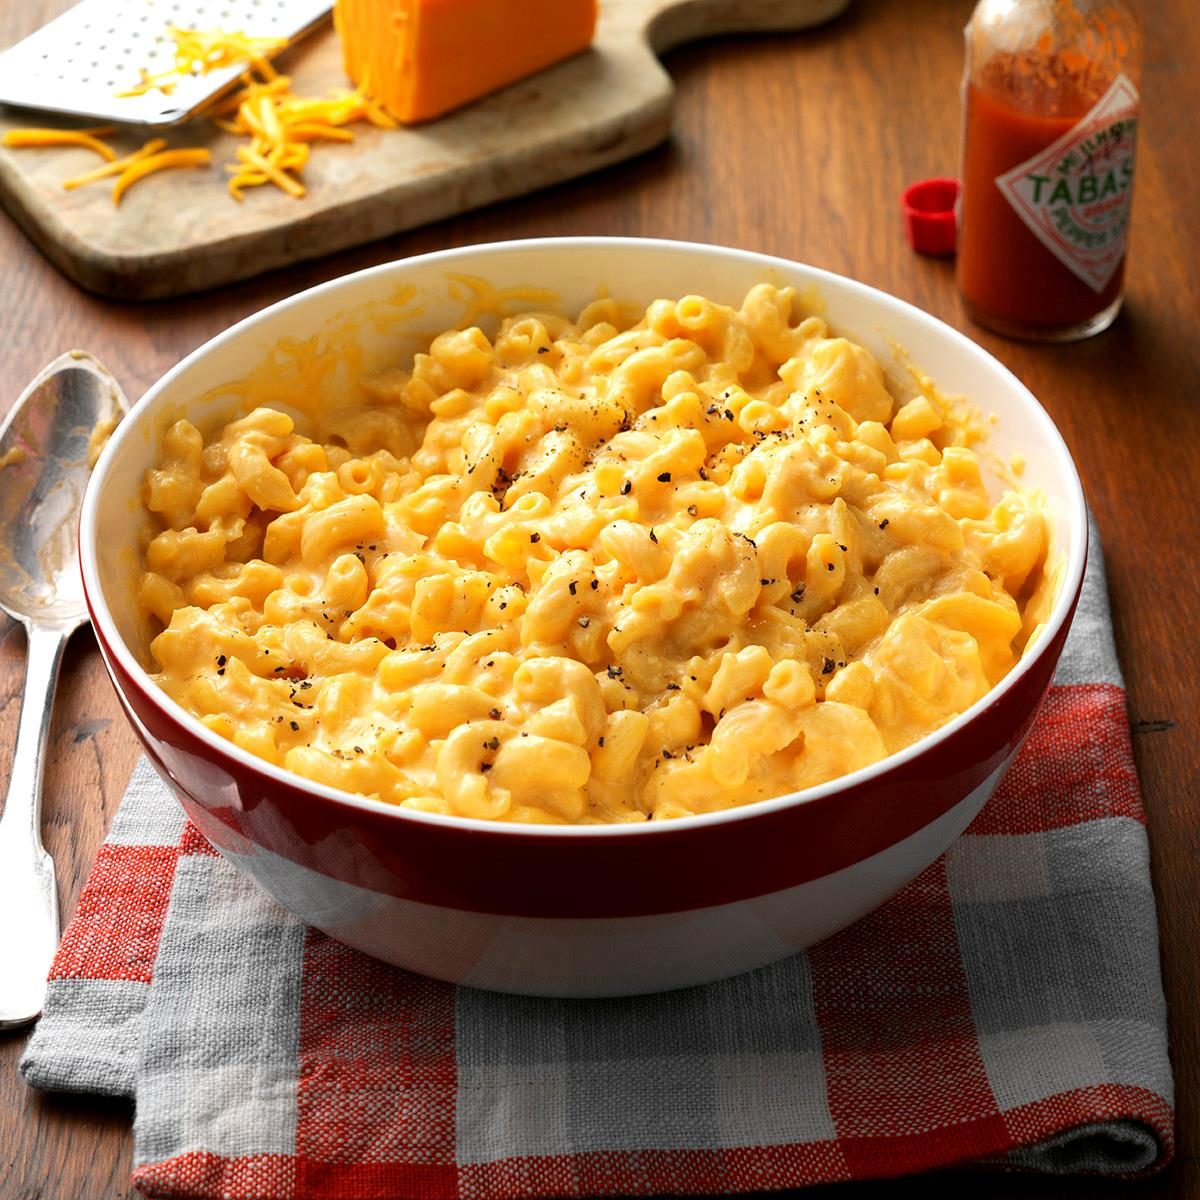
Top Air Fryer Recipes for Kids on Busy Days
Let’s face it: feeding kids can sometimes feel like preparing a three-course meal for the pickiest food critics on Earth. But here’s the good news: your air fryer might just be your new best mate in the kitchen. With its quick cook times, little to no oil needed, and the magical ability to turn veggies into crunchy delights, it’s the ultimate hack for fuss-free mealtimes.According to 2012 findings from Australian National Health Surveys, only 5.1% of kids eat the recommended daily servings of vegetables. That’s a serious veg gap! But studies show that air-frying veggies, particularly Brassica vegetables, can retain more nutrients than freeze-drying, sautéing, and steaming, while still delivering that irresistible crunch that kids actually want to eat. So whether your child’s a nugget-nibbler or a snack monster, we’ve got simple, tasty air fryer recipes for kids that’ll make you a mealtime legend. Ready to turn fussy eaters into happy munchers? Read on for our top kid-friendly air fryer picks!Turn Food Fussiness Around with This Must-Read Book for ParentsIf your child turns their nose up at anything new, Healthy Parents, Healthy Kids by Dr Nick Fuller might just be the secret ingredient you need. Packed with proven strategies for managing picky eating, this book helps take the stress out of mealtime, whether you’re serving up air fryer nuggets, veggie chips, or trying a brand-new recipe.Grab your copy of Healthy Parents, Healthy Kids today and enjoy more peaceful, plate-cleaning moments.How Air Fryers Make Healthy Eating Easier Air fryers make healthier food faster, with less mess, and the results are crunchy, golden and kid-approved. Here’s why they’re perfect for family cooking:Less oil, healthier resultsAir fryers use rapid hot air circulation to cook food, meaning you can skip the deep vat of oil altogether. Studies show this method can cut fat content by up to 70% compared to traditional deep frying. The result? Meals that are still golden and crispy, just without the greasy aftermath.Crispy textures kids loveLet’s be honest: kids are texture critics. From crunchy nuggets to crispy veggie chips, the air fryer delivers that golden coating that makes everything more fun to eat. Air frying draws out more moisture from the surface while keeping the inside tender, giving you that crispy ‘fried’ feel without the oil overload.Fast and easy for busy weekdaysBetween after-school chaos and bedtime routines, weeknight dinners need to be quick. Air fryers heat up in minutes and cook food faster than a standard or convection oven. Plus, with fewer trays and no oil splatter, clean-up is a breeze.Great for small batch cookingNot every meal needs to feed a crowd. Sometimes it’s just one hungry kid asking for a snack. Air fryers are perfect for small portions, whether it’s reheating last night’s fritters or making just a few chicken strips. It’s quick, efficient and doesn’t leave you with a sink full of dishes.5 Best Air Fryer Recipes For KidsLooking for quick, tasty meals that your kids will actually want to eat? These air fryer recipes are fuss-free, parent-approved and perfect for picky eaters. 1. Air Fryer Mac & Cheese BitesThe classic comfort food your kids love, now bite-sized and crispy. These cheesy bites are perfect for lunchboxes, party platters or sneaky midnight snacks. You can even freeze them for quick reheating on busy school mornings.Type: Vegetarian, freezer-friendlyMakes: 12–14 bitesCooking Time: 10 minutesIngredients2 cups cooked mac & cheese (cold leftovers work great)½ cup shredded cheddar cheese1 egg1 tbsp milk½ cup breadcrumbsRecipeIn a bowl, combine mac & cheese, cheddar, egg and milk until sticky.Scoop tablespoon-sized portions and roll into balls, then coat in breadcrumbs.Air fry at 190°C for 8–10 mins, flipping halfway through, until golden and crisp.Pro Tip: Let them cool before packing in a lunchbox to keep the crispness.2. Homemade Air Fryer Chicken NuggetsWay better than the frozen ones, these chicken nuggets are juicy, crunchy and free of preservatives. Plus, they're fun for kids to help make. Serve with dipping sauces and a side of veggies for a balanced meal.Type: High-protein, low-oilServes: 3–4 kidsCooking Time: 12 minutesIngredients2 chicken breasts, cut into small chunks½ cup plain flour1 egg, beaten1 cup panko or breadcrumbsSalt & pepper to tasteRecipeSeason chicken lightly with salt and pepper.Dredge each piece in flour, dip in egg, then coat in breadcrumbs.Air fry at 200°C for 10–12 minutes, shaking the basket halfway.Optional: Add garlic powder or paprika to the breadcrumbs for extra flavour.3. Air Fryer Sweet Potato FriesSweet potato fries are a nutrient-packed alternative to regular chips, with a natural sweetness kids adore. They’re soft on the inside, crispy on the outside, and perfect for little hands to grab.Type: Vegetarian, gluten-free, high in fibreServes: 2 kidsCooking Time: 15 minutesIngredients2 medium sweet potatoes, peeled and cut into fries1 tbsp olive oilPinch of saltOptional: pinch of cinnamon or paprikaRecipeToss sweet potato sticks in olive oil, salt, and any optional spices.Spread evenly in the air fryer basket (don’t overcrowd).Cook at 200°C for 12–15 minutes, shaking halfway for even crisping.Serve with: Greek yoghurt mixed with a drizzle of honey for dipping.4. Hidden-Veggie Air Fryer PattiesPacked with hidden veggies, these patties are a sneaky way to boost your child’s fibre and veggie intake. They’re soft enough for toddlers and make great burger fillings or finger food.Type: Vegetarian, high-fibre, toddler-friendlyMakes: 6 small pattiesCooking Time: 12 minutesIngredients:1 cup mashed potato½ cup grated carrot or zucchini (squeezed dry)¼ cup corn kernels¼ cup shredded cheese¼ cup breadcrumbs1 eggRecipeMix all ingredients until well combined.Shape into patties and place in the air fryer.Cook at 190°C for 10–12 mins, flipping once for even browning.Tip: Turn them into mini sliders with dinner rolls and a little mayo.5. Air Fryer Apple ChipsNaturally sweet and crunchy, apple chips make a perfect lunchbox snack or dessert alternative. With no added sugar, they’re a healthy swap for packaged snacks. And they smell amazing while cooking Type: Vegan, gluten-free, no added sugarMakes: 2 servingsCooking Time: 15 minutesIngredients2 apples, thinly sliced (core removed)Optional: sprinkle of cinnamonRecipeLay apple slices in a single layer in the air fryer basket.Air fry at 160°C for 12–15 minutes, flipping once halfway.Let them cool fully so they crisp up more.Parent hack: Use red apples for sweeter chips or green for a tangy twist.Wrapping UpAir fryers aren’t just a trendy appliance. They are a real game-changer for parents juggling nutrition, time, and picky appetites. Whether you’re dishing up dinner or whipping up after-school snacks, they make it easier to serve up food that’s healthier, faster, and more fun to eat.So if you’re ready to simplify mealtimes and get your kids eating better (without the daily battle), give these air fryer recipes a go, and don’t forget to check out Healthy Parents, Healthy Kids for more practical tips on raising adventurous eaters.Stay informed with fresh tips, expert guidance, unique deals, and tailored support!Click HereMeet Dr Nick FullerMy StoryAs a father, I know first-hand that raising healthy and happy children is tricky. Children are fussy, particularly at the end of the day when they are shattered. We also live in a society where companies seek to profit from what we feed our kids; incorrect and damaging advice is pushed on us and marketed towards our children, and we have no time.But with these recipes and resources, you and your children can enjoy simple and well-founded food and lifestyle choices for lifelong health.
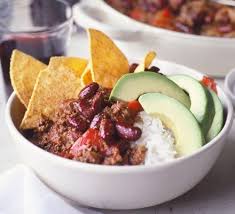
Easy Chilli Con Carne For Kids Even Fussy Eaters Enjoy
Chilli con carne… for kids? You’re probably thinking, ‘No way my child’s touching that!’ But hear us out. This isn’t the fire-breathing version you see on grown-up menus. This kid-approved twist keeps all the comforting flavours of the classic dish, minus the tears, complaints, and accidental milk-chugging.Research shows that kids aged 4 to 13 in Australia still fall short of their recommended daily veggie intake. So why not sneak the good stuff into something they’ll actually want to eat? This mild chilli con carne is loaded with hidden veggies, soft beans, and lean mince, making it a warm, wholesome winner for school nights.Let’s take this classic Tex-Mex favourite and turn it into a fuss-free family staple. Yes. It really is chilli con carne for kids.Struggling With a Fussy Eater? This Book Can HelpHealthy Parents, Healthy Kids by Dr Nick Fuller offers smart, science-backed advice to make mealtimes smoother, especially when introducing something new like kid-friendly chilli con carne. With simple strategies that work for real families, this book can help turn dinner battles into small wins.Grab your copy of Healthy Parents, Healthy Kids today and make trying new dishes a little less stressful.How to Make Chilli Con Carne (The Easy Way)This hearty and kid-friendly chilli is perfect as the weather starts to cool down. It’s warm, filling, and comforting without being too spicy for little tastebuds. We’ve chosen turkey mince for this version because it’s a lean source of protein and now super easy to find in most Aussie supermarkets. Plus, it blends beautifully with mild spices and hidden veggies, making it a sneaky win for parents. You can prep it ahead for busy weeknights, and serve it with brown rice, quinoa, or even a side of crunchy corn chips for a fun twist the kids will love. Type: Contains Meat, Gluten Free, Lactose Free, Winter WarmerServes 6-8 Prep Time: 5 minutesCooking Time: 35 minutes Ingredients2 tablespoons olive oil500g turkey mince1 teaspoon fennel seeds1 teaspoon cayenne pepper1 teaspoon paprika1 teaspoon cumin½ cup tomato paste1x400g tin cherry tomatoes1x400g tin red kidney beans, drained and rinsedHandful fresh coriander leaves, to serve1 cup corn kernels (fresh or canned), to serveRecipe1. Preheat a large frying pan over medium heat. Add in the olive oil, followed by the turkey mince. 2. Fry the mince for 5 minutes, stirring often, until browned. Add in the fennel seeds, cayenne pepper, paprika, and cumin. Stir to combine. 3. Add in the tomato paste and stir well to combine with the turkey mince. Pour in the cherry tomatoes, followed by the red kidney beans. 4. Add in ¾ cup water and stir everything to combine. Reduce heat to low, and cook for a further 10-15 minutes, stirring often, until slightly thickened. Remove from the heat.5. Transfer the chilli con carne into serving bowls, and top with fresh coriander leaves and corn kernels. 6. Serve immediately and enjoyLooking for more kid-friendly meal ideas? If your little one loved this mild chilli, they might enjoy these easy, egg-based recipes too, perfect for picky eaters!Kid-Friendly Tweaks for Chilli Con CarneEven if your chilli con carne is mild and nutritious, the way it’s served can make all the difference, especially for younger eaters. Children eat with their eyes first, and studies show that playful presentation and giving kids some control over their meals can increase their willingness to try new foods. Here are some tried-and-true tips to make this dish not just edible, but exciting for kids.Let Kids Build Their BowlsKids love to feel in charge, and creating their own chilli bowls gives them that sense of independence. Let them scoop rice, add chilli, sprinkle cheese, or pick toppings like corn, avocado, or crushed corn chips. When children are involved in meal prep or assembly, they’re more likely to eat the food, even veggies they’d usually avoid.Serve in Mini Taco Shells or WrapsTurning chilli con carne into mini tacos or wraps instantly makes it more fun. Kids are often more open to handheld foods, and small portions feel less intimidating. Soft wraps also help with picky eaters who might not like seeing all the ingredients mixed together. This way, they can customise each bite.Use Colourful or Character-Themed PlatesBright, fun plates can encourage little ones to sit down and dig in. A study showed that young children were more likely to eat healthy food when it was served on plates featuring their favourite colours or cartoon characters. It’s a small change, but it can turn mealtime into something they look forward to.Add a Dollop of Plain YogurtA spoonful of plain yoghurt not only helps cool down the dish but also adds creaminess that kids often love. Yoghurt is a great source of calcium and probiotics, supporting bone health and digestion, two big wins for growing bodies. Its mild taste also balances out any gentle spice you’ve included in the chilli.Not sure which yoghurt to buy? Check out this quick grocery guide to choosing the best kid-friendly option.Cut Tortillas into Fun ShapesUse cookie cutters to turn tortillas into stars, hearts, or even animal shapes for dipping into the chilli. Presentations like this tap into creativity and curiosity, which helps children feel more engaged with their food. Research notes that positive eating experiences in early childhood are linked to better long-term eating habits.What to Serve With Chilli Con Carne (Kid-Friendly Ideas)One of the best things about chilli con carne? You can serve it in a bunch of different ways, and it still tastes amazing. Explore these fun and easy ideas to mix things up at mealtime:With steamed rice – A no-fuss favourite that soaks up all that saucy goodness.Inside soft tortillas or wraps – Roll it up and let the kids eat with their hands—less cutlery, more fun!Over baked potatoes – Load it up on a fluffy spud for the ultimate comfort food combo.Topped with grated cheese and sour cream – Because cheese makes everything better (and sour cream cools things down nicely).With corn chips for dipping – Crunchy, scoopable, and always a hit with little snackers.Stuffed in bell peppers – A sneaky way to add extra veg without a fuss.Served alongside avocado slices or guacamole – Smooth, creamy, and full of good fats the kiddos need.Key TakeawayChilli con carne doesn’t have to be off-limits for kids. Just a few simple tweaks can turn it into a fun, tasty, and nutritious meal the whole family will enjoy. With playful serving ideas and mild flavours, it might just become a new weeknight favourite. Give it a go and watch those little bowls come back empty.Stay informed with fresh tips, expert guidance, unique deals, and tailored support!Click HereMeet Dr Nick FullerMy StoryAs a father, I know first-hand that raising healthy and happy children is tricky. Children are fussy, particularly at the end of the day when they are shattered. We also live in a society where companies seek to profit from what we feed our kids; incorrect and damaging advice is pushed on us and marketed towards our children, and we have no time.But with these recipes and resources, you and your children can enjoy simple and well-founded food and lifestyle choices for lifelong health.

How to Make Kid-Friendly Sausage Rolls
If your kids are anything like most Aussie kids, getting them excited about mealtimes can be a bit of a mission. But here’s a win-win: these kid-friendly sausage rolls are not only super tasty and easy to whip up. They’re also a sneaky way to get some goodness into fussy eaters (hello, hidden veggies).Research shows that 96% of Australian children aged 2–17 don’t eat enough vegetables daily. And if your child is among them, you’re not alone. That’s why meals that combine familiar favourites, like sausage rolls, with nutritious ingredients are total game-changers. Plus, finger foods may increase food acceptance in young children because they’re easier to explore and enjoy without pressure.Get Practical Help for Feeding Fussy Kids TodayIf your little one has strong food opinions, Healthy Parents, Healthy Kids by Dr Nick Fuller is your new best friend. Packed with simple, science-backed strategies for handling fussy eating, it helps take the pressure off mealtimes, whether you're serving sausage rolls or trying something new.Get your copy of Healthy Parents, Healthy Kids today and enjoy more wins at the dinner table.How to Make Kid-Friendly Sausage RollsKid-friendly sausage rolls are a fun and tasty snack that children love. They’re made with soft puff pastry and a mild meat filling that avoids strong spices. You can even sneak in some veggies, and they’re a hit in lunchboxes, parties, or after-school bites.Making kid-friendly sausage rolls is easier than you think and way more satisfying than store-bought ones. With just a few simple ingredients and some clever shortcuts, you’ll have golden, flaky rolls packed with flavour (and maybe even a few hidden veggies). These sausage rolls tick all the boxes:Easy to prepFreezer-friendlyVeggie-smuggle approvedGuaranteed lunchbox winnerReady to roll? Let’s get baking!Type: Contains Meat, Kid Friendly, Snacks Serves: 12 mini rollsPrep Time: 15 minutesCooking Time: 25 minutesIngredients500g beef or chicken mince (choose lean)1 small carrot, grated1 small zucchini, grated (squeeze out extra water)1 small onion, finely chopped or grated1/2 cup breadcrumbs1 egg (for mixing)1 tsp garlic powder (optional)1 tsp dried parsleySalt – a small pinch2 sheets frozen puff pastry (thawed)1 extra egg (for brushing)Sesame seeds (optional, for topping)RecipeSet your oven to 200°C (fan-forced) or 220°C (conventional).In a large bowl, mix the mince, grated carrot, zucchini, onion, breadcrumbs, one egg, garlic powder, parsley, and a pinch of salt. Use clean hands or a spoon to mix well until combined.Lay out the puff pastry sheets and cut each sheet in half to make two rectangles (you’ll have 4 in total).Spoon the meat mixture along one edge of each rectangle in a log shape (around 3 cm wide). Keep it even and firm.Roll the pastry over the meat to form a sausage shape. Press the edge to seal. Place the roll seam-side down.Cut each long roll into 3 smaller sausage rolls (you’ll get 12 in total).Place the rolls on a lined baking tray. Beat the extra egg and brush it over the tops of the rolls. Sprinkle sesame seeds if using.Bake for 20–25 minutes or until golden brown and cooked through. The pastry should puff up and turn a nice golden colour.Let them cool slightly before serving. They’re great warm or cold.Tasty Twists on Sausage Rolls Your Kids Will LoveNo two kids are the same, and neither are their taste buds. Whether you’ve got a picky eater, a cheese-lover, or a little veggo in the house, there’s a sausage roll version that’ll win them over. These tasty twists are not only crowd-pleasers. They’re also a great way to sneak in nutrients while keeping snack time stress-free.Classic Beef Sausage RollsYou can’t go wrong with the classic. Made with good quality beef mince, onion, breadcrumbs and a hint of herbs, these sausage rolls are a timeless hit. Beef is a rich source of iron and zinc, two nutrients kids commonly fall short on. Add a side of tomato sauce and you’ve got a lunchbox legend.Chicken and Veggie RollsWant something lighter but still packed with protein? Chicken and veggie sausage rolls are perfect. Chicken is lean, high in B vitamins, and easily accepted by kids thanks to its mild flavour. Add grated carrot, zucchini or sweet potato for a boost of fibre and vitamin A.Cheese Sausage RollsIf your little one is cheese-obsessed, this version will be their go-to. Combining mince (beef or chicken) with shredded cheese adds flavour and creaminess that many kids adore. Cheese is also a good source of calcium, which is vital for growing bones and teeth, especially since the majority of Aussie kids fall short of their calcium needs.Veggie-Only RollsPerfect for meat-free Mondays or vegetarian families, these rolls are loaded with lentils, grated veg, and cheese or tofu for protein. Legumes like lentils are high in iron and fibre, both crucial for kids’ digestion and energy. According to research, boosting plant-based variety early on can support long-term healthy eating habits. And when wrapped in golden puff pastry? Even the pickiest kids will give them a go.Wish your child would eat more veggies? Sausage rolls are the ideal place to start sneaking them in. Pair your recipe with our practical tips for dealing with veggie refusal. Learn how to deal with a child who refuses vegetables.Turkey Sausage RollsTurkey is a lean, iron-rich alternative to beef or pork that’s naturally lower in fat. It’s also high in tryptophan, an amino acid linked to mood regulation, and we could all use a bit more calm at the dinner table! A narrative review of poultry consumption reported that lean unprocessed poultry, including turkey, has either neutral or beneficial effects on body weight, cardiovascular risk, and type 2 diabetes markers compared to red meat .Tips to Make Sausage Rolls Fun For KidsSometimes, it’s not just about taste. It’s about how fun food looks. Making sausage rolls visually appealing or involving your kids in the process can boost their interest and even encourage them to try new ingredients. In fact, studies show that children are more likely to eat foods they help prepare. So let’s turn snack time into playtime with these simple, creative tips:Use cookie cutters to shape the pastry: Stars, hearts or dinosaurs – let their imagination (and appetite) run wild.Let kids help with mixing the filling: It’s messy, fun, and gives them a sense of ownership over the food they’re eating.Add smiley faces on top with pastry strips: A few extra cuts of dough can turn an ordinary roll into a grinning snack.Make mini-sized rolls for small hands: Bite-sized means less mess and more fun, especially for toddlers.Serve with fun dipping sauces: Think beetroot hummus, yoghurt ranch, or good ol' tomato sauce in cute ramekins.Use colourful plates or lunchboxes: Bright colours can make the meal feel more exciting (and studies show they boost food appeal in kids too!).Add a tiny flag or toothpick topper: It’s amazing what a little flag can do for snack-time enthusiasm.Mix in cheese for extra flavour: Cheese makes almost everything better, and it's packed with calcium.Sneak in finely grated veggies: Carrot, zucchini or even mushroom – they won’t notice, but their bodies will thank you.Turn them into 'animals' with pastry ears or tails: Use pastry off-cuts to make bunny ears or lion tails – edible art at its cutest.Kids eat with their eyes first. Learn how playful food presentations (like fun-shaped sausage rolls) can spark their appetite. Discover the role of food presentation in a child’s appetite.Final ThoughtsKid-friendly sausage rolls are a creative, nutritious, and downright fun way to keep little tummies full and happy. Whether you stick with the classic beef or go wild with veggie-packed animal-shaped bites, there’s a version here to suit every little eater. And, when you get the kids involved in the process, you’re not just feeding them; you’re teaching them lifelong food confidence.So roll up your sleeves (and some pastry) and give these ideas a go. Snack time just got a whole lot more exciting.Struggling with a picky eater? Turn mealtimes into a win with our simple tricks for expanding your child’s diet, starting with familiar favourites like sausage rolls. Read our top strategies for expanding a child’s diet.Stay informed with fresh tips, expert guidance, unique deals, and tailored support!Click HereMeet Dr Nick FullerMy StoryAs a father, I know first-hand that raising healthy and happy children is tricky. Children are fussy, particularly at the end of the day when they are shattered. We also live in a society where companies seek to profit from what we feed our kids; incorrect and damaging advice is pushed on us and marketed towards our children, and we have no time.But with these recipes and resources, you and your children can enjoy simple and well-founded food and lifestyle choices for lifelong health.
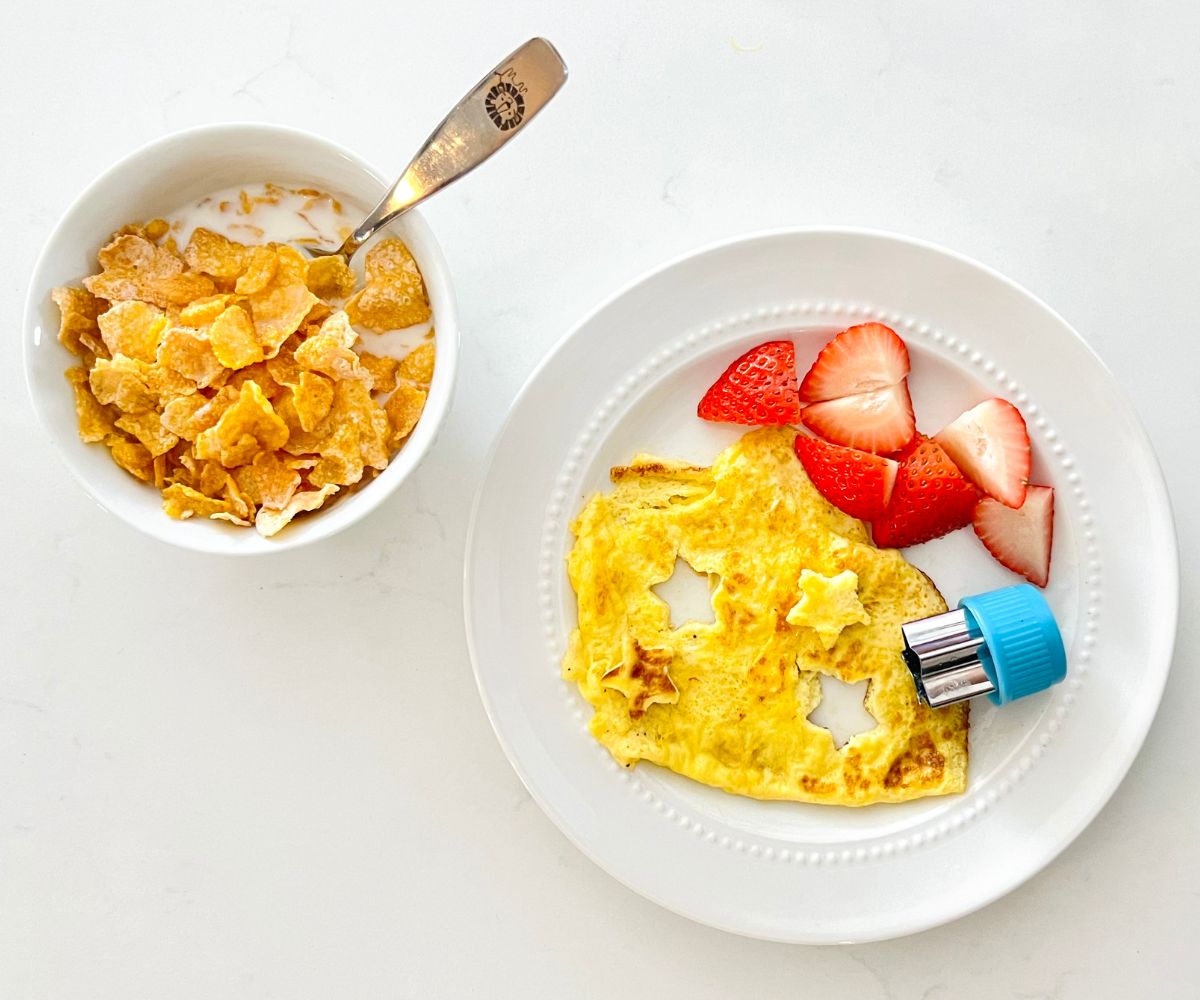
Picky Eater Recipes with Eggs to Cook This Week
If you’re a parent of a picky eater, you know the struggle is real. Getting kids to eat anything other than plain toast can feel like a full-time job. Luckily, eggs are a total game-changer. Not only are they super versatile and quick to whip up, but they’re also packed with top-quality nutrition. Did you know that eggs are one of the best sources of high-quality protein, containing all nine essential amino acids? They are also loaded with important nutrients like choline, which supports brain development, perfect for growing little legends. According to the Australian Dietary Guidelines, eggs can be part of a healthy diet for kids, helping to keep them full and fuelled for their busy days. So, if you’re ready to turn mealtime battles into yum-time wins, these egg recipes for picky eaters are just what you need.Tired of Fussy Eating? This Book Can HelpStruggling to feed a picky eater? Healthy Parents, Healthy Kids by Dr Nick Fuller offers practical, evidence-based strategies to help you navigate fussy eating without the stress. From understanding your child’s food habits to introducing variety in a way that works, this book is your go-to guide for peaceful, nourishing mealtimes.Had enough of mealtime meltdowns? Grab your copy of Healthy Parents, Healthy Kids today.4 No-Fuss Picky Eater Recipes With EggsEggs are a secret weapon for feeding fussy eaters. They’re quick to prepare, easy to mix into all sorts of meals, and loaded with nutrients that growing bodies and brains need. Best of all? They’re surprisingly kid-friendly when prepared the right way. Below are four tasty egg-based recipes even the pickiest eaters won’t turn down.Shakshuka Shakshuka is a tasty egg dish from Israel that’s great for picky eaters. It has eggs cooked in a yummy tomato sauce, which helps add some veggies without being too strong in flavour. You can eat it for breakfast, lunch, or dinner, and it’s easy to make milder so kids will love it. It’s a simple, healthy meal the whole family can enjoy. Type: Vegetarian, Gluten Free, Lactose FreeServes 2Prep Time: 2 minutesCooking Time: 10-15 minutesIngredients1 teaspoon olive oil4 cloves garlic, crushed1/2 onion, diced2 teaspoons fresh or dried chilli3 teaspoons paprika3 teaspoons cumin2 x 400g tins of chopped tomato (or alternatively use roughly chopped fresh tomatoes - a great way to use up any dying slowly in your fridge!)1 x red capsicum, core and seeds removed4 eggs1 large handful basil, rocket or baby spinachRecipe1. Heat oil in a large pan, then add garlic, onion, chilli and spices and cook until aromatic. 2. Add tomato and capsicum, then cook for another 5 minutes until soft. 3. Create four wells in the tomato mixture, then crack an egg into each hole. Cover the pan with a lid and cook for 5-7 minutes, until the eggs are firm with a runny egg yolk. 4. Top with basil/rocket/baby spinach and then serve with toasted whole grain bread. Enjoy!Miso Scrambled Eggs with VegetablesMiso scrambled eggs are a great way to add some tasty variety to meals for picky eaters. The miso paste gives the eggs a gentle, savoury flavour that can help kids enjoy their eggs even more. Start with just one teaspoon of miso to keep the taste mild and easy to like. You can also add a little bacon sometimes for a more filling breakfast that keeps kids happy and full. Type: Breakfast, Vegetarian (Bacon option contains meat)Serves 4Prep Time: 5 minutes Cooking Time: 10 minutesIngredients6 eggs 2 generous teaspoons miso paste (white or yellow variety is preferred)Olive oil sprayLarge handful silverbeet, finely chopped2 large mushrooms (portobello or similar), finely choppedLeftover vegetables (if you have any), finely chopped½ avocado4 slices whole grain bread, toastedRecipe1. Crack the eggs into a bowl and whisk with the miso paste. 2. Spray a large frying pan with olive oil and heat over medium heat. Pour in the egg mixture and cook, stirring, for 3 minutes or until cooked to your liking. Transfer the scrambled eggs to a large bowl and cover with foil to keep warm.3. Add the silverbeet and mushrooms to the pan, along with any leftover veggies or bacon (if using) and spray again with olive oil. Cook for 3-5 minutes.4. Toast your wholegrain bread and then spread the avocado evenly over each slice. Top with the scrambled eggs, silverbeet, mushroom, bacon (if using) and any other vegetables.Tip: The miso will be easier to whisk into the egg if it is at room temperature rather than straight out of the fridge. I sometimes run the packet under warm water to heat it up a little.Egg Salad SandwichThis is a simple recipe, but the end result is a balanced sandwich with enough protein and wholegrain carbohydrates to keep you satisfied. Type: VegetarianServes 2Prep Time: 5 minutesCooking Time: 0 minutesIngredients2 hard boiled eggs3 tablespoons cottage cheese1 teaspoon curry powder4 slices wholemeal bread1 cup mixed lettuce leaves1 carrot, gratedSalt and pepperRecipe1. Chop the hard boiled eggs into small pieces and add to a mixing bowl. Add in the cottage cheese and curry powder. Gently mix all ingredients together.2. Arrange 2 slices of the wholemeal bread on a board. Cover each with the mixed lettuce, then top with the egg salad mixture. Spread the egg salad mixture evenly over the top of the lettuce. Sprinkle it with salt and pepper, then add grated carrot on top.3. Close each sandwich with the remaining two slices of wholemeal bread. Slice each sandwich in half and serve. Enjoy!Green ShakshukaGreen eggs for breakfast – the ham is optional! This is a hearty green version of the popular shakshuka dish – perfect for a leisurely weekend breakfast made at home. This breakfast also contains lots of green vegetables (which you can also substitute with what you have in the fridge), so you can feel accomplished in the morning that you have already made a great start on your vegetable intake for the day!Type: Vegetarian, Gluten Free (when served without the bread)Serves 2Prep Time: 5 minutesCooking Time: 20-25 minutesIngredients1 tablespoon olive oil4 spring onions, sliced1 leek, sliced1 lemon, juicedSprinkle cumin powderSprinkle chilli flakes½ cup peas (frozen is fine)1-2 cups baby spinachHandful mint leaves, plus extra to serveHandful parsley leaves, plus extra to serve4 eggs½ avocado, sliced50g feta cheeseCracked black pepperToasted seeded bread (eg. Soy and linseed) – optional, to serveRecipe1. In a large fry pan or pot (that you have a fitted lid for) heat the olive oil over medium heat. Add the spring onion and leek. Allow to sweat down over medium heat, stirring often, for 10 minutes until softened and slightly browned. Pour over the lemon juice and stir through. 2. Sprinkle over the cumin and chili flakes and stir through. Add the peas, baby spinach, mint leaves and parsley and cook for another couple of minutes until wilted. 3. Use a spoon to clear 4 wells in the green veggie mixture. Crack an egg into each well, then cover the pot and allow to cook for approximately 5 minutes until the eggs are cooked (cook for longer if you prefer the egg yolk hard). 4. Sprinkle the shakshuka with extra mint and parsley leaves. Add the avocado, and crumble over the feta cheese. Sprinkle with cracked black pepper. Serve immediately with the toasted bread and enjoy straight from the pan! Try these easy, kid-friendly soup recipes to complement your egg dishes and keep mealtimes stress-free. Give them a go and make mealtime a breeze.Summing UpEggs are a fantastic, nutritious ingredient that can help turn mealtime struggles into tasty wins, especially for picky eaters. With so many simple and delicious recipes to try, you can keep things interesting and make sure your kids get the nutrients they need. Give these egg dishes a go, and watch even the fussiest eaters come back for seconds.Stay informed with fresh tips, expert guidance, unique deals, and tailored support!Click HereMeet Dr Nick FullerMy StoryAs a father, I know first-hand that raising healthy and happy children is tricky. Children are fussy, particularly at the end of the day when they are shattered. We also live in a society where companies seek to profit from what we feed our kids; incorrect and damaging advice is pushed on us and marketed towards our children, and we have no time.But with these recipes and resources, you and your children can enjoy simple and well-founded food and lifestyle choices for lifelong health.

How to Introduce Dairy to Picky Eaters
Getting your child to drink milk or eat cheese and yoghurt can feel like trying to crack a secret code. But here’s the thing: dairy is a nutritional powerhouse that supports strong bones, muscles, and teeth, critical for growing kids. Yet about 60% of Australian children don’t meet their daily calcium requirements, putting their development at risk.Despite dairy’s importance, many kids reject it due to taste, texture, or simply unfamiliarity. The good news? With some clever, fun strategies, you can sneak dairy into their diet without the drama and help them build healthy habits that last a lifetime.Ready to discover easy, effective ways to get your picky eater loving dairy? Keep reading for top tips and tricks that really work.Struggling to Get Dairy Back on the Menu? Start HereIf your child avoids dairy or turns their nose up at anything creamy, you’re likely wondering how to bring it back without the usual resistance. In Healthy Parents, Healthy Kids, Dr Nick Fuller shares practical, stress-free strategies to reintroduce dairy at your child’s pace—no pressure, no mealtime drama.Make dairy doable again. Grab your copy of Healthy Parents, Healthy Kids today.The Real Reason Picky Eaters Need DairyDairy isn’t just about milk moustaches and cheese toasties. It packs a serious nutritional punch. For kids who are fussy eaters, dairy can help fill crucial nutrient gaps that their limited diet might be missing. Here’s why it matters:Source of CalciumCalcium is an absolute legend when it comes to building strong bones and teeth. Unfortunately, many Aussie kids fall short of their daily calcium needs. Dairy is one of the simplest and tastiest ways to top up calcium, helping little bones grow tough and teeth stay healthy. In fact, a 2023 meta-analysis of clinical trials found that having dairy during childhood and adolescence can significantly boost bone mineral mass.Supports Bone GrowthChildhood is prime time for packing on bone mass, with rapid growth spurts demanding plenty of calcium and phosphorus. Dairy foods deliver both these essential minerals in a handy combo that supports strong, growing skeletons. Getting enough dairy during these years sets kids up for healthier bones well into adulthood, reducing the risks of osteoporosis later on.Provides ProteinMilk, cheese, and yoghurt aren’t just calcium champs. A study in Poland found that dairy products also provide a good share of the protein, vitamins, and essential amino acids kids need for healthy growth.Protein is crucial for building muscles, repairing tissues, and keeping skin healthy, which is especially important for active kids. It also supports the immune system and helps little bodies fight off bugs and bounce back faster.Contains Vitamin DVitamin D is the sidekick calcium needs to do its job properly, helping the body absorb it efficiently. While Aussie sunshine is a fantastic natural source, many dairy products are fortified with vitamin D to fill any gaps. This double whammy of calcium and vitamin D in dairy helps keep bones strong and growing as they should.Helps With Muscle DevelopmentStronger muscles need both protein and calcium, and dairy delivers on both fronts. For kids learning to run, jump, and climb, these nutrients support muscle function and coordination. Regular dairy intake can help little movers build the strength they need to explore and play with confidence. Studies have found that milk’s unique combo of high-quality protein, natural sugars like lactose, and essential minerals supports healthy growth, strong muscles, and steady energy, especially important during active play.Supports Healthy TeethDairy isn’t just good for bones. It’s a tooth’s best mate too. Calcium, phosphate, and casein (a milk protein) team up to strengthen tooth enamel and protect against decay. Research suggests that kids who consume dairy regularly may have healthier smiles and fewer cavities, thanks to the enamel-strengthening and antibacterial properties of milk and dairy products.Boosts the Immune SystemDairy foods contain zinc and vitamin A, which are essential for a strong immune system. So, including dairy in your child’s diet can give their natural defences a helpful boost.Why Do Picky Eaters Say No to Dairy?Not all dairy rejections are the same. Here are some of the top reasons picky eaters might avoid it:Dislike of Taste or Smell: Milk can taste bland or 'funny' to sensitive palates. Cheese can smell strong. Yoghurt can be sour. Toddlers are brutally honest critics.Texture Issues: Some kids don’t like the smoothness of yoghurt or the 'squeaky' chew of cheese. Texture sensitivity is super common in children under 6.Past Stomach Discomfort: A bad experience, like bloating or vomiting, can lead to long-term aversion, even if it wasn’t caused by the dairy itself.Preference for Sweet Drinks: Juice and chocolate milk are more exciting to the taste buds than plain milk. That preference can stick hard without variety in the early years.Fear of Trying New Foods: 'Food neophobia' (aka fear of the unfamiliar) peaks between ages 2–6. Introducing new textures like soft cheese or creamy yoghurt might trigger a hard pass at first.Too Much Snacking Before Meals: Full tummies leave little room for dairy-rich foods. Grazing kids often reject dairy during main meals out of sheer fullness.Association With Negative Experiences: If your child was pressured to drink milk, had a tummy ache, or threw up after dairy in the past, they might associate it with discomfort, even subconsciously.Want to cut through the confusion about which milk to buy? Dr Nick Fuller breaks down the best milk options for your family’s health, explaining what to look for and why. Watch now to make smarter, healthier choices at the supermarket.Best Ways to Introduce Dairy to Picky EatersReady to outsmart the dairy dodgers? These clever, low-pressure ideas make it easier to sneak dairy into your child’s diet without the drama.Add to Smoothies or ShakesBlend milk or yoghurt with naturally sweet fruits like banana, mango, or berries to mask the flavour and add natural sweetness, no need for added sugar. Smoothies are a great way to pack in calcium and protein in a delicious, drinkable form. If children consume dairy in varied forms, they are more likely to meet their calcium needs. So, mixing it up really helps.Use Cheese in Fun Shapes or DishesGrab some cookie cutters and turn cheese slices into stars, animals, or other fun shapes to make snack time exciting. Melting cheese over pasta, toast, or scrambled eggs adds flavour and texture that many kids find irresistible. According to the Australian Dietary Guidelines, cheese is a nutrient-dense dairy source that can boost calcium and protein intake in a kid-friendly way.Mix Yoghurt with Fruits or CerealAdding diced fruit or crunchy granola to yoghurt not only improves texture but also makes the snack more appealing and interactive. Letting kids 'build' their own yoghurt bowl encourages independence and curiosity around food. Want to know which yoghurt is actually the best pick for your family? Check out Dr Nick Fuller’s easy guide to choosing yoghurt that’s low in sugar but high in nutrition. Serve Milk with a Favourite Straw or CupSometimes, it’s the little things that make a big difference. Serving milk in a fun cup or with a bendy straw can turn a boring drink into a treat. Giving kids the choice of their own 'milk cup' helps them feel in control and more likely to drink up.Cook Meals Using Dairy (Soups, Sauces)Sneak cheese into veggie-packed pasta sauces, stir milk into creamy mashed potatoes, or add yoghurt to dressings and dips. Cooking with dairy is a clever way to boost calcium and protein without your child even noticing. Incorporating dairy into meals may support nutrient intake while reducing mealtime battles.Try Frozen Yoghurt as a TreatEvidence points to sweetened drinks like fruit juices and sports drinks making up roughly one-quarter of the added sugars in kids' snack intake. Swap traditional ice cream for frozen yoghurt, which feels indulgent but often contains less sugar and more protein and calcium. Frozen yoghurt can be a fun, refreshing way to encourage dairy consumption, especially on warm Aussie days. Start with Mild-Flavoured Dairy ProductsAvoid strong, sharp cheeses like blue cheese or aged cheddar initially; instead, offer mild options like mozzarella, Colby, or plain Greek yoghurt to ease kids into new tastes. Mild dairy products are less likely to overwhelm sensitive palates and can build acceptance over time. The gradual introduction of new flavours is a proven strategy to reduce food neophobia in young children.Struggling to get your picky eater to enjoy nutritious meals? These toddler-friendly potato recipes are perfect for sneaking in dairy like cheese and yoghurt while keeping flavours simple and kid-approved. Let Kids Help Prepare Dairy-Rich SnacksGet your little ones involved in making yoghurt parfaits, smoothie bowls, or cheese toasties. It’s a fun way to build excitement around food. Kids who participate in food prep are more likely to try and enjoy what they’ve made. Studies consistently show that hands-on involvement boosts children’s willingness to try new foods, including dairy.Wrapping UpIntroducing dairy to picky eaters doesn’t have to feel like a war zone. With a bit of creativity, some patience and a few sneaky kitchen hacks, you can help your child warm up to dairy without the drama.Remember, consistency is key, and exposure matters more than pressure. Keep offering, keep it light, and over time, you’ll likely see progress (and maybe even a few milk moustaches).Stay informed with fresh tips, expert guidance, unique deals, and tailored support!Click HereMeet Dr Nick FullerMy StoryAs a father, I know first-hand that raising healthy and happy children is tricky. Children are fussy, particularly at the end of the day when they are shattered. We also live in a society where companies seek to profit from what we feed our kids; incorrect and damaging advice is pushed on us and marketed towards our children, and we have no time.But with these recipes and resources, you and your children can enjoy simple and well-founded food and lifestyle choices for lifelong health.

Toddler-Friendly Recipes Without Dairy That Work
Did you know that nearly 1 in 20 school-aged Aussie kids have a food allergy, with dairy as one of the foods topping the list? If your toddler’s one of them, you’re probably juggling meal ideas that keep them safe and happy. No worries! Ditching dairy doesn’t mean dull dinners. In fact, dairy-free meals can be just as creamy, tasty and packed with the nutrients your little champ needs to grow. Let’s explore some fuss-free, toddler-friendly recipes that’ll have your bub licking their plate clean, all without a drop of milk in sight.Struggling with a Picky Eater? Help Is in This Book.Healthy Parents, Healthy Kids by Dr Nick Fuller offers expert guidance and practical strategies to make mealtimes easier. Packed with science-backed tips and simple recipes, this book is designed to support your child’s nutrition, even when they’re fussy at the table.Grab your copy of Healthy Parents, Healthy Kids today and take the stress out of feeding picky 8 Toddler-Friendly Recipes Without DairyMealtimes just got easier (and tastier). These 8 toddler-friendly recipes are full of flavour and goodness, perfect for keeping little tummies happy and parents stress-free.Baked Green Curry CauliflowerThis easy baked green curry cauliflower is a winner for busy weeknights and perfect for little ones on a dairy-free diet. Just pop everything in the oven and let it cook while you get on with your day. Swap brown rice for microwave rice to save time, and skip the yoghurt topping to keep it completely dairy-free. Toddlers will love the mild, tasty flavours. Type: Vegetarian, Gluten Free, Dairy Free (If made with tofu)Serves 4Prep Time: 5 minutes Cooking Time: 45 minutesIngredients1 cup brown rice½ large cauliflower, chopped1 brown onion, chopped1x 400g tin chickpeas, drained and rinsed¾ of a small jar of green curry paste1x 400g block of tofu or paneer cheese, cubedSmall bunch spring onions, slicedRecipe1. Preheat the oven to 200°C.2. Cook the brown rice over the stove according to packet directions. 3. Add the cauliflower, onion, and chickpeas to a large baking dish. Add in the green curry paste and stir well to combine. Make sure everything is coated in the curry paste. 4. Top with the cubes of tofu or paneer.5. Place the baking dish into the oven for 20 minutes. Remove from the oven and give everything a stir.6. Return the baking dish to the oven for a further 20-25 minutes, until the tofu or paneer is slightly golden, and the cauliflower is cooked through. 7. Top the baked curry with sliced spring onions. Serve immediately, with a side of brown rice. Enjoy!Mediterranean TofuA simple, tasty Mediterranean-style meal that’s dairy-free and toddler-friendly. Serve with wholemeal couscous for a wholesome, easy dinner the whole family will enjoy. Type: Vegetarian, Vegan, Dairy FreeServes 4Prep Time: 5 minutesCooking Time: 25 minutes Ingredients2 cups wholemeal couscous600ml boiling water2 tablespoons olive oil1 red onion, chopped2 cloves garlic, crushed2 bunches broccolini, chopped1 red capsicum, chopped400g firm tofu, cut into cubes2x 400g tin tomatoes½ cup pitted whole black olivesHandful fresh basil leavesHandful fresh parsleyRecipe1. Place the couscous into a large bowl. Pour over the boiling water, then cover and allow to stand for 5-10 minutes. Fluff the couscous with a fork to separate the grains, then set aside. 2. Heat a large saucepan over medium to high heat. Add in the olive oil, red onion and garlic. 3. Cook, stirring often, for 4-5 minutes until softened. Add in the broccolini and capsicum, followed by the tofu. 4. Fry for 5 minutes, stirring occasionally. Stir in the tin tomatoes and the olives, then reduce the heat to medium. 5. Allow the sauce to simmer for 10 minutes, uncovered, to thicken. Remove from the heat.6. Sprinkle with the fresh basil and parsley leaves.7. Serve immediately, accompanied by the couscous. Enjoy! GF DF Banana LoafA yummy gluten-free, dairy-free banana loaf that’s perfect for toddler snacks or lunch boxes — delicious, healthy, and allergy-friendly.Type: Vegetarian, Gluten Free, Dairy Free, Snacks, Contains NutsMakes 1 loafPrep Time: 10 minutesCooking Time: 45 minutes Ingredients3 overripe bananas2 eggs½ cup soy milk2 tablespoons olive oil1 tablespoon honey2 cups almond meal½ cup ground flaxseeds1 ½ teaspoons baking powder2 teaspoons cinnamon¼ cup toasted walnuts, roughly choppedRecipe1. Preheat the oven to 160°C. Line a loaf pan with baking paper. 2. Add the bananas to a large mixing bowl and use a fork to mash. 3. Add in the eggs, soy milk, olive oil and honey into the mashed banana. Mix well to combine. 4. Add in the almond meal, flaxseeds, baking powder, cinnamon and walnuts. Fold all ingredients together until well combined. 5. Pour the batter into the loaf pan. Place into the oven and bake for 40-45 minutes until risen and golden. 6. Allow to cool slightly before removing from the loaf pan. Cut into thick slices and enjoy! Apple StreuselWarm, juicy apples with a crumbly topping, apple streusel is a tasty snack or dessert your toddler will love. Skip the yoghurt to keep it dairy-free and enjoy it fresh or reheated. Perfect for little ones with dairy sensitivities.Type: Vegetarian, Contains NutsServes 3-4Prep Time: 10 minutesCooking Time: 25 minutes IngredientsOlive oil spray, for greasing3 pink lady apples, chopped into small piecesZest and juice of 1 lemon1 teaspoon cinnamon 1 ½ cups rolled oats3 tablespoons honey3 tablespoons almond butter Greek yoghurt, to serve (optional)Recipe1. Preheat the oven to 180°C. Spray a small loaf tin with olive oil spray and set aside. 2. In a mixing bowl combine the chopped apple, lemon zest and juice, and half of the cinnamon. Stir to combine. 3. Transfer the apple mixture into the loaf tin. Spread the apples to cover the entire bottom of the tin. 4. Add the rolled oats, honey, almond butter and the remaining half teaspoon of cinnamon into the mixing bowl. 5. Stir well to combine. If your honey and/or almond butter are not liquid enough to stir easily, heat them gently in the microwave for 10 seconds at a time until runny. 6. Sprinkle the oat streusel mixture over the top of the apples in the loaf tin. Place the loaf tin into the oven and bake for 25 minutes until golden. 7. Divide the apple streusel into serving bowls, and top with a dollop of yoghurt. Serve immediately and enjoy!Trail MixLooking for a healthy, dairy-free snack your toddler can munch on anytime? This easy trail mix is perfect! Make a batch, portion into small containers, and you’re all set for grab-and-go goodness. Type: Vegetarian, Vegan, Gluten Free, Dairy Free, Snacks, Contains NutsMakes approx. 8 servesPrep Time: 5 minutesCooking Time: 20 minutes Ingredients2 cups of raw nuts (we used a combination of almonds, cashews, pistachios and walnuts)¼ cup raw seeds (we used pepitas and sunflower seeds)¼ cup dried fruit e.g. goji berries, dried figs, sultanas (optional)Recipe1. Preheat the oven to 170°C. Prepare 2 baking trays. 2. Add the nuts and seeds onto the baking trays. Ensure they are spread out in a single layer. 3. Place into the oven and bake for 15-20 minutes. Stir the nuts around the trays halfway through cooking to ensure they roast evenly. 4. Once the nuts are toasted and golden, remove from the oven. Allow to completely cool on the trays. 5. Once cooled, mix through the dried fruit (optional). 6. Transfer the trail mix to an airtight container. Enjoy!Pecan Pie GranolaCrunchy and packed with warm pecan pie flavours, this dairy-free granola is perfect for breakfast or a quick snack. It keeps fresh for up to a month in an airtight jar — easy, tasty, and toddler-approved.Type: Vegetarian, Dairy Free, Contains NutsMakes approx. 3 cups Prep Time: 5 minutesCooking Time: 25 minutes Ingredients2 cups rolled oats1 cup pecans¼ cup pepitas3 tablespoons olive oil2 tablespoons honey1 tablespoon almond butter½ teaspoon cinnamonSprinkle of allspice Recipe1. Preheat the oven to 170°C. Line a baking tray with baking paper. 2. Place the oats, pecans and pepitas into a large bowl and stir to combine. 3. In a small bowl add the olive oil, honey, almond butter, cinnamon and allspice. Stir well to combine. 4. Pour the olive oil mixture into the rolled oats mixture. Stir well to ensure all the ingredients are combined. 5. Pour the oats mixture out onto the baking tray. Spread the mixture so that it is as flat as possible and covers the whole tray. 6. Place into the oven and bake for 10 minutes. Use a spoon to stir the oat mixture to ensure it cooks evenly. Return the oats to the oven and bake for a further 10-15 minutes until crisp and golden. 7. Remove the granola from the oven and let it cool completely on the baking tray. 8. Once the granola is cooled, transfer to an airtight container. Enjoy!Apple Slice 'Donuts'A fun, healthy after-school snack the whole family will love. For a dairy-free twist, swap yoghurt for peanut butter or try other nut-free toppings like granola, sunflower seeds, or dark choc chips. Easy, tasty, and perfect for little hands. Type: Vegetarian, Vegan, Dairy Free, Gluten Free, Contains Nuts, Kid FriendlyMakes 10 ‘donuts’Prep Time: 10 minutesCooking Time: 0 minutes Ingredients2 large pink lady apples3 tablespoons natural 100% peanut butter3 tablespoons of assorted toppingsRecipe1. Use an apple corer to remove the core of each apple. 2. Place the apple on its side so that the empty core is parallel to your chopping board. Trim off both ends of the apple, then slice the apple into 5 even slices. 3. Place the apple slices cut side facing up onto a flat chopping board or plate. 4. Spread the top of each slice with peanut butter. 5. Sprinkle the assorted toppings on top of the peanut butter. 6. Serve the apple ‘donuts’ immediately and enjoy!Pesto Frittata Quick, easy, and totally dairy-free, just use a dairy-free pesto or make your own. This is p erfect for a toddler-friendly lunch alongside a fresh rocket salad or potato salad.Type: Vegetarian, Dairy Free, Gluten FreeServes 3Prep Time: 10 minutesCooking Time: 30 minutes Ingredients6 large eggs2 tablespoons green pesto (dairy free)Handful fresh parsley Handful fresh dill1 large zucchini, chopped1 tomato, sliced into thin circlesRecipe1. Preheat the oven to 190°C. Find a large rectangular loaf tin to bake the frittata in. 2. In a medium sized mixing bowl whisk together the eggs and pesto. 3. Stir in the parsley, dill, and chopped zucchini. 4. Pour the egg mixture out into the loaf tin. Arrange the tomato slices on top of the egg mixture. 5. Place into the oven and bake for 30 minutes until risen and slightly golden on top. 6. Allow to cool before cutting into slices. Serve and enjoy!Looking to expand your toddler’s dairy-free meals with more veggie-packed, meat-free options? Check out these 5 easy and tasty meal ideas for toddlers without meat, perfect for keeping mealtimes fun, nutritious, and allergy-friendly.Summing UpFeeding toddlers dairy-free doesn’t have to be tricky or boring. With these simple, tasty recipes, you can keep mealtimes fun, nutritious, and stress-free, all while catering to your little one’s needs. Give these dishes a go and watch your bub enjoy delicious meals that are kind to their tummy and packed with flavour!Stay informed with fresh tips, expert guidance, unique deals, and tailored support!Click HereMeet Dr Nick FullerMy StoryAs a father, I know first-hand that raising healthy and happy children is tricky. Children are fussy, particularly at the end of the day when they are shattered. We also live in a society where companies seek to profit from what we feed our kids; incorrect and damaging advice is pushed on us and marketed towards our children, and we have no time.But with these recipes and resources, you and your children can enjoy simple and well-founded food and lifestyle choices for lifelong health.