Article

How to Make Healthy Fish Fingers For Kids (And Sneak in the Good Stuff)
Fish fingers are a classic kid-friendly favourite, and it’s easy to see why. Crunchy on the outside, tender on the inside, and packed with protein and omega-3s, they’re a clever way to sneak in some healthy nutrients while keeping kids happy at the dinner table. Kids are much more likely to dive into a meal when it looks like something they already recognise, which makes fish fingers for kids a total winner for busy families. Whether you bake them, pop them in the air fryer, or give them a light pan-fry, these little bites are super versatile and perfect for lunchboxes or a quick dinner. Stick around for our favourite tips and tricks to make fish fingers a meal your kids will actually ask for.Build Healthy Habits with Foods Kids Already LoveGetting kids to eat well doesn’t mean you have to reinvent the wheel. In Healthy Parents, Healthy Kids, Dr Nick Fuller shows you how to use the foods your kids already love to encourage balanced eating without the usual pressure or mealtime stress. It’s all about simple, practical ways to turn everyday meals into healthy wins.If you’re ready to support your child’s wellbeing without the fuss, grab your copy of Healthy Parents, Healthy Kids today.How to Make the Perfect Fish Fingers For KidsMaking your own fish fingers is actually way easier than it looks. With just a few simple steps, you’ll have golden, crunchy bites that the kids won’t be able to resist.You can even get the little ones involved in the prep! It’s been shown that kids who help out in the kitchen are usually in a much better mood when it’s time to eat (and more likely to finish their plate). Don’t stress if things get a bit messy. That’s all part of the fun, and the result is definitely worth it.What You’ll Need:600 g white fish fillets, cut into strips1 tsp paprikaSalt and pepper, to taste75 g breadcrumbs25 g grated Parmesan cheese1 egg2–3 tbsp mayonnaise2–3 tbsp flour (for batter)Oil spray1. Cut the fish into strips.Start by cutting your fish fillets into finger-sized strips. Try to keep them roughly the same size so they cook evenly, perfect for little hands!2. Prepare the batter.In a small bowl, mix the flour with a pinch of salt and pepper. Add a splash of water if needed to make a smooth, thick batter. This will help the crumbs stick nicely.3. Dip the fish in the batter.Gently dip each fish strip into the batter, making sure it’s fully coated. This creates that crunchy outer layer kids love.4. Coat with crumbs.Mix the breadcrumbs and Parmesan cheese together. Roll each battered fish strip in the crumb mixture until well coated. Extra cheesy crumbs = extra yum.5. Bake or fry until golden.Spray a baking tray or pan with oil, then place the fish fingers on top. Bake at 200°C for 12–15 minutes or fry in a little oil until golden and crispy. Turn halfway for even cooking.6. Cool slightly before serving.Let the fish fingers cool for a minute or two—hot, crispy fish fingers are tempting, but slightly cooled ones are safer and easier for kids to hold. Serve with a side of mayo or ketchup for dipping fun.A Few Tips for the Perfect CrunchWant to take your fish fingers from tasty to totally irresistible? A few simple tricks can make a massive difference. We’re talking about getting that perfect extra-crispy coating, adding a few hidden flavours, and making those small, kid-approved tweaks that sneak in a little extra nutrition. These tips are super easy to follow and will probably have the kids reaching for seconds before you’ve even had a chance to sit down.Toast the breadcrumbs first: Spread breadcrumbs on a tray, spray lightly with oil, bake about 4–5 minutes to get them golden before coating the fish. This ensures the crust browns evenly since the fish cooks fast.Extra-strength dredge batter: Instead of separate flour, then egg, then crumbs, use a combined batter to help the coating stick well.Use mayonnaise in the batter: A small amount of mayo helps by adding oil into the batter so the crumbs brown nicely inside and out, and adds flavour.Choose the right fish: Use white fish fillets that won’t dry out quickly. Avoid very lean fish like swordfish or tuna for this style.What to Serve With Your Fish FingersPairing your fish fingers with the right sides can turn a simple meal into a full, kid-friendly feast. Here are some easy ideas:Mashed potatoes – Creamy and soft, perfect for dipping those golden fish fingers.Steamed veggies – Carrots, peas, or broccoli add colour and nutrition without fuss.Rice – A simple, mild base that balances the crunchy fish fingers.Fries – Always a winner! Bake or air-fry for a slightly healthier option.Salad – Fresh, colourful leaves with cherry tomatoes can make the plate look extra fun.Dipping sauces – Ketchup, mayo, or a mild yoghurt dip make eating even more exciting for little hands.The Bottom LineFish fingers aren’t just a classic favourite. They’re a clever way to serve up protein, omega-3s, and a touch of veggie goodness in a form kids actually love. With simple steps, a few secret tips, and some tasty sides, you can turn mealtimes into a stress-free, fun experience for the whole family. Bake, fry, or air-fry them, get creative with dips and sides, and watch your little ones happily reach for seconds. Golden, crispy, and packed with flavour. These fish fingers are sure to become a regular hit in your kitchen.Looking for more fun lunch ideas to serve alongside fish fingers? Check out our 6 Non-Sandwich Lunch Ideas For Picky Eaters — easy, kid-friendly, and fuss-free.Stay informed with fresh tips, expert guidance, unique deals, and tailored support!Click HereMeet Dr Nick FullerMy StoryAs a father, I know first-hand that raising healthy and happy children is tricky. Children are fussy, particularly at the end of the day when they are shattered. We also live in a society where companies seek to profit from what we feed our kids; incorrect and damaging advice is pushed on us and marketed towards our children, and we have no time.But with these recipes and resources, you and your children can enjoy simple and well-founded food and lifestyle choices for lifelong health.

The Best 10-Minute Pizza Bagels For Kids Who Love a Treat
Looking for a snack or meal that kids will actually get excited about? Pizza bagels for kids might just be your new secret weapon. These mini pizzas are not only a total blast to make together, but they’re also the perfect size for little hands to manage. The best part is that when you get the kids involved in the kitchen, they’re usually much more likely to tuck in and try something new.Bagels are such a handy base because they let you sneak on all sorts of toppings, from colourful veggies to a good hit of protein-packed cheese, without any of the usual fuss. Stick around to see how you can turn a simple bagel into a kid-friendly pizza that’s just as much fun to look at as it is to eat.Make Kids’ Favourites Work for YouWe all know kids love familiar foods, but as parents, we’re always looking for that healthy balance. In Healthy Parents, Healthy Kids, Dr Nick Fuller shows you exactly how to make those everyday favourites part of a healthy lifestyle. His approach is all about helping kids enjoy their food while building those all-important healthy habits for the long run.If you want to serve up family favourites with total confidence, grab your copy of Healthy Parents, Healthy Kids today. It’s a game-changer for making mealtimes that much easier.The Best Recipe for Pizza Bagels For KidsYou can substitute any vegetables of your choice in this recipe—for example, thinly sliced zucchini, mushrooms, or roasted pumpkin. This recipe makes for a fun dinner for the whole family. Lay out all of the ingredients, including your chosen vegetable options, and allow the kids to prepare their own pizza bagels. You could also use up slightly stale bagels in this recipe. Type: Vegetarian, Kid Friendly Serves 4Prep Time: 10 minutesCooking Time: 10 minutes What You’ll Need:4 wholegrain seeded bagels, halved lengthways4 tablespoons tomato paste½ red onion, thinly sliced1 cup mozzarella cheese, grated1 punnet cherry tomatoes, halvedFresh parsley and basil, to serve (optional)How to Do It:1. Preheat the oven to 220°C. 2. Line 2 baking trays with baking paper. Arrange the bagel halves cut side up onto the baking trays.3. Spread the tomato paste evenly onto the bagel halves. Top with the sliced onion, mozzarella and the tomatoes. 4. Place the bagels into the oven and bake for 10 minutes until the cheese is melted and golden. 5. Sprinkle over the fresh herbs. Serve immediately and enjoy!Fun Pizza Bagel Variations for KidsPizza bagels don’t have to be boring. Mixing it up keeps snack time exciting and can even encourage picky eaters to try new flavours.Veggie-only versionLoad up on colourful veggies like capsicum, grated carrot, or spinach. Research suggests that repeated exposure, like to a variety of vegetables, at a young age increases the likelihood children will enjoy them later.Cheesy extra melt versionFor little cheese lovers, sprinkle extra mozzarella or mild cheddar. Cheese not only tastes great but is a good source of calcium, which is important for growing bones.Hidden veggie sauce versionBlend veggies like pumpkin, carrot, or zucchini into your tomato sauce. Kids get a nutritional boost without even knowing it, a clever trick backed by nutritionists.Looking for ways to sneak more veggies into fun meals? Try our Top Hidden Vegetable Recipes For Picky Eaters — perfect to pair with pizza bagels for a nutritious twist.Rainbow topping version for fun colours Make it a visual treat with toppings in all colours of the rainbow. Studies show that visually appealing food can increase children’s willingness to try new ingredients.Quick Tips to Make Pizza Bagels for KidsA few small tweaks can make pizza bagels a hit every time:Use mini bagels – They’re the perfect size for little hands and mean less waste if they take a nibble and get distracted.Keep the sauce light – A thin spread prevents soggy bagels and balances flavours.Add mild cheese – Mozzarella, cheddar, or a mix of mild cheeses keeps it kid-friendly.Choose soft, kid-friendly toppings – Avoid anything too hard or spicy. Think cherry tomatoes, small veggie pieces, or finely diced ham.Bake until lightly golden – Bake them until the cheese is just melted and the edges have a tiny bit of crunch.Let them cool slightly before serving – Give them a few minutes to cool down before serving. It saves those tiny tongues from the ‘lava-hot’ cheese experience!When to Serve Your Pizza BagelsPizza bagels are versatile and perfect for all kinds of occasions:After school snack – Quick, filling, and fun for kids to eat on their way home from school.Lunch box treat – Slice into halves for an easy, mess-free lunch.Party platter – Make a rainbow of mini pizza bagels for birthdays or playdates.Weekend brunch – Pair with fruit and yoghurt for a balanced and colourful brunch spread.Picnic-friendly option – Portable and easy to pack, they’re a hit outdoors without extra cutlery.Summing UpPizza bagels are so much more than just a quick snack. They’re a great way to get creative in the kitchen, a brilliant trick for sneaking in extra veggies, and a surefire way to get the kids excited about sitting at the table. Whether you go for a ‘mega melt’, a rainbow of toppings, or a hidden veggie surprise, these mini pizzas are the ultimate low-stress meal.So, grab a bag of bagels, get the toppings ready, and watch the kids tuck into a meal they’ll actually love.Want more easy, kid-friendly meal ideas like pizza bagels? Check out our 7 Simple and Delicious Rice Dishes For Picky Eaters for simple, fuss-free options the whole family will enjoy.Stay informed with fresh tips, expert guidance, unique deals, and tailored support!Click HereMeet Dr Nick FullerMy StoryAs a father, I know first-hand that raising healthy and happy children is tricky. Children are fussy, particularly at the end of the day when they are shattered. We also live in a society where companies seek to profit from what we feed our kids; incorrect and damaging advice is pushed on us and marketed towards our children, and we have no time.But with these recipes and resources, you and your children can enjoy simple and well-founded food and lifestyle choices for lifelong health.
The Best Halloween Food Ideas Kids Will Actually Eat
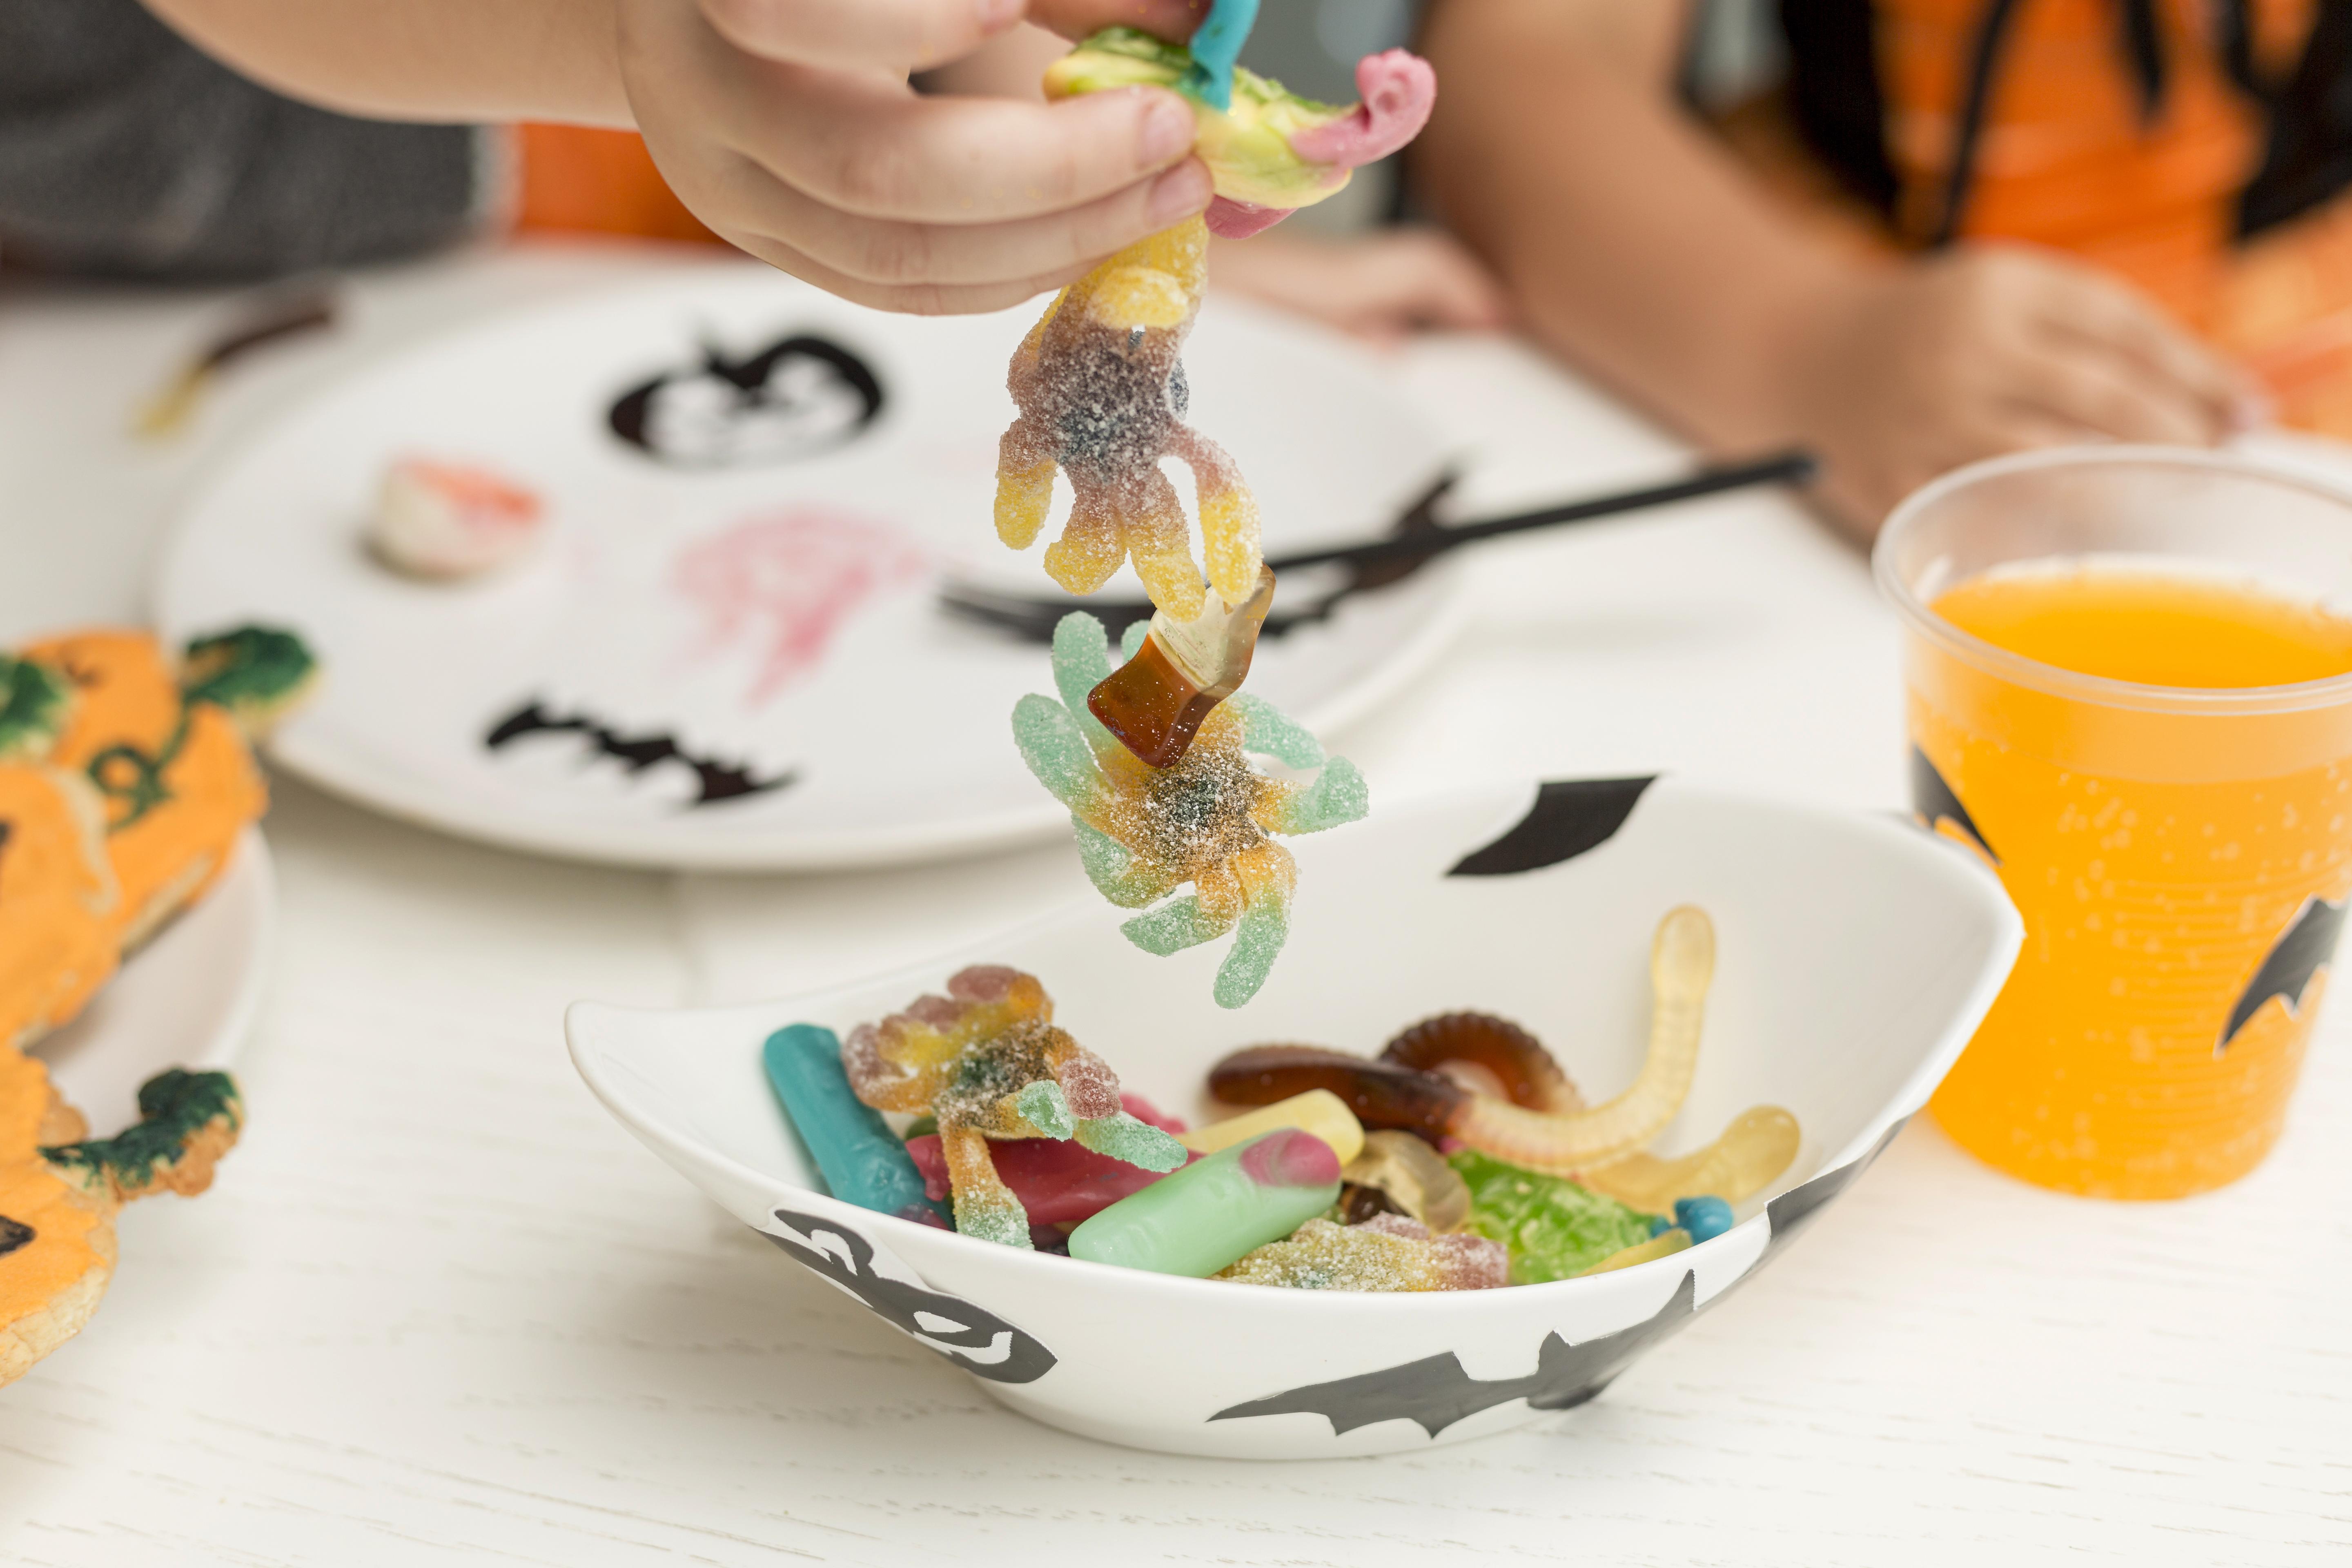
Halloween is the perfect time to turn snack time into a spooky adventure. But keeping treats fun and kid-friendly can be tricky. Studies show that colourful, playful foods can encourage children to try new flavours and eat more veggies, even during festive occasions. Halloween food ideas kids will love don’t have to be stressful or packed with artificial stuff. In this guide, we’ve rounded up some easy, creative, and actually healthy ideas that will have the kids reaching for more while you breathe a sigh of relief. Here are our favourite tips and recipes to make this Halloween both fun and nutritious.Spooky Fun, Stress-Free Food ChoicesPlanning Halloween food can feel overwhelming, especially with picky eaters. Dr Nick Fuller’s Healthy Parents, Healthy Kids provides practical tools to help parents enjoy themed meals while still encouraging healthy habits. No guilt, no battles, just simple, sensible guidance that works.Take the pressure off Halloween food. Grab your copy of Healthy Parents, Healthy Kids today and enjoy the fun without the fuss.7 Quick Halloween Food Recipes for KidsReady to turn your kitchen into a bit of a haunted house? These 7 halloween food ideas kids recipes are simple, colourful, and a total blast to make. Plus, they’re a great way to sneak in some of the good stuff along the way.Silly Face SmoothieA creamy, colourful smoothie that’s as playful as it is tasty. Perfect for kids with texture sensitivities, it’s smooth and easy to sip while still letting them decorate with fruit, seeds, or a swirl of yoghurt to make silly faces. Quick to make and full of goodness, it turns snack time into a fun, healthy treat for little hands.Type: Vegetarian, Gluten-Free, Nut-Free, DairyServes: 2–3 kidsPrep Time: 5 minutesCooking Time: 0 minutesIngredientsMilkBananaFrozen pineapple, strawberries, or mangoSpinachRecipeMake a green smoothie for kids. top with granola for hair, dried fruit (like cranberries or raisins) for eyes, and mini marshmallows for funny teeth.Halloween ToastCrunchy, colourful, and totally spooky, this Halloween toast is a playful way to sneak in some healthy toppings. It’s easy to bite and decorate with fruit, spreads, or seeds to make fun Halloween shapes and faces. Quick to prepare and full of goodness, it turns snack time into a festive, hands-on treat little ones will love.Type: Vegetarian (Gluten-Free option available)Serves: 2–3 kidsPrep Time: 5 minutesCooking Time: 5 minutesIngredientsBreadCheeseAvocado or tomatoOlivesCucumber or capsicum for shapesRecipeLightly toast the bread.Spread avocado or place cheese slices on top.Cut veggies into shapes like eyes or smiles.Arrange them to make a cute Halloween face.Side Eye Snack BarAdd some silly eyes to a homemade granola bar, chocolate protein muffin, or any snack you like! Simply roll cream cheese into two small balls and place them on top, then press a mini chocolate chip into each for instant personality. It’s an easy, playful way to make everyday snacks more fun for kids.Type: Vegetarian (Gluten-Free option possible)Serves: 2–4 kids (depending on the snack)Prep Time: 5 minutesCooking Time: 0–10 minutes (depending on the base snack)Ghost English Muffin PizzaTurn a toasted English muffin into a spooky, delicious snack or mini dinner! Spread on pizza sauce or pesto, then cut a ghost shape from a slice of cheese and place it on top. Add two little eyes with a knife or tiny toppings, and either serve as-is or give it a quick melt in the oven or microwave for gooey, ghostly fun.Type: VegetarianServes: 1–2 kids per muffinPrep Time: 5 minutesCooking Time: 2–5 minutes (if melting cheese)Puff Pastry PumpkinsFlaky, golden puff pastry transforms into adorable little pumpkins that are as fun to make as they are to eat. Perfect for a festive snack or lunch, these little treats bring Halloween to the plate in the most delicious way.Type: Vegetarian (can be made Gluten-Free with GF pastry)Serves: 4–6 kidsPrep Time: 10 minutesCooking Time: 15–20 minutesIngredients2 sheets of puff pastry1/2 cup whipping cream1/4 cup pumpkin puree1/2 teaspoon vanilla extract2 tablespoons powdered sugar1/4 teaspoon pumpkin pie spiceRecipePreheat the oven to 400Unfold the puff pastry and cut into pumpkins using a pumpkin cookie cutter.Place the pumpkins on a baking sheet and bake for 10-12 minutes, until golden brown.While the pumpkins are baking, place the remaining ingredients in a large bowl and beat with an electric mixer, or in the bowl of a stand mixer, until thoroughly combined and fluffy, about 5 minutes.Remove the pumpkins from the oven, allow to cool slightly, then slice in half. Top one half with the pumpkin mixture, place the other pumpkin half on top, and decorate with chocolate chips for eyes as desired.Pizza MummiesMini pizzas get a spooky twist. Top your base with sauce, cheese, and toppings, then use strips of pastry or extra cheese to wrap them like mummies. Add little eyes with olives or peppercorns for a hilarious, Halloween-ready snack or dinner that kids will love unwrapping.Type: Vegetarian, Gluten-Free option possibleServes: 2–4 kidsPrep Time: 10 minutesCooking Time: 10–15 minutesIngredients 2 English muffins, cut in half1/4 cup pizza or marinara sauce2 mozzarella cheese sticks3 green olives with pimentosRecipePreheat oven to 400℉.Place the English muffin halves on a baking sheet and bake for 5 minutes.Remove muffins from oven and spread 1 tablespoon of the pizza sauce onto each English muffin half.Peel the mozzarella sticks into strings and decoratively arrange them on top of each English muffin. Slice the green olives into 1/4 inch thick rings and place them on top of the cheese to create eyes.Bake mummies for 3-5 minutes, or until the cheese is melted.Spooky Grilled CheeseA classic comfort snack gets a Halloween twist! Golden, melty, and ooey-gooey, this grilled cheese is perfect for little hands and adds a spooky touch to lunch or snack time. It’s simple, satisfying, and guaranteed to bring some festive fun to the plate.Type: Vegetarian, Gluten-Free option possibleServes: 1–2 kidsPrep Time: 5 minutesCooking Time: 5–7 minutesIngredients Pumpernickel or dark rye breadCheddar cheeseButterRecipe Using a Halloween-themed cookie cutter, take four slices of the bread and cut out the centers.Heat butter in a griddle or skillet over medium heat.Cook both the cut-out pieces of bread and the whole slices for about 3 minutes until lightly golden.Flip the whole pieces of bread, cover with 1-2 slices of cheese, and top with the cut-out pieces of bread.Cook for an additional 3 minutes or until the cheese is melted, and serveWrapping UpWith these spooky, silly, and colourful Halloween food ideas kids will love, snack time can be just as much of a highlight as the trick-or-treating itself. From mini mummies and ghostly muffins to silly smoothies and puff pastry pumpkins, there’s something here to put a smile on every little ghoul’s face.These recipes are a total cinch to make, packed with the good stuff, and a brilliant way to get the kids involved in the kitchen. So, grab your ingredients, let their imaginations run wild, and turn this Halloween into a tasty, hands-on adventure the whole family can actually enjoy.Looking to make spooky snacks colourful and nutritious? Try our Innovative Salad Ideas for Kids That Make Veggies Fun for creative ways to include veggies in Halloween food.Stay informed with fresh tips, expert guidance, unique deals, and tailored support!Click HereMeet Dr Nick FullerMy StoryAs a father, I know first-hand that raising healthy and happy children is tricky. Children are fussy, particularly at the end of the day when they are shattered. We also live in a society where companies seek to profit from what we feed our kids; incorrect and damaging advice is pushed on us and marketed towards our children, and we have no time.But with these recipes and resources, you and your children can enjoy simple and well-founded food and lifestyle choices for lifelong health.
The Ultimate Party-Ready Halloween Platter Kids Can Munch On
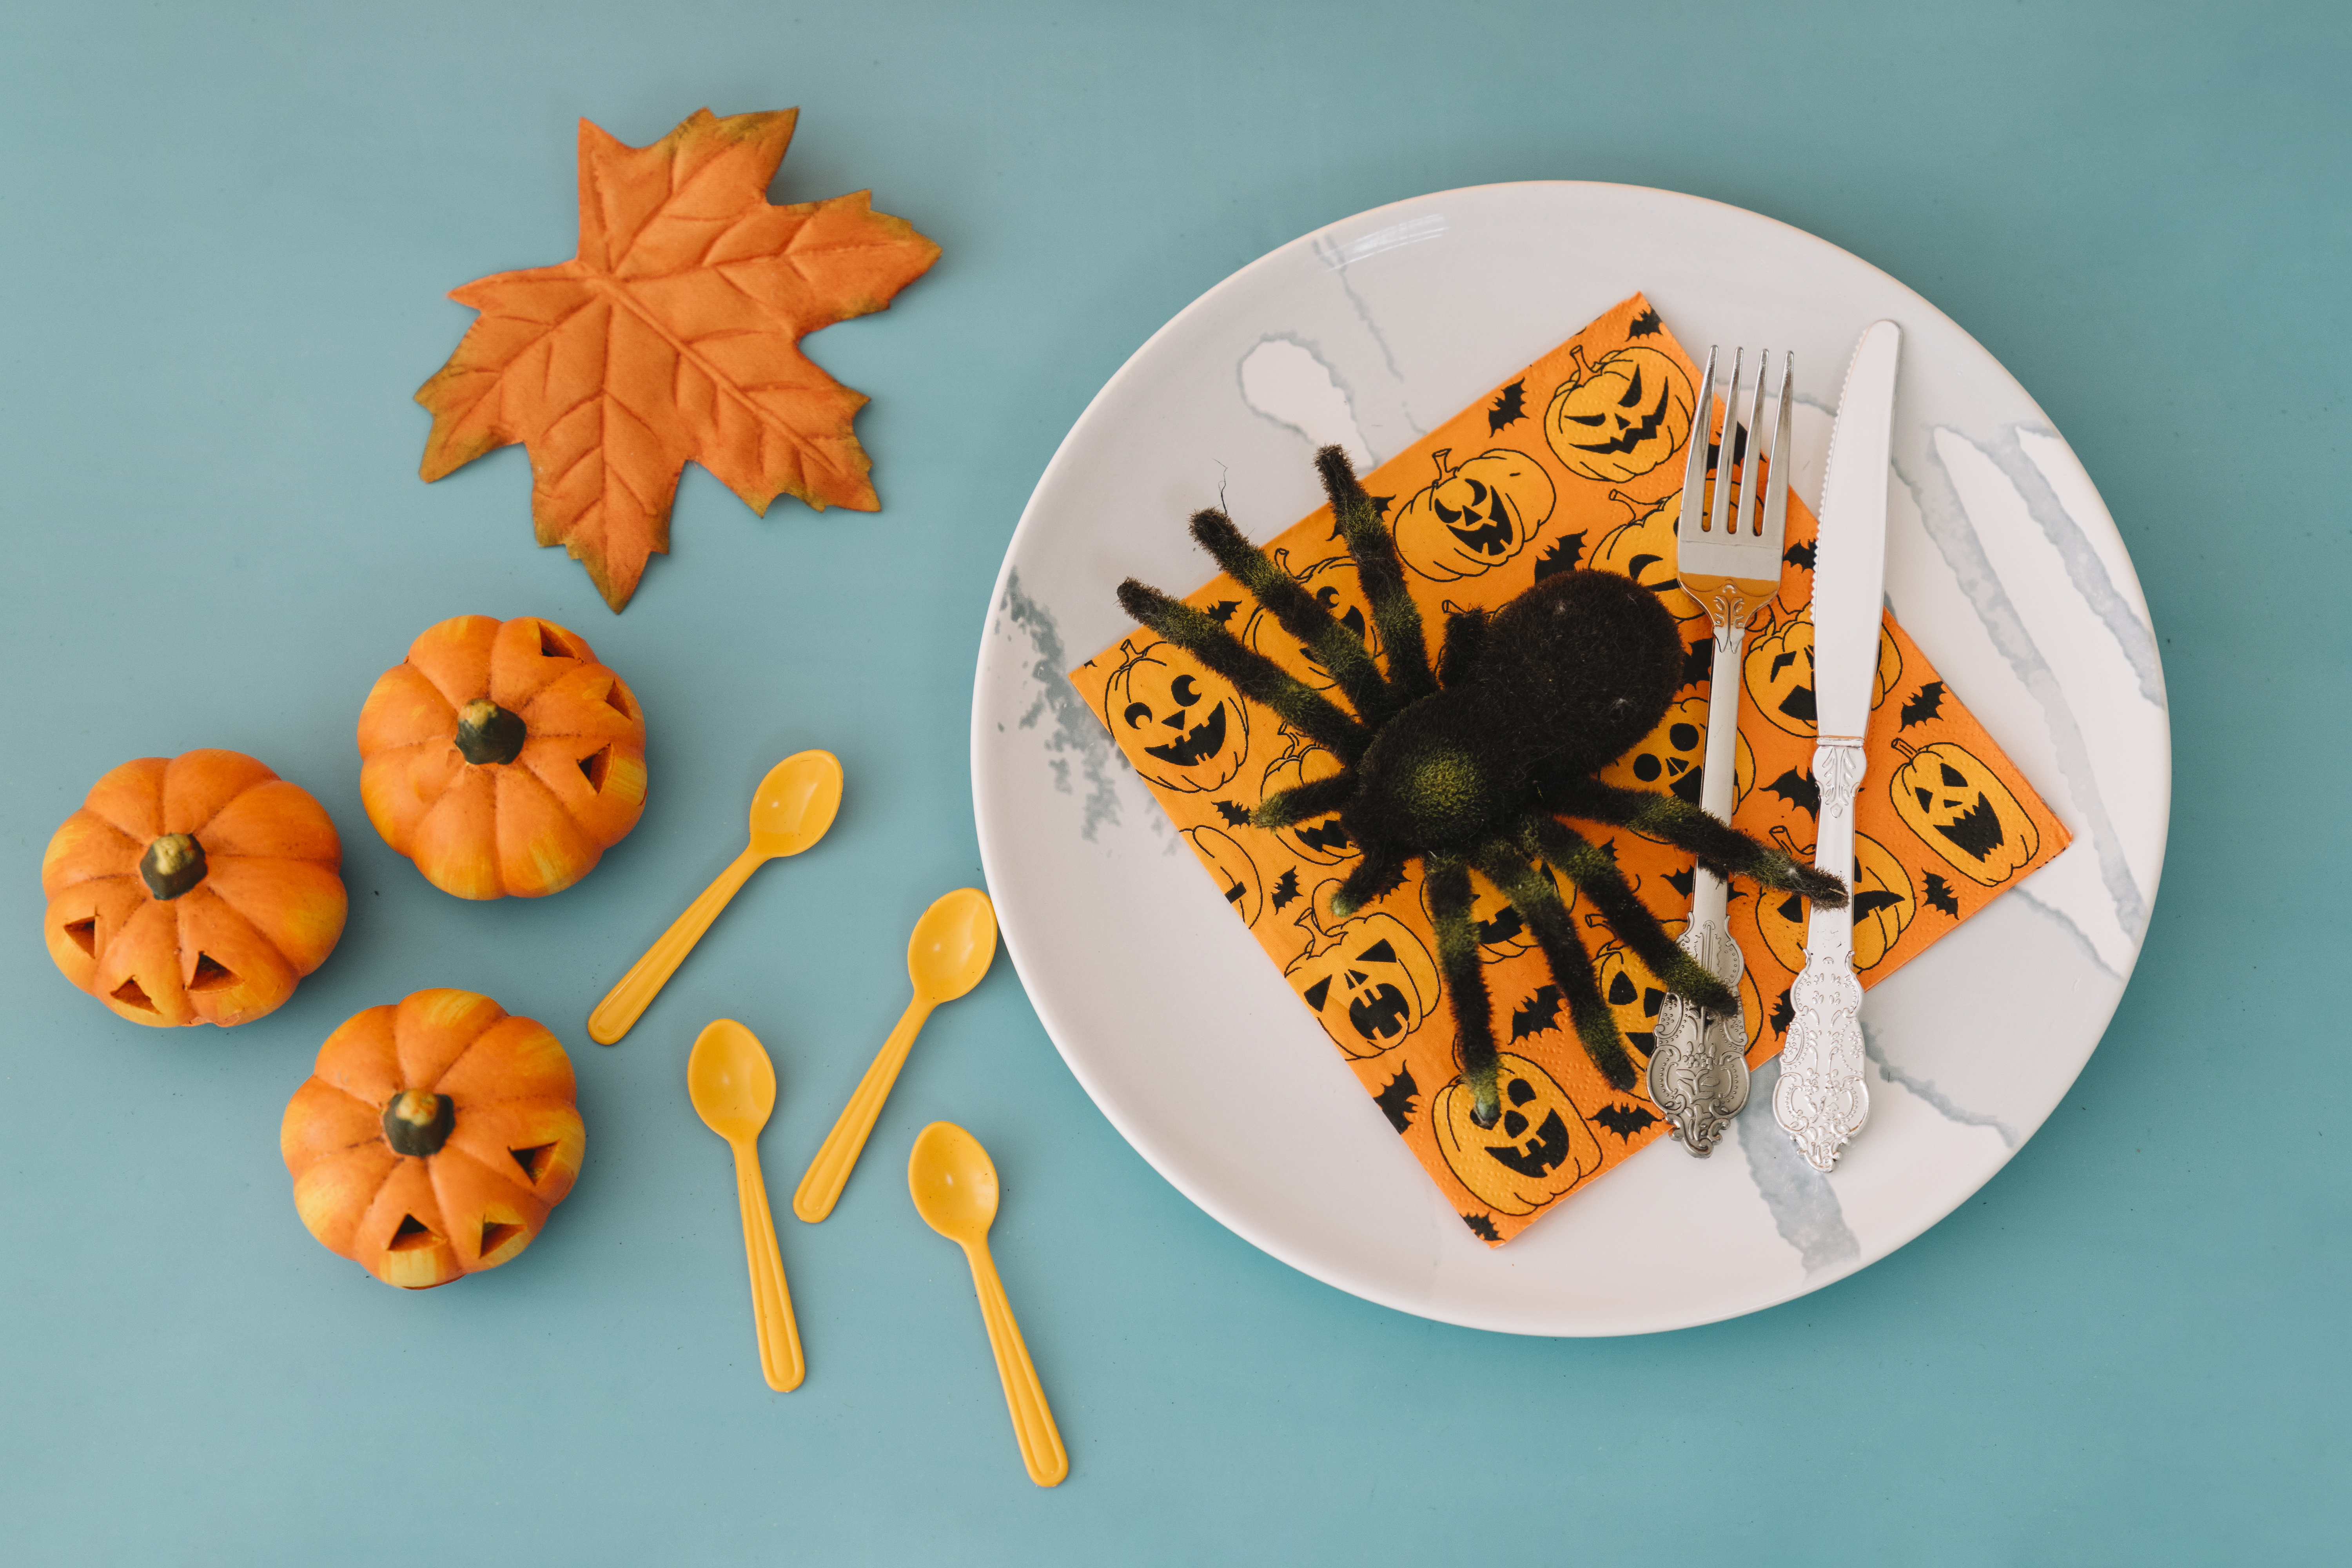
Halloween is easily one of the most exciting times of the year for kids, and we all know snacks are a massive part of that thrill. Interestingly, research shows that almost all kids aged 2–12 are daily snackers, and usually, those snacks lean towards sweets and treats rather than the green stuff.Since snacking actually makes up nearly a third of a child’s daily energy, Halloween is a brilliant opportunity to do things differently. Instead of just a sugar rush, a Halloween platter kids can get excited about is the perfect chance to mix those playful treats with healthier options. It’s all about supporting a balanced diet while still keeping the spooky fun alive.This guide isn't just about creepy shapes and colours; it's about creating a spread that delights your little ghouls while keeping nutrition in the back of your mind. Here are some creative ideas that balance fun, flavour, and a bit of mindful eating.Enjoy Halloween Without the Mealtime MeltdownsHalloween food doesn't have to equal chaos. In Healthy Parents, Healthy Kids, Dr Nick Fuller shares how to approach themed celebrations with total confidence. His strategies are all about balance and keeping your child’s relationship with food positive, even when there's chocolate involved!Celebrate without the stress this year. Grab your copy of Healthy Parents, Healthy Kids today and make Halloween a happy memory for everyone.Step-by-Step: How to Make Your Halloween Platter for KidsNow that you’ve got the spooky theme in mind, let’s roll up our sleeves and turn it into a show-stopping Halloween platter for the kids.What You'll Need:Spooky Crunch & 'Slime' (Guacamole): Blue corn tortilla chips, avocado, garlic, lemon juice, and salt.Mandarin / Clementine 'Pumpkins': Mandarins (or clementines) and celery sticks.Spider Web Pretzels: Pretzel sticks (or coconut rolls), white chocolate, and raisins.Mummy Cookies: Vanilla wafer biscuits, white chocolate, and candy eyes.Fruit & Veggie Skewers: Black grapes, cherry tomatoes, white marshmallows, and a little extra chocolate for faces.Ghost Bananas: Bananas and chocolate drops (large and small).Cheese Monsters: Babybel cheeses and candy eyes.Ants on a Log: Celery sticks, peanut butter, and raisins or candy eyes.How to Put it Together:Building your platter is much easier when you think of it as a collection of fun, spooky bits and pieces. You can prep each element separately and then just arrange them on the board for a colourful, playful spread. Here’s how to tackle each part:Spooky Crunch & 'Slime' (Guacamole + Corn Chips)Place the crushed garlic, lemon juice, and salt in a bowl, and mix to combine. Add the destemmed and peeled avocado, and mash until you reach the desired consistency. Serve with the blue corn chips.Mandarin / Clementine PumpkinsPeel the mandarins and remove any excess pith. Cut the celery into small sticks. Insert the celery sticks into the centre of the mandarins/clementines, voila, they are now little pumpkins!These can be made up to 7 days in advance if stored in an airtight container in the fridge.Spider Web PretzelsLay out a piece of baking paper or parchment paper. Arrange the pretzel sticks into five 8-pronged stars. Melt the white chocolate. Pipe the white chocolate over the pretzel sticks to make spider webs. Add the raisins to be flies. Leave to harden.These can be made up to 7 days in advance if stored in an airtight container in the pantry.Mummy CookiesLay out a piece of baking paper or parchment paper. Lie the vanilla wafer cookies on top. Melt the white chocolate. Pipe the white chocolate over the wafers in squiggly lines to make bandages. Add the candy eyes. Leave to harden.These can be made up to 7 days in advance if stored in an airtight container in the pantry.Fruit & Veggie SkewersThread the grapes, cherry tomatoes, and marshmallows onto the skewers so that you end up with 2 of each on each skewer in an alternating pattern. Optional: Melt the chocolate and pipe ghost faces onto the marshmallows.These can be made up to 1 day in advance if stored in an airtight container in the fridge.Ghost BananasCut each banana in half. Add the small chocolate drops as eyes and the large ones as mouths.Cheese MonstersRemove the cellophane wrapper from the Babybel cheese, then remove the middle wax strip from the Babybel. Use a small, pointed, sharp knife to create some fang shapes. Then add some candy eyes.These can be made up to 4 days in advance if stored in an airtight container in the fridge.Ants on a LogSpread each celery stick with a tablespoon of peanut butter. Top the peanut butter with a few evenly spaced raisins (these are your ants). You could also add a few candy eyes.These can be made up to 4 days in advance if stored in an airtight container in the fridge, just don't add the raisins or eyes until you are assembling the snack board.Setting the Spooky Scene:Now for the best part! Arrange all of the Halloween treats and Halloween snacks you have made onto a platter or grazing board. Add a few extra decorations, like some spiders, and your Halloween Charcuterie Board is ready!Tips to Make an Interesting Halloween Platter for KidsCreating a Halloween platter that grabs kids’ attention is all about colour, variety, and a little bit of spooky fun. Here are some tips to make your platter both exciting and easy for little hands to enjoy:Go big on colour: Use bright fruits, veggies, and snacks to make the whole spread pop. It’s the easiest way to make the healthy stuff look just as enticing as the treats.Mix your sweet and savoury: Balance is everything. Pairing fruity snacks with mild cheeses or crackers keeps their taste buds happy and prevents that dreaded sugar crash.Keep it bite-sized: Small portions are much easier for kids to grab and munch on without any fuss.Stick to simple, familiar shapes: You don’t have to overcomplicate it. Circles, sticks, and triangles are fun and familiar for little ones.Build from the big items down: Start by placing your larger pieces, like the mandarin pumpkins, banana ghosts, or Babybel cheeses, to anchor the board.Fill in the gaps: Use smaller snacks like raisins, chocolate drops, or pretzel sticks to fill up any empty spaces. It makes the platter look full and festive.Let the eyes do the work: A few candy eyeballs or chocolate drops can instantly turn an ordinary piece of fruit into a spooky character.Keep the flavours mild: Avoid anything too spicy or overwhelming so even your pickiest eaters can get involved.Use a bright tray: A colourful board or tray instantly makes the whole thing feel like a party.Add some colour and fun to your Halloween treats! These Quick Fruit Snack Ideas For Picky Kids are perfect for little hands and a healthy twist on festive snacks.Final ThoughtsAnd there you have it—a Halloween platter that’s colourful, playful, and perfect for little hands! By mixing sweet and savoury, adding simple spooky shapes, and keeping everything bite-sized, you’ll create a spread that’s as fun to look at as it is to eat. If you’re planning a party or just a special Halloween snack at home, these tips and step-by-step ideas make it easy to put together a platter that will have kids coming back for more. Now all that’s left is to grab a tray, get creative, and let the spooky snacking begin.Looking to make your Halloween platter even more kid-friendly? Check out our Simple Snacks For Picky Eaters for quick, tasty, and spooky-fun snack ideas.Stay informed with fresh tips, expert guidance, unique deals, and tailored support!Click HereMeet Dr Nick FullerMy StoryAs a father, I know first-hand that raising healthy and happy children is tricky. Children are fussy, particularly at the end of the day when they are shattered. We also live in a society where companies seek to profit from what we feed our kids; incorrect and damaging advice is pushed on us and marketed towards our children, and we have no time.But with these recipes and resources, you and your children can enjoy simple and well-founded food and lifestyle choices for lifelong health.
Skip the Cutlery! 7 Fun Finger Food Dinners For Kids
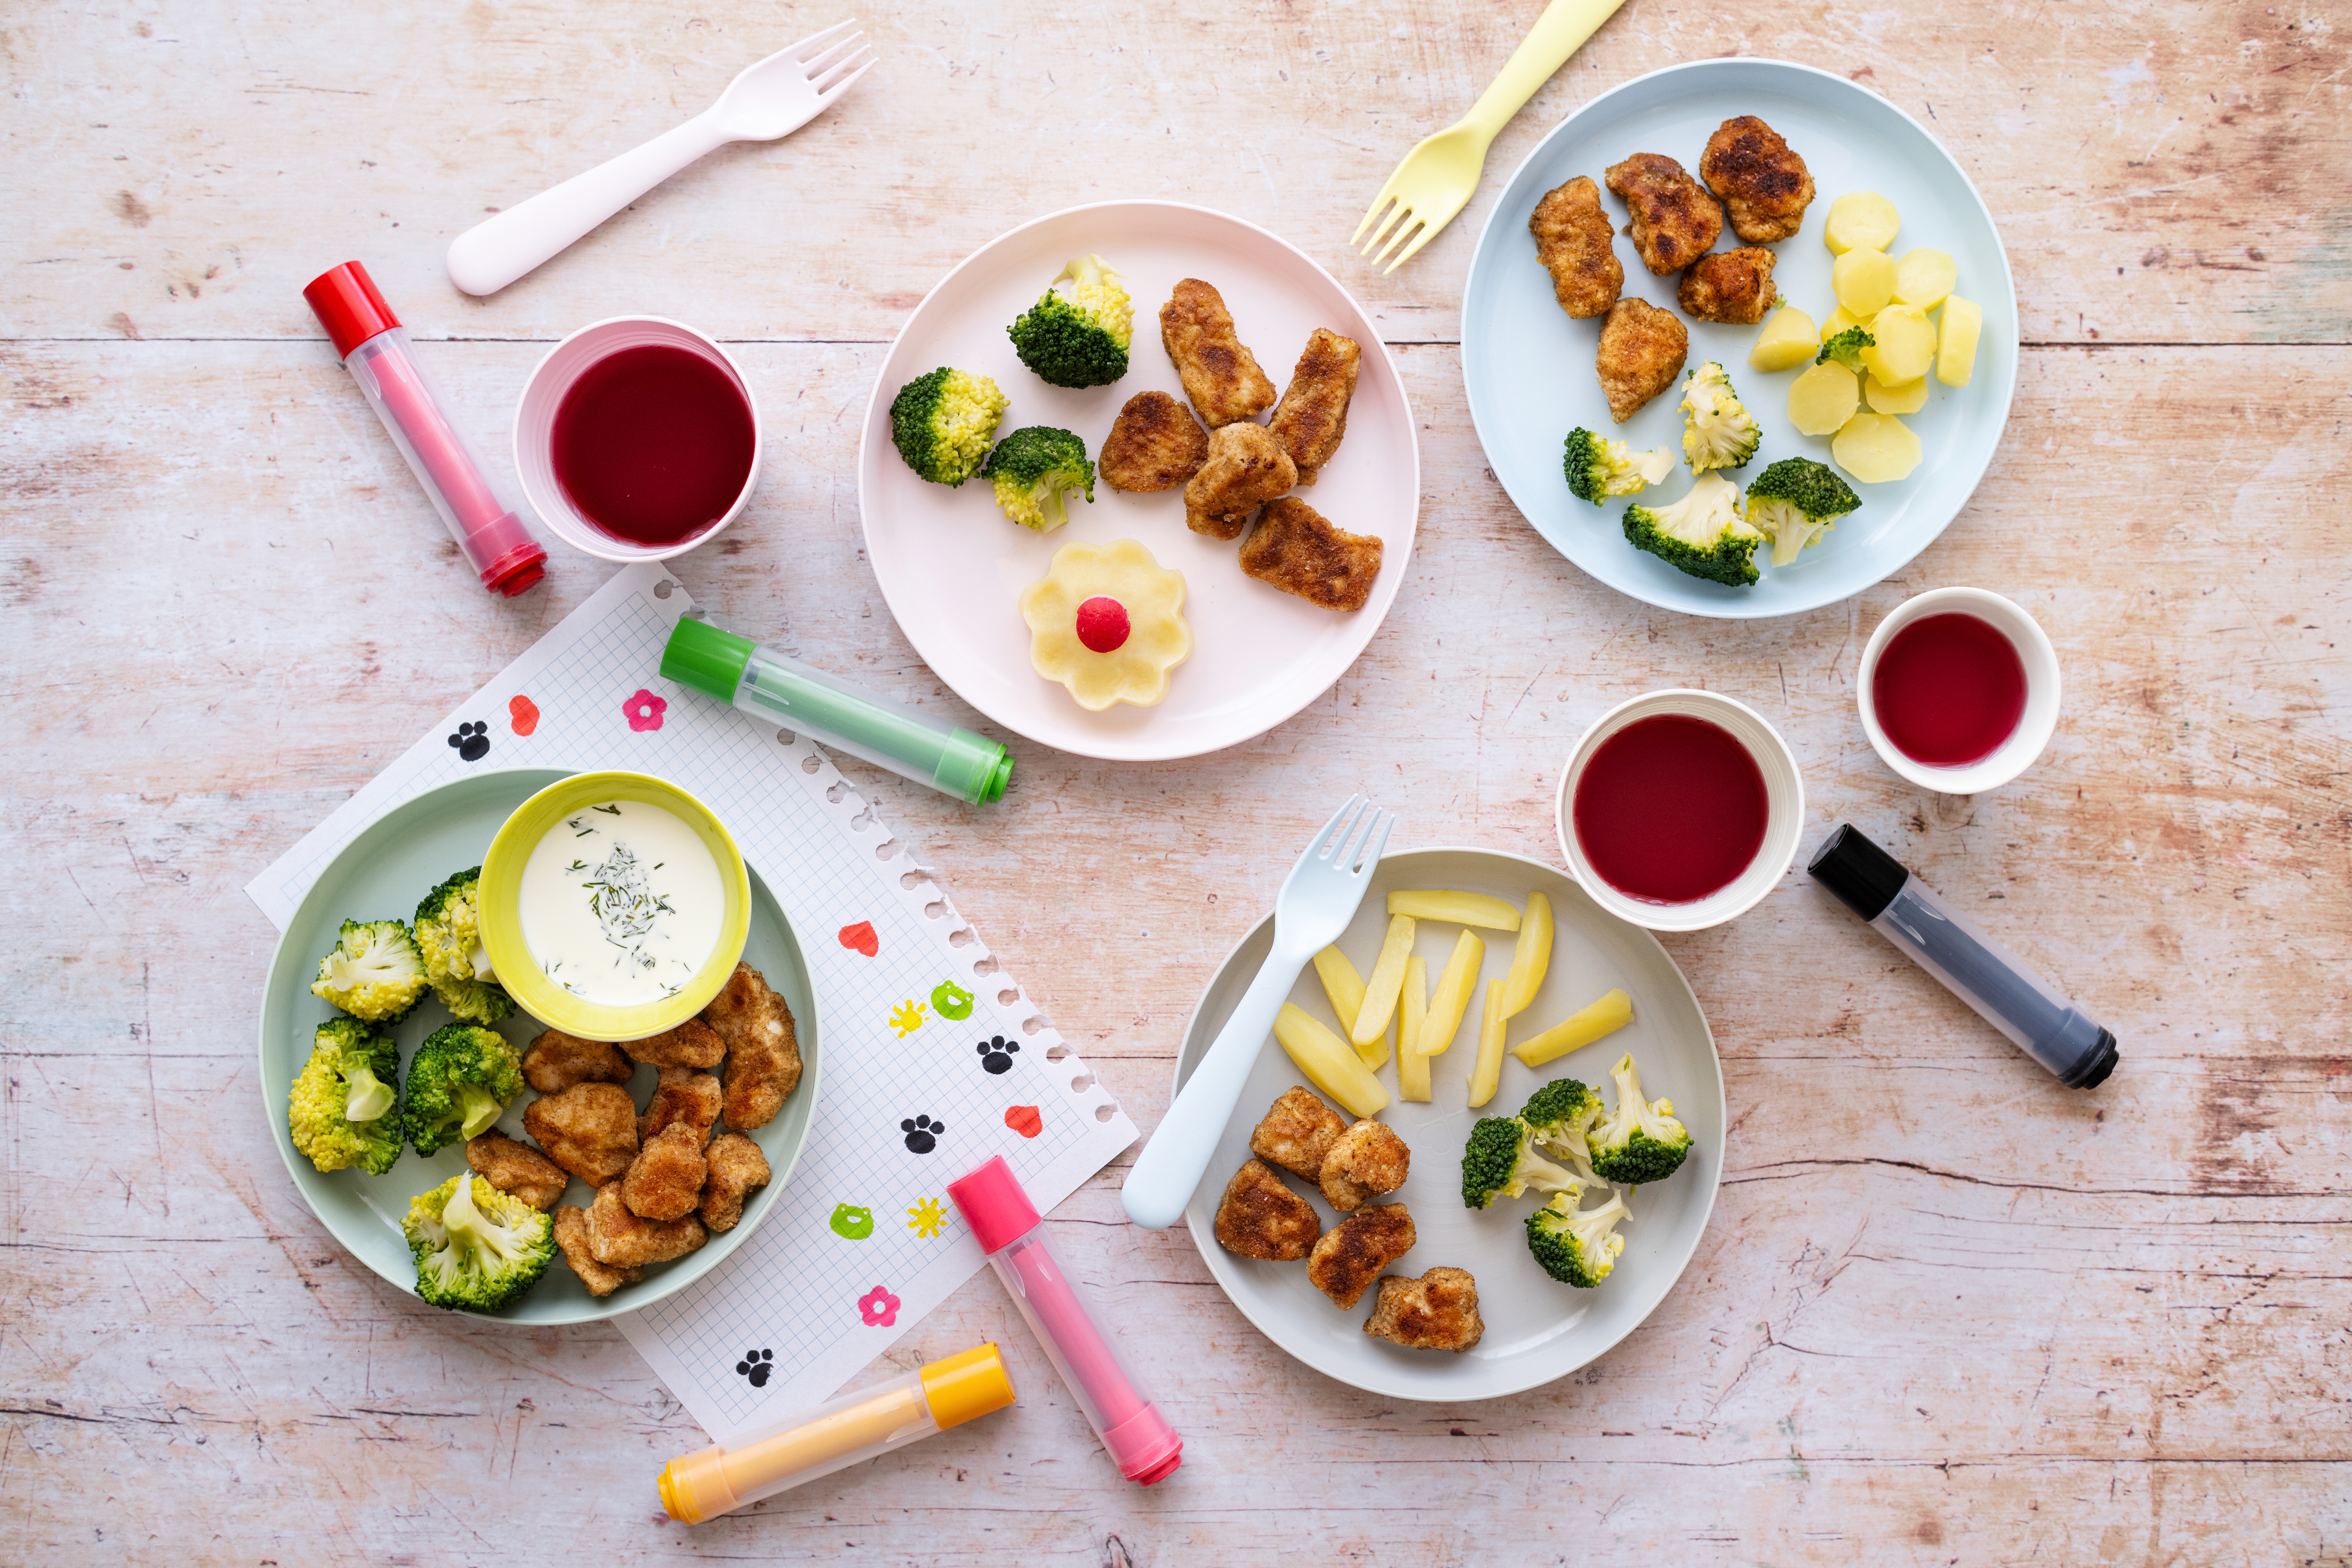
If we’re being real, finger food dinners for kids aren’t just about looking cute on the plate. They are incredibly practical, total stress-savers, and perfectly designed for little hands to manage. If you’ve ever felt like mealtime is a bit of a battleground, you’ll be glad to know that research into how kids eat actually backs this up. It shows that low-pressure, child-led environments lead to much happier mealtimes, especially for our fussy eaters. When dinner feels less like a big ‘demand’ and more like a casual snack, kids are way more likely to give things a go, even if they’re just exploring at first.Finger foods are the ultimate way to support this. Because they can be picked up and eaten independently, there’s no need to fuss around with cutlery or constant ‘adult help’, which lets your little ones explore their food at their own pace. It fits perfectly with ‘responsive feeding’, which is the idea that we decide what goes on the table, but the kids decide how much of it actually goes into their tummies.In this guide, we’ve pulled together some easy, family-friendly ideas that are perfect for those hectic weeknights. We’re talking simple ingredients, bugger-all prep, and foods kids can grab, dip, and enjoy without a fork in sight. Ready to make dinnertime a lot calmer and actually enjoy your own meal for once? Let’s get stuck in.Less Fuss, More Fun at DinnertimeFinger food dinners for kids can be an absolute lifesaver for busy Aussie families. If you’re looking for more ways to keep the peace, Dr Nick Fuller’s Healthy Parents, Healthy Kids is packed with expert advice on using fun, flexible meals to support healthy habits, without dinner turning into a massive power struggle.If you’re ready to make mealtimes relaxed and enjoyable again, grab your copy of Healthy Parents, Healthy Kids today. It’s a great way to bring the joy back to the family table and take the stress out of the evening rush.Why Finger Food Dinners For Kids Work So WellIf you've ever wondered why a plate of ‘bits and pieces’ disappears faster than a standard meal, there’s actually a bit of magic behind it. Finger food dinners for kids hit all the right notes for how little ones actually want to eat. Here’s why they’re such a winner:They’re easy to pick up and eatMost kids find cutlery a bit of a mission, and let’s face it, dinner is much more fun when you can just dive right in. Handheld foods feel more like ‘play’ and less like ‘work’, which takes the pressure off the whole experience. It’s also a great way for them to practice their coordination without the frustration of a slippery fork. Strong fine motor and hand–eye coordination skills in early childhood are linked to better school readiness and academic outcomes later on, particularly for writing and self-care tasks. They’re much less overwhelming on the plate A piled-up plate can cause sensory overload for a small child. According to the Delboeuf illusion, when a plate lacks ‘white space,’ the brain perceives the meal as an exhausting, unending task, often triggering a refusal to eat before the first bite is even taken. By breaking a meal into bite-sized finger foods, you reduce the visual volume, transforming a ‘mountain’ into a series of achievable goals. Making the meal look manageable reduces anxiety and increases the likelihood that they will actually finish what is in front of them.They’re great for picky eaters who prefer small portions If you’re dealing with a fussy eater, ‘nibbling’ is often their preferred way to go. Finger foods allow them to try tiny portions of different things without feeling like they’re committed to a massive serving. It’s a low-risk way for them to explore new textures and flavours at their own pace.They help build confidence with self-feeding There’s nothing like the sense of pride a kid gets when they can do it themselves. There’s nothing like the pride kids feel when they can feed themselves. Grabbing their own food and choosing what to eat next gives them a sense of independence and control. Those early experiences of mastery help young children develop self‑efficacy or the belief in their ability to succeed, which predicts greater resilience, willingness to try new things and better social and learning outcomes later on.5 Best Finger Food Dinner Recipes for KidsNow that we’ve looked at why these meals work so well, let's get into the actual recipes. These finger food dinners for kids are designed with fussy eaters in mind, using simple ingredients and familiar flavours that are easy for little hands to manage.They’re quick to prepare and family-friendly, which makes them a great option for those busy weeknights when you want to get a healthy dinner on the table without the usual fuss.Healthy NachosCrunchy, scoopable and packed with familiar flavours, this finger food dinner favourite is made with beef mince, but can easily be made vegetarian by swapping the beef for an extra tin of red kidney beans.Serves 8Prep time: 15 minutesCooking time: 8 minutesIngredients1 tablespoon olive oilI brown onion, finely chopped500g lean beef mince1 x 400g tin red kidney beans, drained and rinsed1 red chilli, finely chopped2 tablespoons tomato paste2 x 400g tin whole or chopped tomatoes with Italian herbs (or keep it plain if you prefer)1 x 230g packet wholegrain tortilla or corn chips1/3 cup (40g) grated cheddar 1 avocado, dicedHandful of coriander leaves, parsley, rocket or kaleRecipes1. Preheat the oven to 180°C.2. Heat the olive oil in a large frying pan over medium heat, add the onion and cook for 3 minutes or until softened.3. Add the mince and cook, breaking up any lumps with the back of a wooden spoon, until lightly browned.4. Stir in the kidney beans, chilli, tomato paste and tinned tomatoes. Reduce the heat to low and simmer for 10 minutes or until the mixture thickens.5. Spread the corn chips across two deep baking trays. Top with the mince sauce and sprinkle over the grated cheese.6. Bake for about 8 minutes or until the cheese has melted.7. Top with the avocado and coriander/parsley/rocket/kale and serve.Tip: If you prefer your nachos crunchy, sprinkle some corn chips on top of the mince sauce as well. Prawn and Mango TacosFresh, juicy and perfect for little hands, this finger food dinner is a great way to make the most of summer mango season. The prawns can be pan-cooked or popped on the BBQ for an easy, flavour-packed twist. Type: Pescatarian, Lactose FreeServes 4Prep time: 5 minutesCooking time: 5 minutesIngredients10 cherry tomatoes, sliced into small pieces1 cucumber, cubed1 small mango, cubed1 avocado, cubed¼ Spanish onion½ cup coriander, plus extra to serve1 lime, plus extra lime wedges to serve400g peeled raw prawns1 teaspoon olive oil 1 garlic clove ½ teaspoon paprika8 mini wholemeal tortillasRecipe1. In a small bowl combine the tomatoes, cucumber, mango, avocado, Spanish onion and coriander. Squeeze over the juice of one lime and stir. Set aside.2. Add the olive oil to a small frypan and heat over medium heat. Add the garlic and cook until fragrant. Add the prawns and paprika then continue cooking for 4-5 minutes until cooked through. 3. Warm the tortillas in the oven or microwave if desired. Fill with the mango mix and the cooked prawns. Sprinkle over some more coriander and serve with lime wedges. Enjoy!Tortilla PizzaQuick to make and always a hit with kids, this easy finger food dinner uses tortillas as the base for a speedy pizza fix. Keep it simple or let little tastes lead the way by adding extra veg like capsicum, zucchini, olives, or even roasted pumpkin and feta.Type: Vegetarian, Kid Friendly Makes 2 pizzasPrep Time: 5 minutesCooking Time: 10 minutes Ingredients2 wholegrain tortillas or wraps2 tablespoons tomato paste or tomato passata12 cherry tomatoes, halved½ cup mozzarella cheese, gratedFresh basil, to serve Recipe1. Preheat the oven to 200°C. 2. Prepare 2 baking trays, and place 1 tortilla onto each baking tray. 3. Spread the tomato paste evenly onto the tortillas. Top with the sliced tomatoes, and sprinkle cheese over the top. 4. Place the tortillas into the oven and bake for 8-10 minutes until the cheese is melted and golden. 5. Sprinkle over the fresh basil. Use a pizza cutter to slice each pizza into quarters. 6. Serve immediately and enjoy!Quinoa and Chicken Rice Paper RollsGreat for little hands and big appetites, these rice paper rolls work beautifully as a finger food dinner or a DIY family meal. Filled with cooked chicken, quinoa and crunchy veg, they’re easy to customise. Swap the chicken for another lean protein and use up whatever vegetables you have on hand.Type: Gluten Free, Lactose Free, ChickenMakes 8 rollsPrep Time: 10 minutesCooking Time: 10 minutesIngredients1 tablespoon olive oil1 chicken breast, sliced1 tablespoon soy sauce (or gluten free tamari), plus extra to serve1 tablespoon honey1 teaspoon ginger, minced8 round rice paper roundsMint leavesCoriander leaves1 cup cooked quinoa1 large carrot, sliced into long thin pieces1 large cucumber, sliced into long thin pieces1 large capsicum, sliced into long thin piecesSriracha, to serveRecipe1. Heat the olive oil in a non-stick pan over medium heat. Add the chicken and cook, stirring occasionally for five minutes. Add the soy sauce, honey and ginger and cook for another five minutes until chicken is cooked through. Set aside. 2. To assemble the rice paper rolls, fill a large round shallow dish with warm water. Immerse one rice paper round into the water for about 15 seconds until slightly softened. Transfer to a flat surface and spread out into a circle. It will be sticky and fiddly so it may take a few attempts to perfect it. 3. Top the rice paper with a few mint and coriander leaves down the centre of the roll, leaving a gap towards the edges of the roll. Top with a spoonful of quinoa and spread down the middle of the round on top of the herbs. Add a couple of pieces of carrot, cucumber, capsicum and chicken. You do not want to overfill the rice paper as this will make it harder to roll up. Fold in the edges of the rice paper roll then roll up tightly. Repeat with the remaining rice paper rounds and fillings. 4. Serve the rice paper rolls with extra soy sauce and sriracha for dipping. Enjoy!Air-Fried Spicy Chicken Lettuce WrapsPerfect for warm nights, this easy finger food dinner comes together fast without turning on the oven. The spicy chicken cooks quickly in the air fryer, then gets wrapped up in crisp lettuce cups for a fresh, hands-on meal kids can enjoy.Type: Contains Chicken, Lactose Free, Gluten Free, Air FryerServes 4Prep Time: 10 minutesCooking Time: 25 minutes Ingredients4 large chicken thigh fillets2 tablespoons tamari or gluten free soy sauce1 teaspoon sesame oil2 tablespoons rice wine vinegar1 tablespoon honey2 tablespoons siracha 200g dried vermicelli noodles1-2 heads of cos lettuce, leaves washed and separated2 carrots, peeled and spiralised or cut into thin stripsSesame seeds, to serveSpring onion, sliced, to serveRecipe1. Line the basket of the air fryer with baking paper or use a pre-cut air fryer liner. 2. Prepare the chicken by adding it to a bowl with the tamari, sesame oil, rice wine vinegar, honey, and sriracha. Mix well to combine. 3. Place the chicken thighs and marinade into the basket of the air fryer. Air fry the chicken at 190°C for 20-25 minutes until golden and cooked through. 4. Meanwhile, place the dried vermicelli noodles into a large bowl. Cover with boiling water and set aside for 5 minutes to soak until softened. Drain the noodles and rinse under cold water. 5. Layer 2 cos lettuce leaves on top of each other to form the lettuce wrap. Repeat to prepare 8 lettuce wraps. 6. Fill each lettuce wrap with carrot strips and the cooked vermicelli noodles. 7. Slice the air fried chicken thighs into thick pieces. Add the chicken to the lettuce wraps on top of the noodles, and drizzle with any remaining cooked marinade from the air fryer. 8. Sprinkle each lettuce wrap with sesame seeds and spring onion. Serve immediately and enjoy! Tips to Build a Balanced Finger Food PlatePutting together finger food dinners for kids doesn’t have to mean random snacks on a plate. You can easily pull together a proper meal that hits their energy and growth needs with just a bit of planning. Aim for a mix of different colours and familiar favourites to help them feel relaxed at the table while they get the nutrients they need.Choose a proteinIncluding a protein source helps support growth and keeps kids feeling fuller for longer. Foods like chicken pieces, eggs, beans, yoghurt-based dips or cheese sticks are easy to eat with little hands and fit well into finger food-style meals.Add a colourful veggieOffering at least one colourful vegetable adds important vitamins, minerals and fibre. Research shows that repeated exposure to vegetables, even without pressure to eat them, can support acceptance over time, so it’s okay if they’re just explored or tasted at first.Include a familiar foodA familiar or ‘safe’ food can make the whole plate feel less intimidating. Research consistently shows that low-pressure meals with known favourites or familiar food can help children feel more relaxed, which supports more positive mealtime experiences overall.Add a fun dipDips like hummus, yoghurt or mild salsa can make foods more appealing and encourage interaction with different textures. Allowing kids to dip foods themselves also supports autonomy at the table, which is a key principle of responsive feeding.Keep portions small and friendlySmall portions feel more manageable and reduce pressure to eat everything. Children are generally better at regulating their appetite when they’re allowed to decide how much to eat, with parents focusing on what foods are offered.Short on time but want fun, healthy finger food dinners? Try our Quick 5-Ingredient Meals For Picky Eaters That Are Sure Hits.The Bottom LineFinger food dinners for kids are a simple, stress-free way to make mealtimes much more enjoyable for everyone at the table. You can easily create plates that are balanced and tasty just by mixing proteins, colourful veggies, and some fun dips. Whether you’re serving up nachos, rice paper rolls, or quick tortilla pizzas, these meals keep things interactive and flexible for little hands.So, grab a plate, let the kids dig in, and turn your next dinner into a relaxed family moment.Need more fuss-free finger food ideas for dinner? Check out our Simple Snacks For Picky Eaters — quick, tasty, and kid-approved.Stay informed with fresh tips, expert guidance, unique deals, and tailored support!Click HereMeet Dr Nick FullerMy StoryAs a father, I know first-hand that raising healthy and happy children is tricky. Children are fussy, particularly at the end of the day when they are shattered. We also live in a society where companies seek to profit from what we feed our kids; incorrect and damaging advice is pushed on us and marketed towards our children, and we have no time.But with these recipes and resources, you and your children can enjoy simple and well-founded food and lifestyle choices for lifelong health.
The 3-Ingredient Strawberry Milk Kids Recipe You Can Whip Up in Minutes
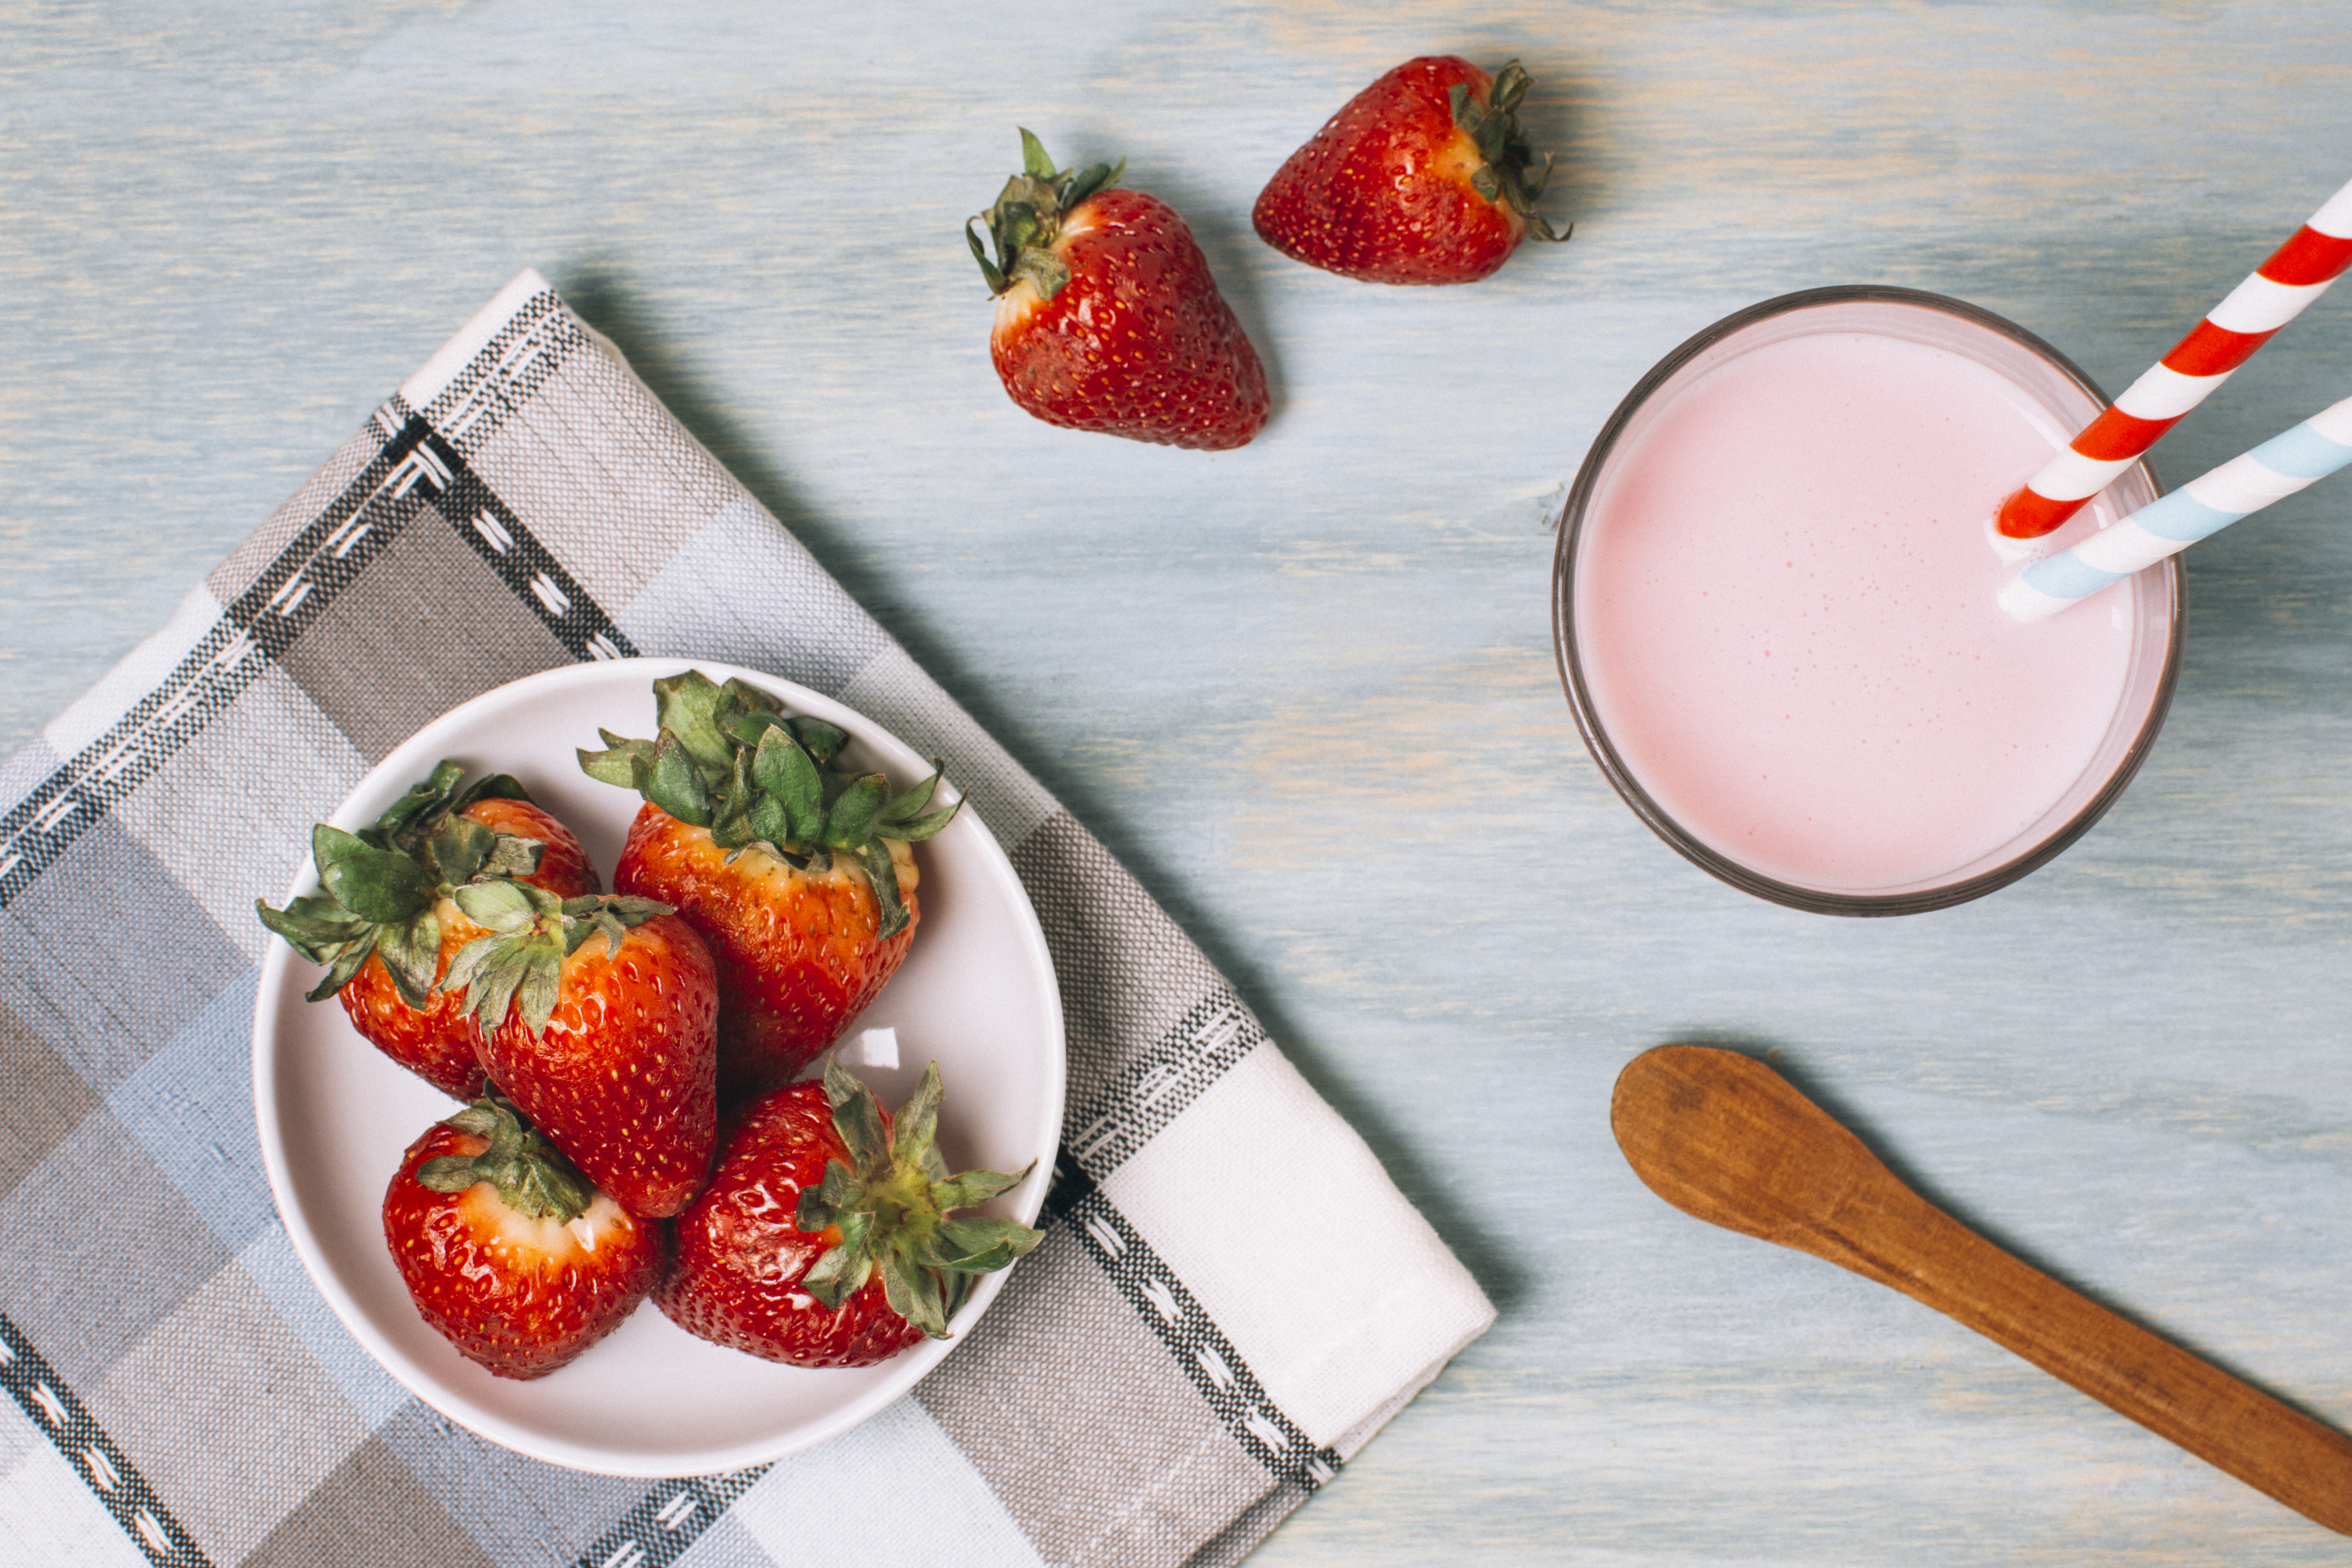
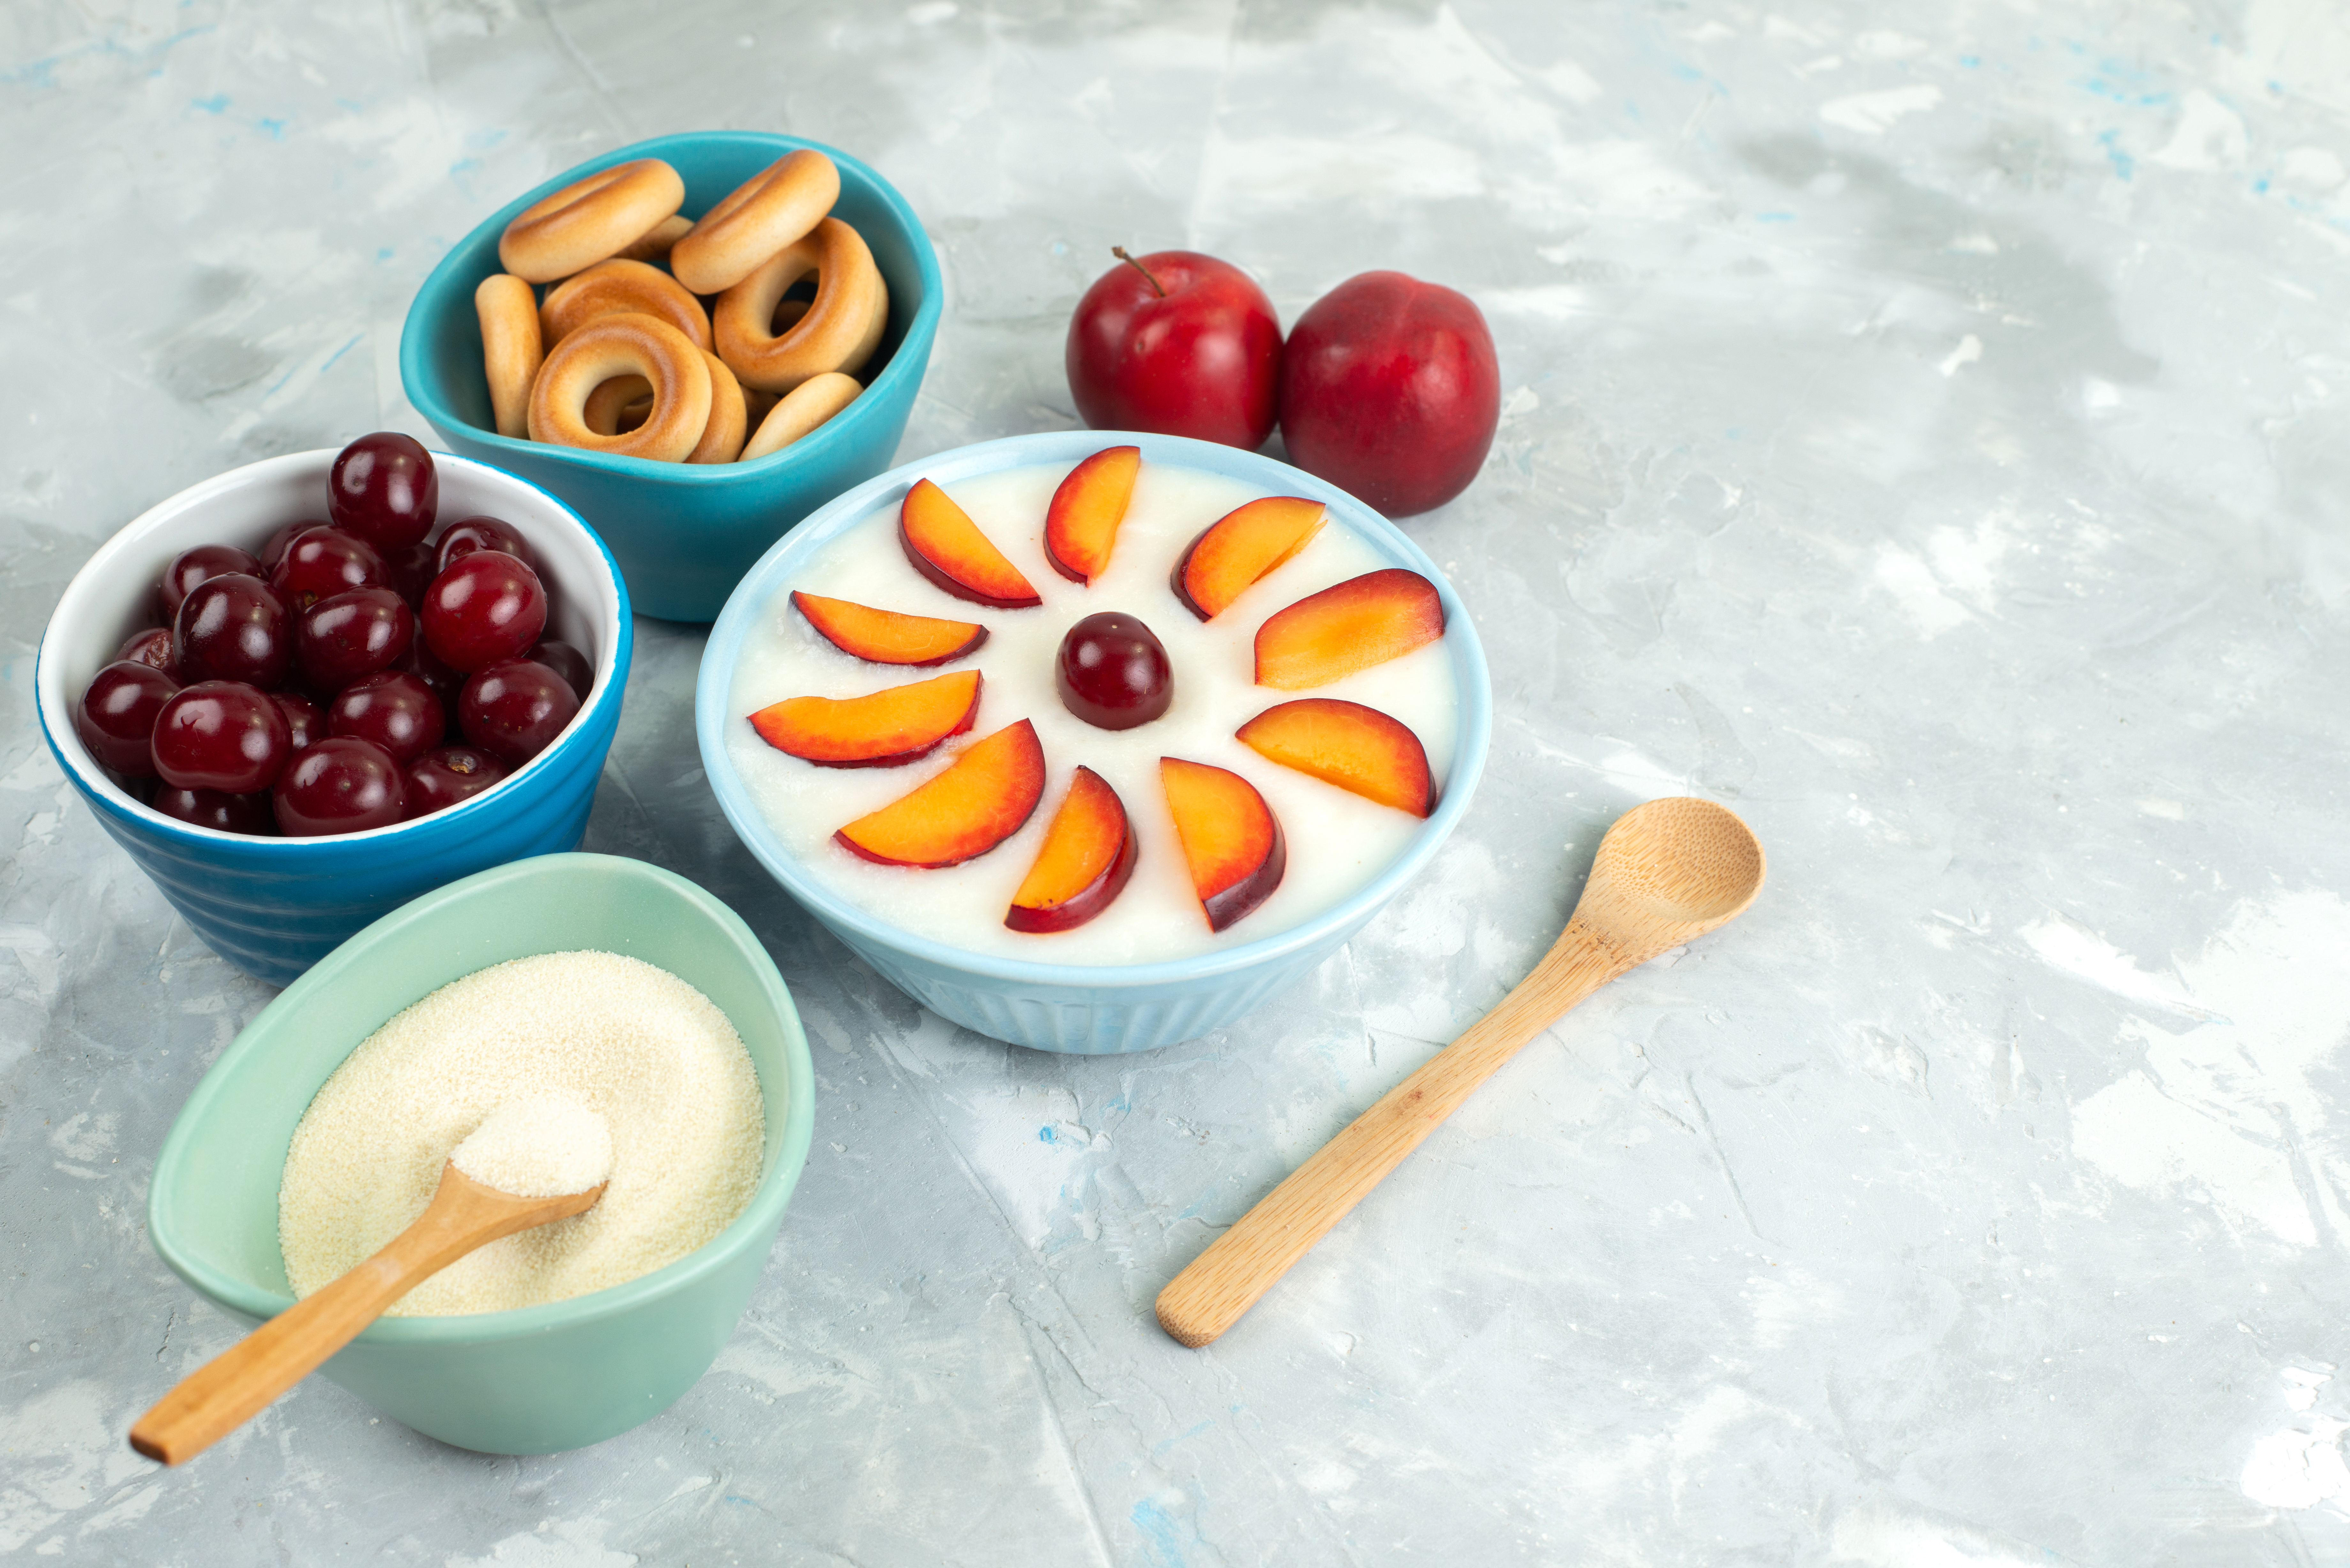
If you’re chasing a fruity, creamy drink your kids will actually enjoy, this strawberry milk kids recipe is about to become a total go-to. Not only does it taste delicious, but it’s actually a brilliant way to help your little ones get the nutrients they need. We all know milk is a bit of a powerhouse for calcium, protein, and potassium—all the essentials for strong bones, teeth, and growing muscles. In fact, most Aussie kids still rely on milk for a huge chunk of their daily calcium.You might be surprised to hear that research suggests flavoured milks, like this strawberry version, can be just as good for them as plain milk. It supports their overall nutrition without the worry of extra weight gain compared to kids who don't drink milk at all. Plus, because most kids are suckers for anything fruity and pink, offering this can actually boost their total milk intake and steer them away from those less-than-ideal sugary soft drinks.This recipe keeps things nice and simple with fresh strawberries, milk, and just a touch of natural sweetness. It’s perfect for breakfast, lunchboxes, or a quick after-school treat. Let’s dive into how to make this creamy drink your kids are going to love.Make Sweet Drinks Smarter for KidsWhen the kids start asking for flavoured drinks, it’s easy to feel a bit stuck between saying ‘no’ and worrying about the sugar. Dr Nick Fuller’s Healthy Parents, Healthy Kids is a brilliant resource that offers heaps of practical advice on how to guide them toward healthier choices while still keeping things fun. It’s all about building those positive habits without the restriction or mealtime stress.If you want to feel more confident about what’s actually in your child’s cup, grab a copy of Healthy Parents, Healthy Kids today. It really takes the guesswork out of those everyday choices.Is Strawberry Milk Good for Kids?Strawberry milk isn’t just a delicious treat; it can actually be a really nutritious addition to your child’s day. When you make it with fresh strawberries and milk, you’re serving up a colourful drink that’s a natural source of vitamins, minerals, and protein.Milk is a powerhouse: It’s packed with calcium, potassium, and protein, which are all the essentials for growing bones, teeth, and muscles.Berries bring the goodness: Strawberries add a boost of Vitamin C, antioxidants, and fibre, which are great for supporting the immune system and overall health.Offering a strawberry version can even help boost milk intake for kids who might usually reach for a sugary soft drink or juice. It gives them the nutrients they need in a way that feels like a treat. In addition, making it at home means you’re the boss of the sugar content, with no artificial flavours or weird colours in sight. It’s a total win-win: the kids get a drink they’re obsessed with, and you get a nourishing option that supports their growth.What You’ll Need for Your Strawberry Milk Kids RecipeYou only need a handful of simple, fridge-staple ingredients to get this going:Fresh or frozen strawberries: A small handful is plenty to help hit those daily fruit goals for little ones.Milk of your choice: Whether you’re a dairy family or prefer plant-based, both work a treat.A little sugar or honey: Just a touch to balance out the tartness of the berries. Optional vanilla: A tiny drop of vanilla extract is a great trick for boosting the flavour without having to add more sugar.Easy Steps to Make Strawberry Milk for KidsMaking your own strawberry milk kids recipe at home is a total game-changer. It gives you full control over the ingredients, but more importantly, you can tweak the flavour, the texture, and the sweetness to suit your little ones. We all know those are the ‘make or break’ factors for whether a drink actually gets finished or left on the bench!Prepare strawberriesWash and hull fresh strawberries, or partially thaw frozen ones. Studies show that repeated exposure to familiar foods in different forms (fresh, blended, chilled) can increase acceptance over time, even in picky eaters.Blend with milkBlend strawberries and milk until smooth. According to research, combining familiar foods with new flavours can make children more willing to try and accept new tastes. Milk often acts as a ‘safe’ base for introducing fruit flavours.Add sweetenerTaste first, then add a small amount of sugar or honey only if needed. Children naturally prefer sweet flavours, but exposure to less-sweet versions may help moderate sweetness expectations as they grow.Strain if neededStrain the mixture to remove seeds if your child is texture-sensitive. Texture is a major driver of food refusal in young children, sometimes even more than taste. Smoother textures are often better tolerated.Chill before servingServe the strawberry milk well chilled. Temperature can influence flavour perception. Cooler drinks may taste smoother and more refreshing, which can increase acceptance without altering ingredients.Tips for the Picky EatersWe all know that no two kids are the same when it comes to what they’ll actually drink. These easy little tweaks let you adjust your strawberry milk kids recipe on the fly without having to start from scratch:The seed-free version: If your little one is sensitive to textures, give the blended milk a good strain through a fine sieve. The extra creamy version: Use full-cream milk or stir in a dollop of yoghurt. Younger kids often prefer that richer texture, and the bonus is that yoghurt adds some extra protein and gut-friendly bacteria.The lightly sweet version: If the strawberries are super ripe and juicy, you can skip the extra sugar or honey altogether. It’s a great way to get them used to less sugar over time.The smoothie-style version: Toss in a banana or a couple of ice cubes and blend it until it’s nice and thick. Smoothies are a classic way to sneak in more fruit and milk. Curious if smoothies actually help picky eaters? Read this article to find out. The fruit-heavy version: If your child isn't a huge fan of ‘milky’ drinks, try using a few more berries and a little less milk for a stronger fruit punch.Tips for Serving Strawberry Milk to KidsSometimes, it’s not about the taste but the presentation. These small tweaks can make a massive difference in whether your kids are keen to give it a go:Serve it icy cold for the freshest flavour.Pull out a colourful cup or a fun reusable straw to make it feel like a treat.Keep the strawberry flavour mild so you don’t overwhelm their taste buds.Start with a small serving so they don't feel pressured to finish a giant glass.Pair it with a snack they already love to make the new drink feel more familiar.Let them choose their own cup or a fun topping; giving them a bit of choice usually makes them much more likely to accept it.Summing UpWe all want our kids to get the good stuff into them without the mealtime battles, and that’s why we love this strawberry milk kids recipe. It’s fresh, it’s creamy, and it’s completely ‘fussy-eater proof’ because you can customise it on the fly. By keeping things simple and pressure-free, you're helping them enjoy nutritious choices without even trying. So, grab a punnet of berries and a fun straw, and watch this one disappear!Stay informed with fresh tips, expert guidance, unique deals, and tailored support!Click HereMeet Dr Nick FullerMy StoryAs a father, I know first-hand that raising healthy and happy children is tricky. Children are fussy, particularly at the end of the day when they are shattered. We also live in a society where companies seek to profit from what we feed our kids; incorrect and damaging advice is pushed on us and marketed towards our children, and we have no time.But with these recipes and resources, you and your children can enjoy simple and well-founded food and lifestyle choices for lifelong health.
Our Favourite Healthy Chicken Wrap For Kids (That Actually Stays Rolled Up!)
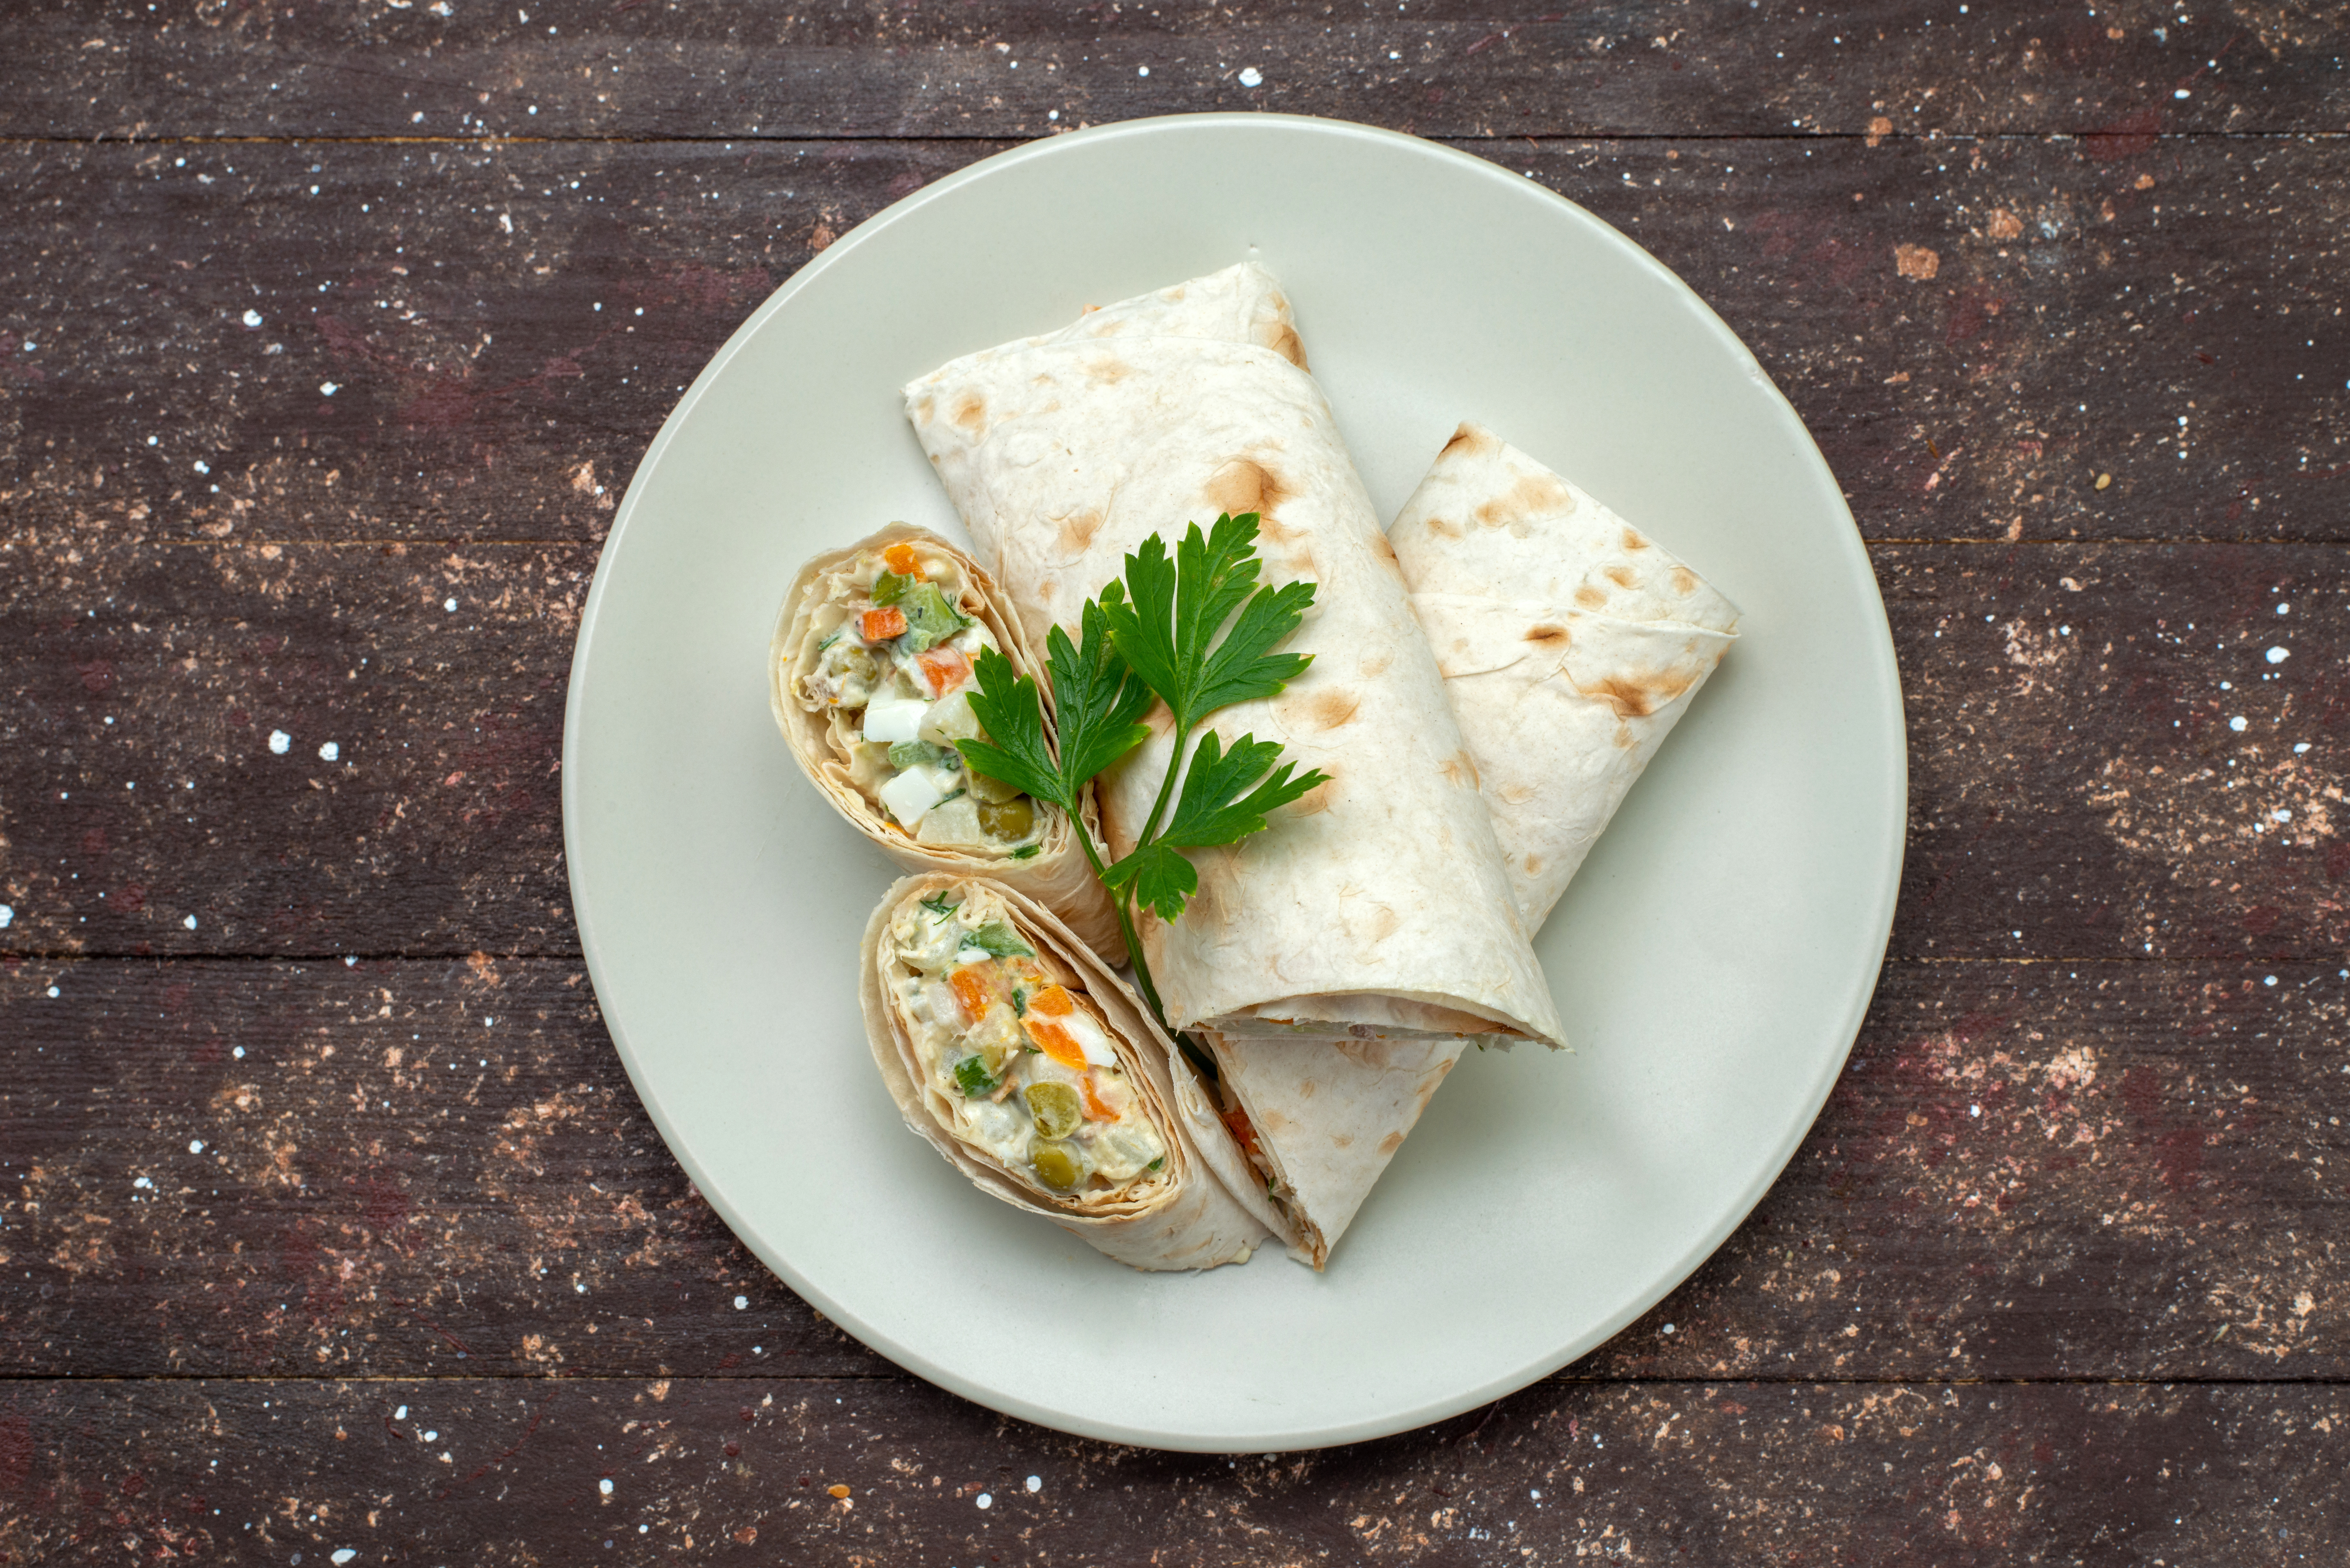
Want a chicken wrap for kids that won't come home in a soggy lunchbox? This recipe hits the spot: it’s quick to whip up and perfect for small hands. Since chicken is a ‘go-to’ for most families, wrapping it up makes lunch feel like a fun snack rather than a scary meal.Research shows that kids feel more confident trying new foods when they're served in familiar, handheld shapes. By sticking to simple fillings and mild flavours, you’re setting yourself up for a stress-free mealtime. Whether it's for school or a quick family dinner, this chicken wrap for kids is easy to tweak based on whatever your fussy eater is currently ‘allowing’on their plate. Read on to see how to make it nutritious and (actually) kid-approved.Turn Everyday Meals into Kid-Approved WinsSimple meals can still be super healthy; you just need the right approach. If you’re looking to add more variety and balance to the table without the usual mealtime battles, Dr. Nick Fuller’s Healthy Parents, Healthy Kids is a total game-changer. Learn about strategies that make family favourites easier to serve and, more importantly, actually fun for kids to eat.Ready to ditch the dinner-table stress? Grab your copy of Healthy Parents, Healthy Kids today and start making mealtimes a whole lot calmer and happier for everyone.Why Kids Love Chicken WrapsLet’s be honest, chicken wraps aren’t just a lifesaver for parents; kids absolutely reckon they’re a winner, too! There are a few really simple reasons why these handheld meals always seem to score big, whether they’re served up at the dinner table or tucked into a school lunchbox.1. Fun to hold and eatKids are naturally drawn to foods they can just pick up and munch on without having to fuss about with a knife and fork. A soft tortilla wrap feels a bit like a mini handheld ‘pocket’ of goodness, which helps make mealtime feel more like an easy snack and a lot less like a formal chore they have to sit through.2. Familiar flavoursChicken is easily one of the most commonly accepted proteins for little ones across Australia. Because it’s mild, tender, and really easy to chew, it’s always a safe bet, even for the most cautious eaters. If you pair it with a bit of cheese, some creamy avocado, or a light sauce, you’ve got a combo of flavours that kids genuinely enjoy.3. Easy to tweakEvery child is different, and the best thing about a chicken wrap is how easily it can be adapted on the fly. You can sneak in some finely grated veggies for a bit of extra nourishment, switch up the sauces, or even try out different wraps, from wholemeal to spinach or tomato, without your little one noticing too much of a difference.4. Balanced nutrition without the fussChicken wraps really do hit all the right notes when it comes to nutrition: you get protein from the chicken, fibre from the veggies or wholegrain wraps, and healthy fats from things like avocado or hummus. It’s such an easy way to pack a properly balanced meal into a fun, portable package that they’ll actually finish.What You’ll Need for Your Chicken Wrap for KidsThe trick is to keep things simple, fresh, and totally kid-friendly. Here’s what you’ll want to have on hand:Soft tortilla – go for wholemeal, spinach, or just plain, depending on what your kids usually prefer.Cooked chicken – it’s best shredded or sliced thinly so it’s easy to roll up tight.Mild cheese – grated or sliced; a simple cheddar or mozzarella usually works a treat.Lettuce or cucumber – slice these nice and thin to add a bit of fresh crunch.Yoghurt or light mayo – just a dollop to give it a nice creamy spread.Salt and pepper – just a tiny pinch to taste.These ingredients are super easy to swap out or add to, so you can easily tailor the wrap to suit your child’s specific taste buds.Want to know which yoghurt to buy? Check out our easy guide to yoghurt in the grocery store and find the best options for your kids’ lunchboxes and snacks.Easy Steps to the Perfect Chicken WrapFollow these simple steps to make a delicious chicken wrap your kids will actually eat.1. Warm the tortillaGently heat the tortilla in a pan or microwave for 10–15 seconds. A warm wrap is easier to roll and tastes better.2. Spread yoghurt or mayoSpread a thin layer of yoghurt or light mayo over the tortilla. This adds creaminess and helps everything stick together.3. Add chickenPlace your cooked chicken in the centre of the tortilla. Shredded chicken works best for little mouths.4. Add veggies and cheeseTop the chicken with a few slices of cucumber or shredded lettuce and a sprinkle of mild cheese. Keep it simple to appeal to picky eaters.5. Roll tightlyFold the sides of the tortilla inwards and roll it up snugly. A tight roll keeps the fillings in place and makes it easier for kids to hold.6. Slice if neededFor smaller hands, slice the wrap into bite-sized pieces. Perfect for lunchboxes or snack plates.Health Benefits of Chicken WrapA chicken wrap for kids isn't just a tasty lunch; it’s a properly balanced meal that packs a punch in the nutrition department:Lean protein: Chicken is a fantastic source of protein, which is essential for supporting growth and keeping those little muscles strong.Steady energy: The combination of protein and carbs provides that lasting energy kids need for a big day of school or play.Helpful fibre from veggies: Adding a bit of green supports healthy digestion and keeps tummies feeling happy.Better fullness: Because it’s a mix of protein, cheese, and veggies, it keeps kids feeling satisfied for longer, so they aren't asking for snacks ten minutes later!A simple, balanced meal: You’re ticking the boxes for protein, carbs, healthy fats, and fibre all in one easy-to-carry package.Easy to digest: Using mild ingredients makes this a gentle option for young stomachs.Tasty Twists on the Classic Chicken WrapOnce you’ve mastered the basic chicken wrap for kids, it’s so easy to get a bit creative. Most kids love a bit of variety, and making small changes to the fillings or sauces can turn a familiar recipe into a brand-new favourite. These variations keep things exciting while still being loaded with protein and flavour:Classic Chicken and Cheese: This is the ultimate comfort choice. Use shredded chicken with mild cheddar or mozzarella and a little dollop of mayo or ranch.Chicken Caesar: Try some sliced chicken with soft romaine lettuce, a tiny bit of Caesar dressing, and a sprinkle of Parmesan for a kid-friendly version of the classic salad.BBQ Chicken: Mix your shredded chicken with a bit of mild BBQ sauce and add some lettuce or a spoonful of coleslaw for a sweet, smoky vibe.Fresh Veggie and Chicken: Pack in the crunch with thin slices of cucumber, tomato, or carrot, using cream cheese, yoghurt, or hummus as your base spread.Crispy Chicken Wrap: If your kids love a bit of crunch, use baked or air-fried chicken pieces with some lettuce and a touch of ranch dressing.Chicken and Avocado: Mash some avocado onto the tortilla, add your chicken and cheese, and finish it off with a tiny squeeze of lemon to keep it bright and fresh.Hoping to make your chicken wraps even more colourful and veggie-packed? Try pairing them with our Innovative Salad Ideas for Kids That Make Veggies Fun.Wrapping UpThere’s no doubt about it—a chicken wrap for kids is one of those rare ‘unicorn’ meals that is actually healthy, super quick to pull together, and genuinely kid-approved. Whether you’re packing it for school or serving it up for a stress-free dinner, it’s a brilliant way to get a balanced meal into them without any of the usual dinner-table drama.Don’t be afraid to experiment with different fillings or let the kids help with the rolling. It’s all part of the fun! So, grab your tortillas and have a crack at it this week. You might just find your new go-to family favourite.Looking for more easy lunch ideas beyond the usual wraps? Check out our 6 Non-Sandwich Lunch Ideas For Picky Eaters — tasty, fuss-free options your kids will love.Stay informed with fresh tips, expert guidance, unique deals, and tailored support!Click HereMeet Dr Nick FullerMy StoryAs a father, I know first-hand that raising healthy and happy children is tricky. Children are fussy, particularly at the end of the day when they are shattered. We also live in a society where companies seek to profit from what we feed our kids; incorrect and damaging advice is pushed on us and marketed towards our children, and we have no time.But with these recipes and resources, you and your children can enjoy simple and well-founded food and lifestyle choices for lifelong health.

6 Quick Last-Minute Easter Treats Kids Will Enjoy
Easter usually means a whirlwind of chocolate eggs, bunny tails, and plenty of bright smiles. But let’s be real. All that sugar can quickly lead to kids literally bouncing off the walls. It’s not just a hunch, either; research on over 4,000 Aussie kids shows that more than 80% are already getting way more sugar than the WHO recommends. Most of that comes from those ‘sometimes’ foods like sugary snacks. That’s why we think planning some Easter treats kids will love, which are also a bit kinder on their tummies, is such a smart move.The best part? You don't need a sugar crash to have a good time. Studies actually show that when kids help out in the kitchen, they’re way more likely to try new things and have fun doing it. So, we’ve put together some playful ideas using simple, wholesome ingredients. They’re festive, delicious, and (mostly) better for growing bodies and big imaginations.Make Easter Treats Joyful Without the Sugar BattlesEaster should be about fun, not food stress. In Healthy Parents, Healthy Kids, Dr Nick Fuller shares practical ways to help parents navigate treats and celebrations while still supporting healthy habits. His approach focuses on balance, enjoyment and reducing mealtime tension, perfect for holidays like Easter.Make Easter food feel positive and pressure-free. Grab your copy of Healthy Parents, Healthy Kids today and enjoy the celebrations with confidence.6 Quick Easter Treat Recipes for KidsSince we already know most Aussie kids are getting plenty of sugar, we don't have to rely on a mountain of chocolate eggs to make the day feel special. The secret sauce? Keeping portions sensible, sticking to simple ingredients, and getting a little creative with how things look. Here are 6 quick Easter treat recipes for kids that are super easy to whip up. They’re big on festive vibes and designed to bring all the joy, without the major sugar overdrive.Hot Cross Bun Bliss BallsHot Cross Bun Bliss Balls are a fun Easter twist on a classic favourite, packed with the warm spices and fruity flavours kids love. These bite-sized treats are perfect for little hands and make an easy, festive snack for Easter celebrations without relying on chocolate.Type: Vegetarian, Vegan, Dairy Free, Contains Nuts, Snacks, Kid FriendlyMakes 15 bliss ballsPrep Time: 15 minutes (+3 hours refrigeration) Cooking Time: 0 minutes Ingredients1 ripe banana½ cup almond butter1 cup rolled oats1 tablespoon chia seeds¼ teaspoon Mixed spice½ teaspoon cinnamonZest of 1 orange2 tablespoons mixed dried fruit and peelRecipe1. Line a large baking tray with baking paper.2. Add the banana to a mixing bowl and use a fork to mash. Make sure the banana is nice and ripe, meaning it is soft enough to mash easily. Add in the almond butter and mix until smooth.3. Add the rolled oats, chia seeds, mixed spice, cinnamon, and orange zest. Mix well to combine.4. Stir in the mixed dried fruit. If the mixture feels too dry, you can add one tablespoon of water or orange juice. The mixture should be only slightly sticky. If it is too wet or sticky it will make it tricky to roll into balls.5. Leave the mixture to sit for 5-10 minutes to allow it to thicken slightly.6. Scoop a heaped tablespoon of the mixture and roll it into a ball. Place onto the lined baking tray. Repeat with the remaining mixture until you have approximately 15 bliss balls.7. Transfer the bliss balls to the fridge. Refrigerate for at least 3 hours until firm.8. Enjoy!Wholemeal Hot Cross BunsA healthier spin on a classic Easter favourite, these wholemeal hot cross buns are perfect for kids and the whole family. Soft, lightly spiced and delicious warm from the oven, they’re ideal served plain or with a protein-rich spread as a festive Easter snack.Type: Vegetarian, Kid Friendly, SnacksMakes 12 bunsPrep Time: 20 minutes (+2 hours proving time)Cooking Time: 25 minutes Ingredients1 ½ cups milk2 tablespoons honey2 ½ teaspoons dried yeast3 ½ cups wholemeal self-raising flour2 teaspoons cinnamon½ teaspoon ground cloves½ teaspoon nutmeg1/3 cup rolled oats½ cup mixed dried fruit and peelFor the crosses: (optional)½ cup wholemeal self-raising flour¼ cup waterRecipe1. Add the milk and honey to a small saucepan and heat over medium heat for 5 minutes until warm. The milk should feel the same as body temperature if you measure it by dipping a finger into the milk. Remove from the heat. 2. Add the yeast to the milk and stir. Allow to sit for 5-10 minutes until frothy. If the yeast doesn't froth, it is a sign that it is not active, and it would be best to start again with new dried yeast. 3. Into a large mixing bowl add the wholemeal flour, cinnamon, ground cloves, nutmeg, rolled oats, and dried fruit. Stir together with a wooden spoon. 4. Make a well in the centre and pour in the yeast and milk mixture. Stir well until all ingredients are combined. Flour your hands and knead lightly to form one large dough ball. 5. Leave the dough in the large mixing bowl and cover with a clean tea towel. Place into a warm area of the kitchen to prove for 1 hour. 6. After 1 hour the dough should have doubled in size. Lightly flour your bench, then turn the dough out onto the bench. Knead gently for a couple of minutes until smooth. 7. Line a baking tray with baking paper. 8. Cut the dough into 12 pieces of roughly equal amounts. Roll each piece into a ball, and place onto the lined baking tray, leaving a little space between each ball. The tray should horizontally fit 3 rows of 4 dough balls. 9. Cover the tray with the tea towel and set aside for a further 50 minutes to prove. If it is a cool day the dough may take slightly longer to prove. 10. Preheat the oven to 180°C. 11. To make the cross mixture (optional), combine the flour and water in a small bowl. Mix until smooth. Use a teaspoon to gently draw a thick cross onto each bun. 12. Place into the oven and bake for 20-25 minutes until crisp and golden brown on the outside. 13. Remove from the oven and serve whilst still warm. Enjoy!Festive Stuffed StrawberriesA bright and colourful addition to your Easter treats for kids, these stuffed strawberries are fun, fresh and perfect for a healthy dessert platter. Decorated with green pistachios and red cranberries, they look extra festive and are best prepared just before serving for maximum freshness.Type: Vegetarian, Gluten Free, Contains Nuts, Snacks, Kid FriendlyMakes 10 strawberriesPrep Time: 10 minutesCooking Time: 0 minutes Ingredients10 medium to large strawberries10 heaped teaspoons cottage cheese¼ cup pistachios, roasted1 tablespoon dried cranberriesRecipe1. Use a small sharp knife to slice off the top of the strawberry, and to carefully remove the core of the strawberry. 2. Use a small spoon to fill each strawberry with one heaped teaspoon of cottage cheese. 3. Chop the pistachios and dried cranberries into small pieces. 4. Sprinkle the stuffed strawberries with the pistachios and cranberries, ensuring that they stick to the cottage cheese. 5. Arrange the stuffed strawberries on a festive serving platter. Serve immediately and enjoy!Chocolate MousseA creamy, chocolatey dessert that feels like a treat but comes with a surprise twist. Made with a secret ingredient you wouldn’t expect, this smooth chocolate mousse is perfect for Easter desserts and can be made vegan with a few simple swaps.Type: Vegetarian, Gluten FreeServes 6Prep Time: 10 minutesCooking Time: 0 minutes (+overnight refrigeration) Ingredients130g 85% dark chocolate300g silken tofu1 teaspoon vanilla essence2 tablespoons maple syrup 6 tablespoons plain yoghurt, to serve (optional)Fresh fruit, to serve Recipe1. Break the chocolate into squares and microwave in 30 second bursts, stirring in between, until melted. 2. Pour the chocolate into the bowl of an electric stand mixer fitted with a whisk attachment. Alternatively, you could use a blender or electronic handheld whisk. 3. Add the silken tofu into the bowl of the mixer, along with the vanilla essence and maple syrup.4. Start the mixer at a slow speed. Once the ingredients are combined, increase the speed to medium-high. 5. Continue to mix for at least 10-15 minutes until smooth. Scrape the bowl at regular intervals and continue to mix. 6. Transfer the mousse mixture into 6 small glasses or ramekins. Cover and refrigerate for at least 4 hours, but ideally overnight. 7. Before serving, top each mousse cup with a spoonful of yoghurt (optional) and fresh fruit. 8. Serve immediately and enjoy! Mango Chia PuddingsA bright and refreshing option to add to your Easter treats for kids, this layered mango chia pudding is naturally sweet and perfect for make-ahead mornings. Stored in jars in the fridge, it’s an easy grab-and-go choice for busy Easter days.Type: Vegetarian, Gluten Free, Kid FriendlyServes 4Prep Time: 10 minutes (+ 3 hours refrigeration) Cooking Time: 0 minutes Ingredients½ cup chia seeds1 ¼ cups milk1 tablespoon honey2 cups Greek yoghurt2 cups frozen mango, chopped1 cup waterChopped fruit or nuts/seeds to top the chia puddings (optional)Recipe1. Add the chia seeds, milk, and honey to a mixing bowl. Stir well to combine, then place into the fridge for at least 3 hours until thickened. The chia seeds should soak up the liquid and create a pudding-like consistency. 2. Meanwhile, add the Greek yoghurt, frozen mango, and water to a blender. Blend well to combine. Place into the fridge until required. 3. Once the chia pudding has set, remove it from the fridge along with the blended mango mixture. Layer the chia pudding and mango mixture between 4 small jars. 4. Store jars in the fridge until ready to serve. Top each jar with fresh fruit or nuts/seeds if desired. 5. Serve and enjoy!Lemon and Blueberry Cheesecake Overnight OatsA delicious flavour combination reminiscent of a decadent baked cheesecake. You can easily increase the quantities of this recipe if you want to prepare your breakfast for the week in advance. If you have some extra time, swap the blueberries out for 1 cup frozen berries; heat gently over the stove and stir to make a warm berry coulis to serve over your oats. Type: Vegetarian, BreakfastServes 2Prep Time: 5 minutes (+overnight refrigeration) Cooking Time: 0 minutesIngredients1 cup rolled oats1 cup milk¾ cup reduced fat cottage cheeseZest of 1 lemonBlueberries, to serveRecipe1. Combine the oats, milk, cottage cheese and lemon zest in a medium bowl. 2. Stir everything together until well combined. 3. Divide the mixture between 2 serving bowls, or containers if taking on the go. 4. Place into the fridge overnight. Top with blueberries before serving and enjoy!Final ThoughtsAt the end of the day, Easter treats don’t have to mean a house full of sugar-crashing kids. These recipes prove that you can still have all the festive flavours and bright colours without the massive sugar high. Whether you're putting together a big platter, spending time baking with the littles, or just prepping the fridge for the long weekend, these Easter treats kids (and parents!) will actually enjoy are a total win for the whole family.Looking for more Easter treats that go beyond chocolate overload? These Simple Snacks For Picky Eaters are perfect for balancing fun treats with easy, kid-approved options.Stay informed with fresh tips, expert guidance, unique deals, and tailored support!Click HereMeet Dr Nick FullerMy StoryAs a father, I know first-hand that raising healthy and happy children is tricky. Children are fussy, particularly at the end of the day when they are shattered. We also live in a society where companies seek to profit from what we feed our kids; incorrect and damaging advice is pushed on us and marketed towards our children, and we have no time.But with these recipes and resources, you and your children can enjoy simple and well-founded food and lifestyle choices for lifelong health.
How to Make Sausage Mummies For Kids: A Spooky Snack Adventure
If you are looking for a snack that’s fun, tasty and a little bit spooky? Sausage mummies are the perfect treat for kids, especially around Halloween, but honestly, any day can be a fun ‘mummy day’ in your kitchen. They’re easy to make, delicious, and can even sneak in some nutrition if you pair them with veggies or fruit. Plus, studies show that involving kids in food prep can encourage them to try new foods, develop motor skills, and build excitement around healthy eating. Read on for a simple recipe and clever serving ideas to make these spooky sausages a hit.Healthy Fun for Halloween and BeyondEven festive treats can be nutritious with a little creativity. Dr Nick Fuller’s Healthy Parents, Healthy Kids is packed with strategies for making meals both fun and healthy. His tips help children enjoy their food and develop positive eating habits without stress.Grab your copy of Healthy Parents, Healthy Kids today and make special occasions tasty, fun, and nourishing for the whole family.Easy Sausage Mummies for Kids RecipeFun, spooky and perfect for little hands, these sausage mummies are a Halloween (or any day) treat kids love. Crispy pastry wrapped around juicy sausages, served with a side of dip for extra fun.Type: High proteinServes: 4 kidsPrep Time: 10 minutesCook Time: 15 minutesIngredients8 small sausages1 sheet puff pastry, thawed1 egg, beaten (for egg wash)Ketchup or mustard for dippingRecipePreheat the oven to 200 °C and line a baking tray with baking paper.Cut puff pastry into thin strips, about 1–2 cm wide.Wrap each sausage with the pastry strips, leaving a small gap for the ‘face.’Brush lightly with beaten egg for a golden finish.Bake for 12–15 minutes until the pastry is golden and cooked through.Serve warm with ketchup or mustard for dipping.Kid-Friendly Ways to Serve Sausage MummiesSausage mummies aren’t just cute; they’re surprisingly versatile! With a few simple tweaks, you can turn them into exciting, balanced meals that kids actually want to eat. Here are some serving ideas:Serve with ketchup or mustard dipKids love anything they can dip. A little ketchup or mustard makes each ‘wrapped’ bite more fun and encourages slower, more mindful eating, which can help with mealtime focus and portion control.Add veggie sticks on the sideCarrot, cucumber, or capsicum sticks add colour, crunch, and extra nutrients. Fibre helps kids feel fuller for longer, while vitamins A and C support immunity and growth. Research shows that repeated exposure, like seeing veggies in fun presentations, can improve intake among young children.Pair with mashed potatoes or friesSausage mummies go brilliantly with creamy mashed potatoes or oven-baked fries, providing a comforting and familiar combo. Choosing oven-baked fries instead of deep-fried adds fibre and reduces unhealthy fats, making the meal more balanced. According to research, pairing protein with complex carbohydrates can help maintain steady energy levels in children.Pack in lunchboxes for a fun surpriseA couple of sausage mummies in a lunchbox can make midday meals more exciting. The novelty boosts appetite, and evidence shows visually appealing food can increase children’s willingness to try new foods.Arrange on a halloween party platterCreating a themed platter with multiple sausage mummies, dips, and veggies makes parties more engaging and fun. A visually appealing spread encourages kids to try a variety of foods, including vegetables and protein sources. Playful food presentation can also increase the consumption of nutrient-dense foods in children.Serve with cheese or yoghurt dipCreamy dips like cheese or yoghurt add flavour and protein. Protein supports muscle growth and satiety, while calcium-rich dairy helps build strong bones. Research suggests that less energy-dense, high-protein foods like yoghurt can improve appetite control, delay the onset of hunger, and reduce short-term food intake, meaning kids feel satisfied without overeating.Add fruit skewers for a balanced plateFruit skewers with strawberries, grapes, or melon cubes bring natural sweetness and vibrant colours to the plate. Pairing fruit with sausage mummies balances indulgence with nutrition, ensuring children receive fibre, antioxidants, and essential vitamins.Use as a snack during movie nightsSausage mummies make an easy, kid-friendly finger food for movie nights. They are less messy than popcorn and provide a mix of protein and carbohydrates, keeping children satisfied without relying on highly processed snacks.Pair with mini sandwiches for a themed mealCombining sausage mummies with mini sandwiches creates a themed meal spread that excites kids. You can sneak in extra veggies or protein through the sandwiches, making the meal both fun and nutritionally balanced. Studies show that offering a variety of foods together increases the likelihood of children consuming a broader range of nutrients.Serve warm with a small saladA simple leafy salad on the side adds freshness, fibre, and micronutrients to the meal. Serving warm sausage mummies alongside a light salad helps balance indulgence with vegetables, supporting a more complete diet. Wrapping UpSausage mummies are a playful, tasty, and adaptable snack that kids love. Whether they’re tucked into lunchboxes, served at parties, or enjoyed during movie nights, they’re quick to prepare and easy to personalise. With the right sides (dips, veggies, fruit, or light salads), you’re serving up both fun and balanced nutrition.Need more fun, kid-friendly snack ideas? Try our Simple Snacks For Picky Eaters for quick, tasty options.Stay informed with fresh tips, expert guidance, unique deals, and tailored support!Click HereMeet Dr Nick FullerMy StoryAs a father, I know first-hand that raising healthy and happy children is tricky. Children are fussy, particularly at the end of the day when they are shattered. We also live in a society where companies seek to profit from what we feed our kids; incorrect and damaging advice is pushed on us and marketed towards our children, and we have no time.But with these recipes and resources, you and your children can enjoy simple and well-founded food and lifestyle choices for lifelong health.