Article

Easy Sausage Spaghetti For Kids They Won’t Resist
Sausage spaghetti is a quick, kid-friendly meal that combines tender spaghetti noodles with savoury sausages in a simple sauce. It’s the perfect mix of protein, carbs and flavour that most kids love, making it a lifesaver for busy evenings. Protein is essential for growth and overall energy in children. Including protein-rich foods like sausages in a balanced meal can help kids stay fuller longer and maintain energy for school or play. If you’re after a meal that pleases picky eaters while sneaking in some nutrition, sausage spaghetti is your answer. Make Mealtime Fun and Stress-Free – Grab Your Copy TodayGetting kids excited about balanced meals doesn’t have to be hard. In Healthy Parents, Healthy Kids, Dr Nick Fuller shares easy strategies for preparing meals like sausage spaghetti that kids love while still being nutritious.Grab your copy of Healthy Parents, Healthy Kids today and make mealtime an enjoyable, stress-free family moment.Why Add Sausage to Spaghetti?Adding sausage to spaghetti isn’t just about taste. Though let’s be honest, that’s a big part of it. Sausages can boost the nutritional profile, make the dish more filling, and help your little ones enjoy a meal without endless coaxing. Here’s why it works so well:Adds extra proteinSausages offer a good amount of protein, which growing kids need. Protein helps build muscle, keeps energy levels steadier, and helps kids stay full longer. Mixing sausage into spaghetti is an easy way to add more protein without complicating the meal.Boosts flavour naturallySausages come packed with seasoning kids already love. This makes spaghetti more appealing without piling on extra sauce or salt. Research also shows that familiar, comforting flavours help kids eat more willingly, which is always a win at mealtimes.Makes the dish more fillingProtein-rich foods like sausages are digested more slowly and help trigger the body’s natural fullness signals. Higher protein intake boosts satiety hormones, which may help kids feel satisfied for longer and reduce mid-afternoon snacking on less nutritious foods.Reduces the need for added saucesAs sausages cook, they release flavour that elevates the whole dish. That means you can use less heavy tomato or cream sauces, which often contain added sugar and sodium. Keeping these lower in early childhood can help shape healthier long-term taste preferences.Easy to mix with vegetablesSausage spaghetti is a sneaky but effective way to add veggies. The savoury flavour blends well with carrots, zucchini, capsicum, or spinach, making them easier for picky eaters to accept. Research shows that pairing vegetables with familiar foods helps kids eat more of them.Works well with different pasta typesSausages are versatile and pair well with spaghetti, penne, fusilli, or other pasta shapes. This flexibility allows you to switch up meals to keep dinner interesting while using whatever pasta is on hand. Offering a variety of food textures and shapes may also encourage children to eat more consistently and explore different foods.Loved by kids for its familiar tasteKids often love sausages because they’re familiar and comforting. Mix them with pasta and you’ve got a classic combo that’s easy for picky eaters to enjoy. Recognisable foods can also help kids feel more confident trying small extras like veggies.Quick to prepare for busy eveningsSausage spaghetti is a lifesaver on busy nights. With only a few ingredients and under 30 minutes of cooking, you can serve a nutritious and satisfying meal. Quick, balanced meals have been linked to better parental wellbeing and better overall family nutrition, making weeknight dinners less of a battle.How to Make Sausage SpaghettiA kid-friendly twist on classic spaghetti, this recipe combines tender pasta with juicy sausages and a mild, flavourful tomato sauce. Quick to make, packed with protein, and perfect for busy weeknights.Type: High proteinServes: 2–3 kidsPrep Time: 5 minutesCook Time: 15 minutesIngredients200 g spaghetti2–3 small sausages (pork, chicken, or beef), sliced or crumbled1 cup tomato passata or pasta sauce1 tsp olive oil½ small onion, finely chopped½ small carrot, grated (optional)1 tsp dried oregano or Italian seasoningSalt and pepper to taste (optional)Grated cheese to serve (optional)RecipeCook spaghetti according to packet instructions. Drain and set aside, reserving a little pasta water.Heat olive oil in a pan over medium heat. Add the onion and cook until softened.Add the sausages and cook until browned and cooked through.Stir in the tomato passata, grated carrot and oregano. Simmer for 5 minutes, adding a splash of pasta water if needed to loosen the sauce.Toss the cooked spaghetti into the sauce until well coated.Serve warm, topped with grated cheese if desired.Kid-Friendly Ways to Serve Sausage SpaghettiYou can make sausage spaghetti even more fun and versatile with these serving ideas:With garlic bread or toastA slice of garlic bread or buttery toast adds crunch and makes the meal feel special. Kids love dipping bread into sauce, which encourages them to finish their veggies in the spaghetti.With steamed vegetablesServe alongside lightly steamed broccoli, carrots or peas. This adds colour, nutrients and keeps the meal balanced.In lunchboxes for next daySausage spaghetti can be enjoyed cold or reheated for lunchboxes. Kids get a filling, protein-rich lunch that’s easy to pack and tastes great even after a few hours.As mini portions for partiesSpoon spaghetti into mini cups or small bowls for kid-friendly party snacks. The familiar flavours and portion sizes make it easy for children to serve themselves.With a sprinkle of parmesan cheeseA light sprinkle of parmesan cheese adds flavour and calcium. It’s a simple way to enhance the dish without overwhelming young taste buds.Final ThoughtsSausage spaghetti is a delicious, nutritious, and quick meal that kids love. With protein-packed sausages, tasty pasta, and the option to sneak in vegetables, it’s a win for both parents and children. Easy to prepare, adaptable and satisfying, this dish is perfect for busy weeknights, lunchboxes, or parties. Give it a try, and watch spaghetti night become the new family favourite.Looking for more easy, fuss-free meals kids will enjoy? Check out our 7 Simple and Delicious Rice Dishes For Picky Eaters.Stay informed with fresh tips, expert guidance, unique deals, and tailored support!Click HereMeet Dr Nick FullerMy StoryAs a father, I know first-hand that raising healthy and happy children is tricky. Children are fussy, particularly at the end of the day when they are shattered. We also live in a society where companies seek to profit from what we feed our kids; incorrect and damaging advice is pushed on us and marketed towards our children, and we have no time.But with these recipes and resources, you and your children can enjoy simple and well-founded food and lifestyle choices for lifelong health.
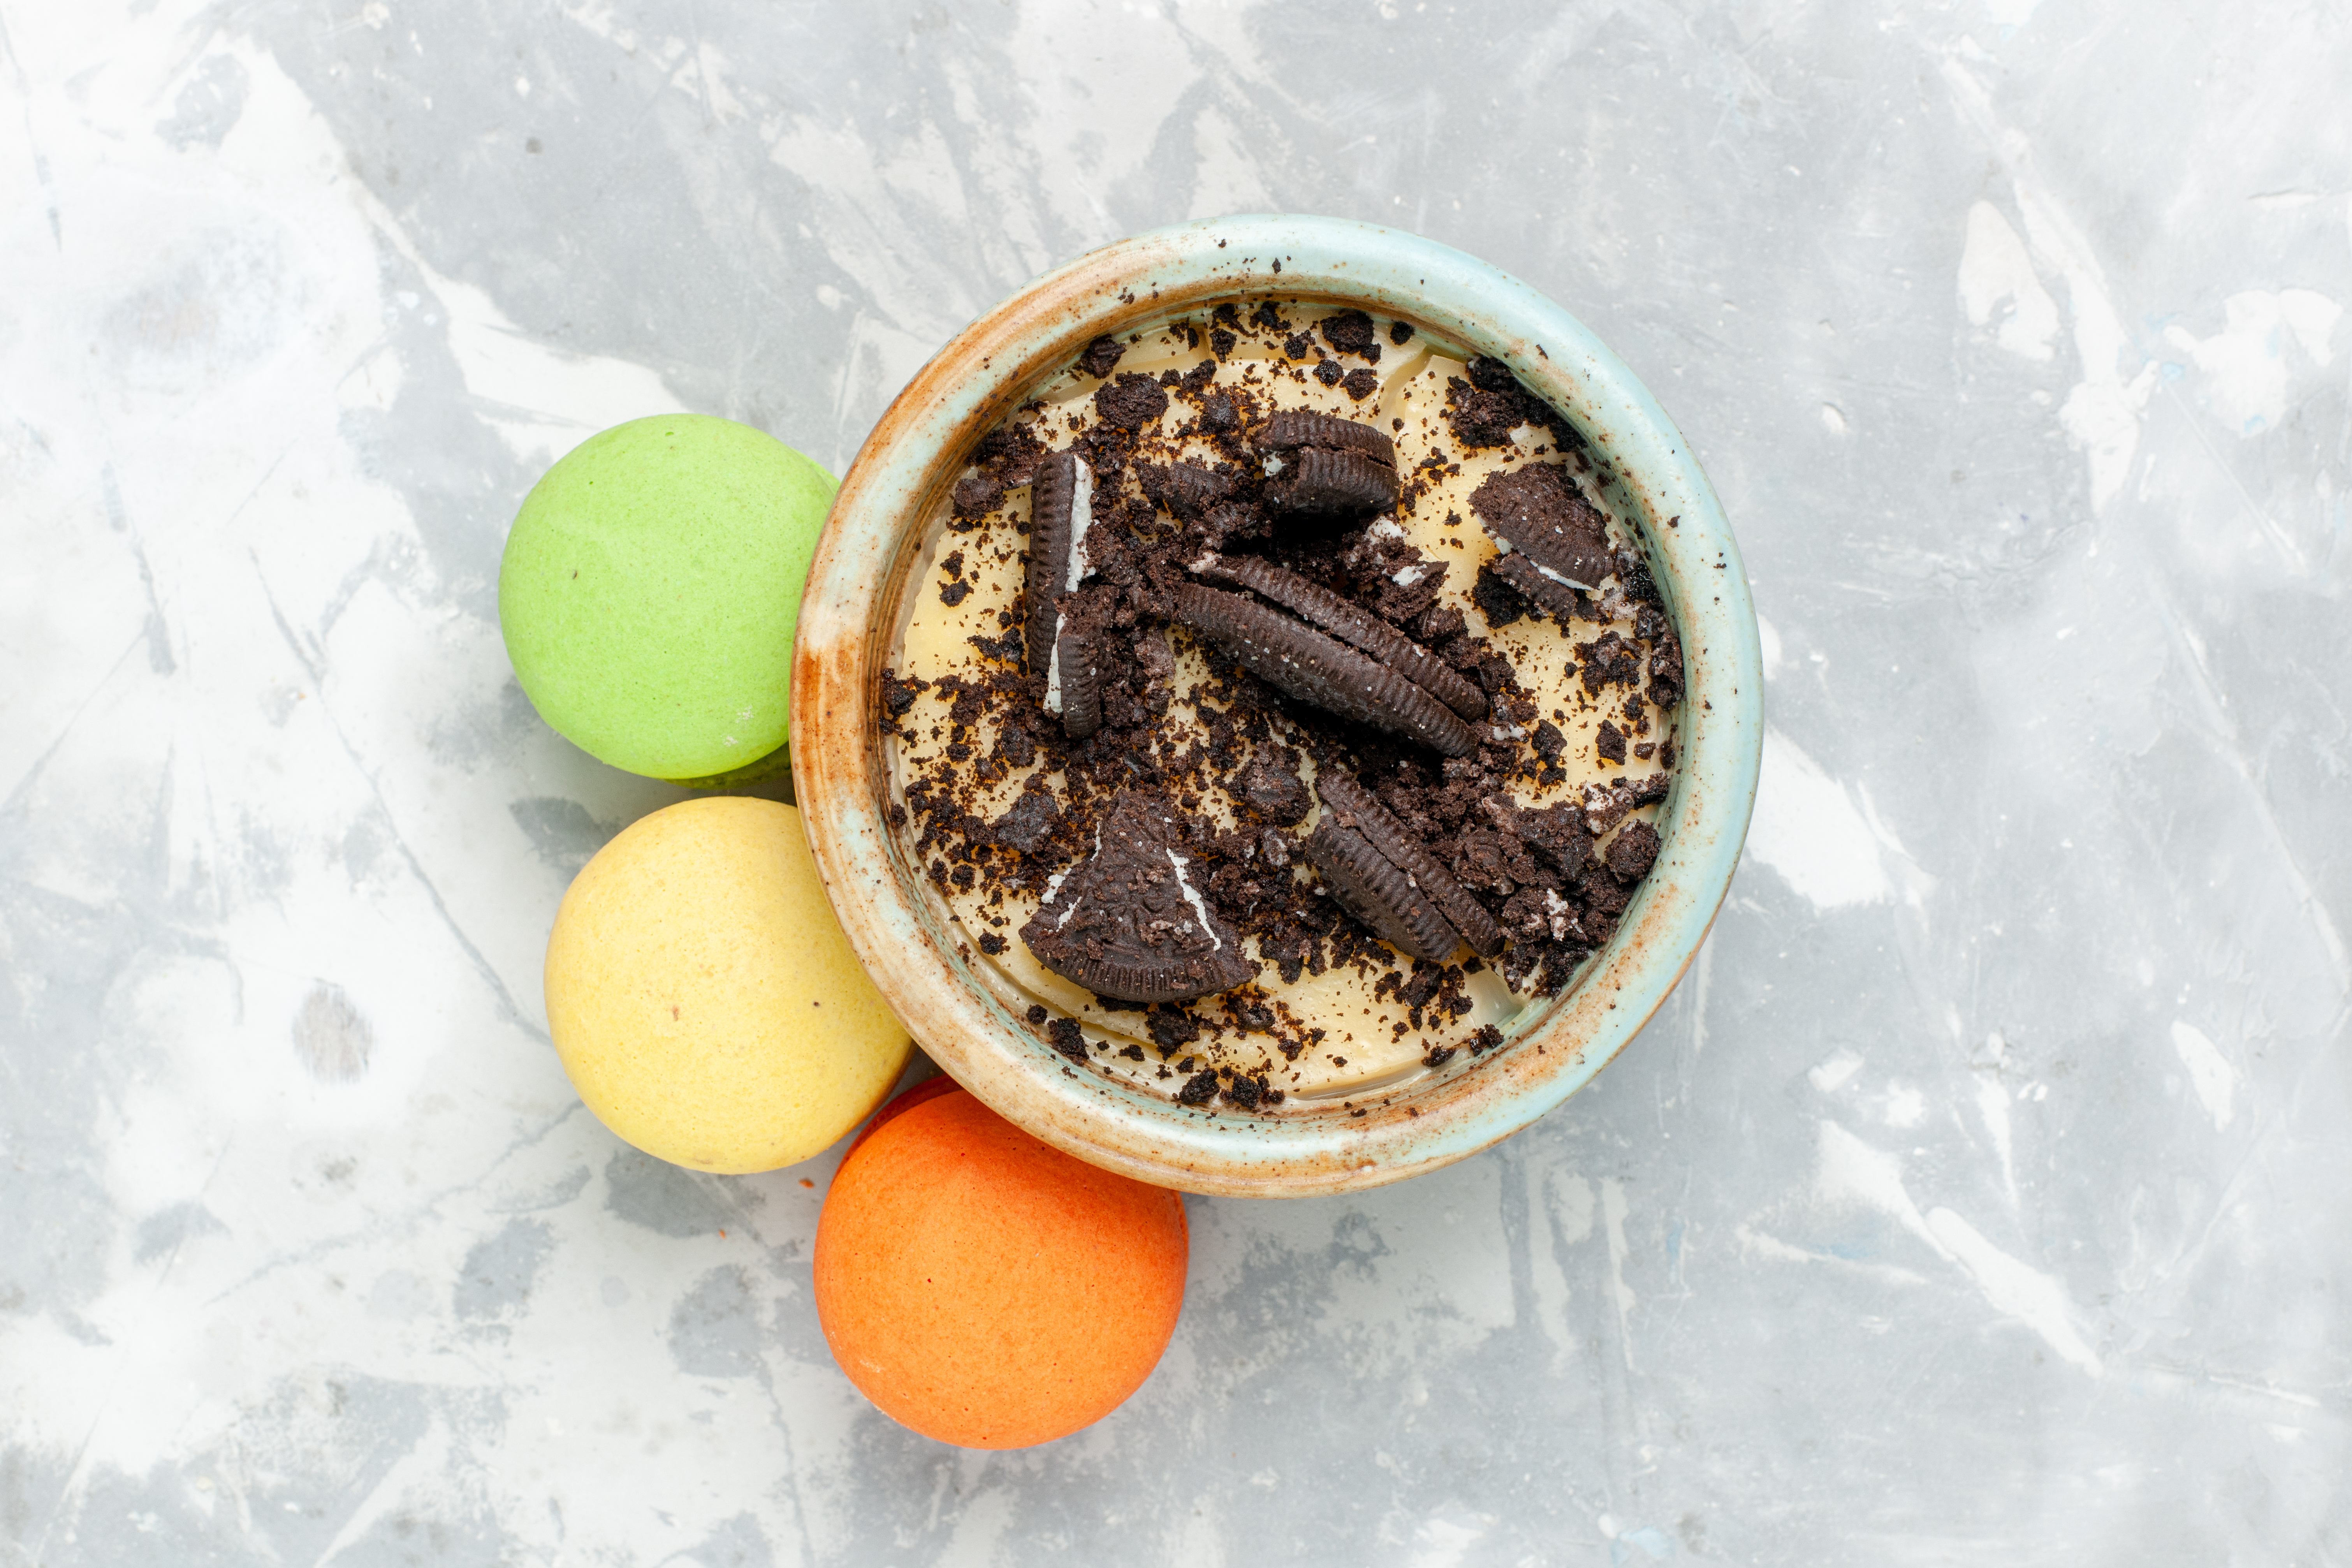
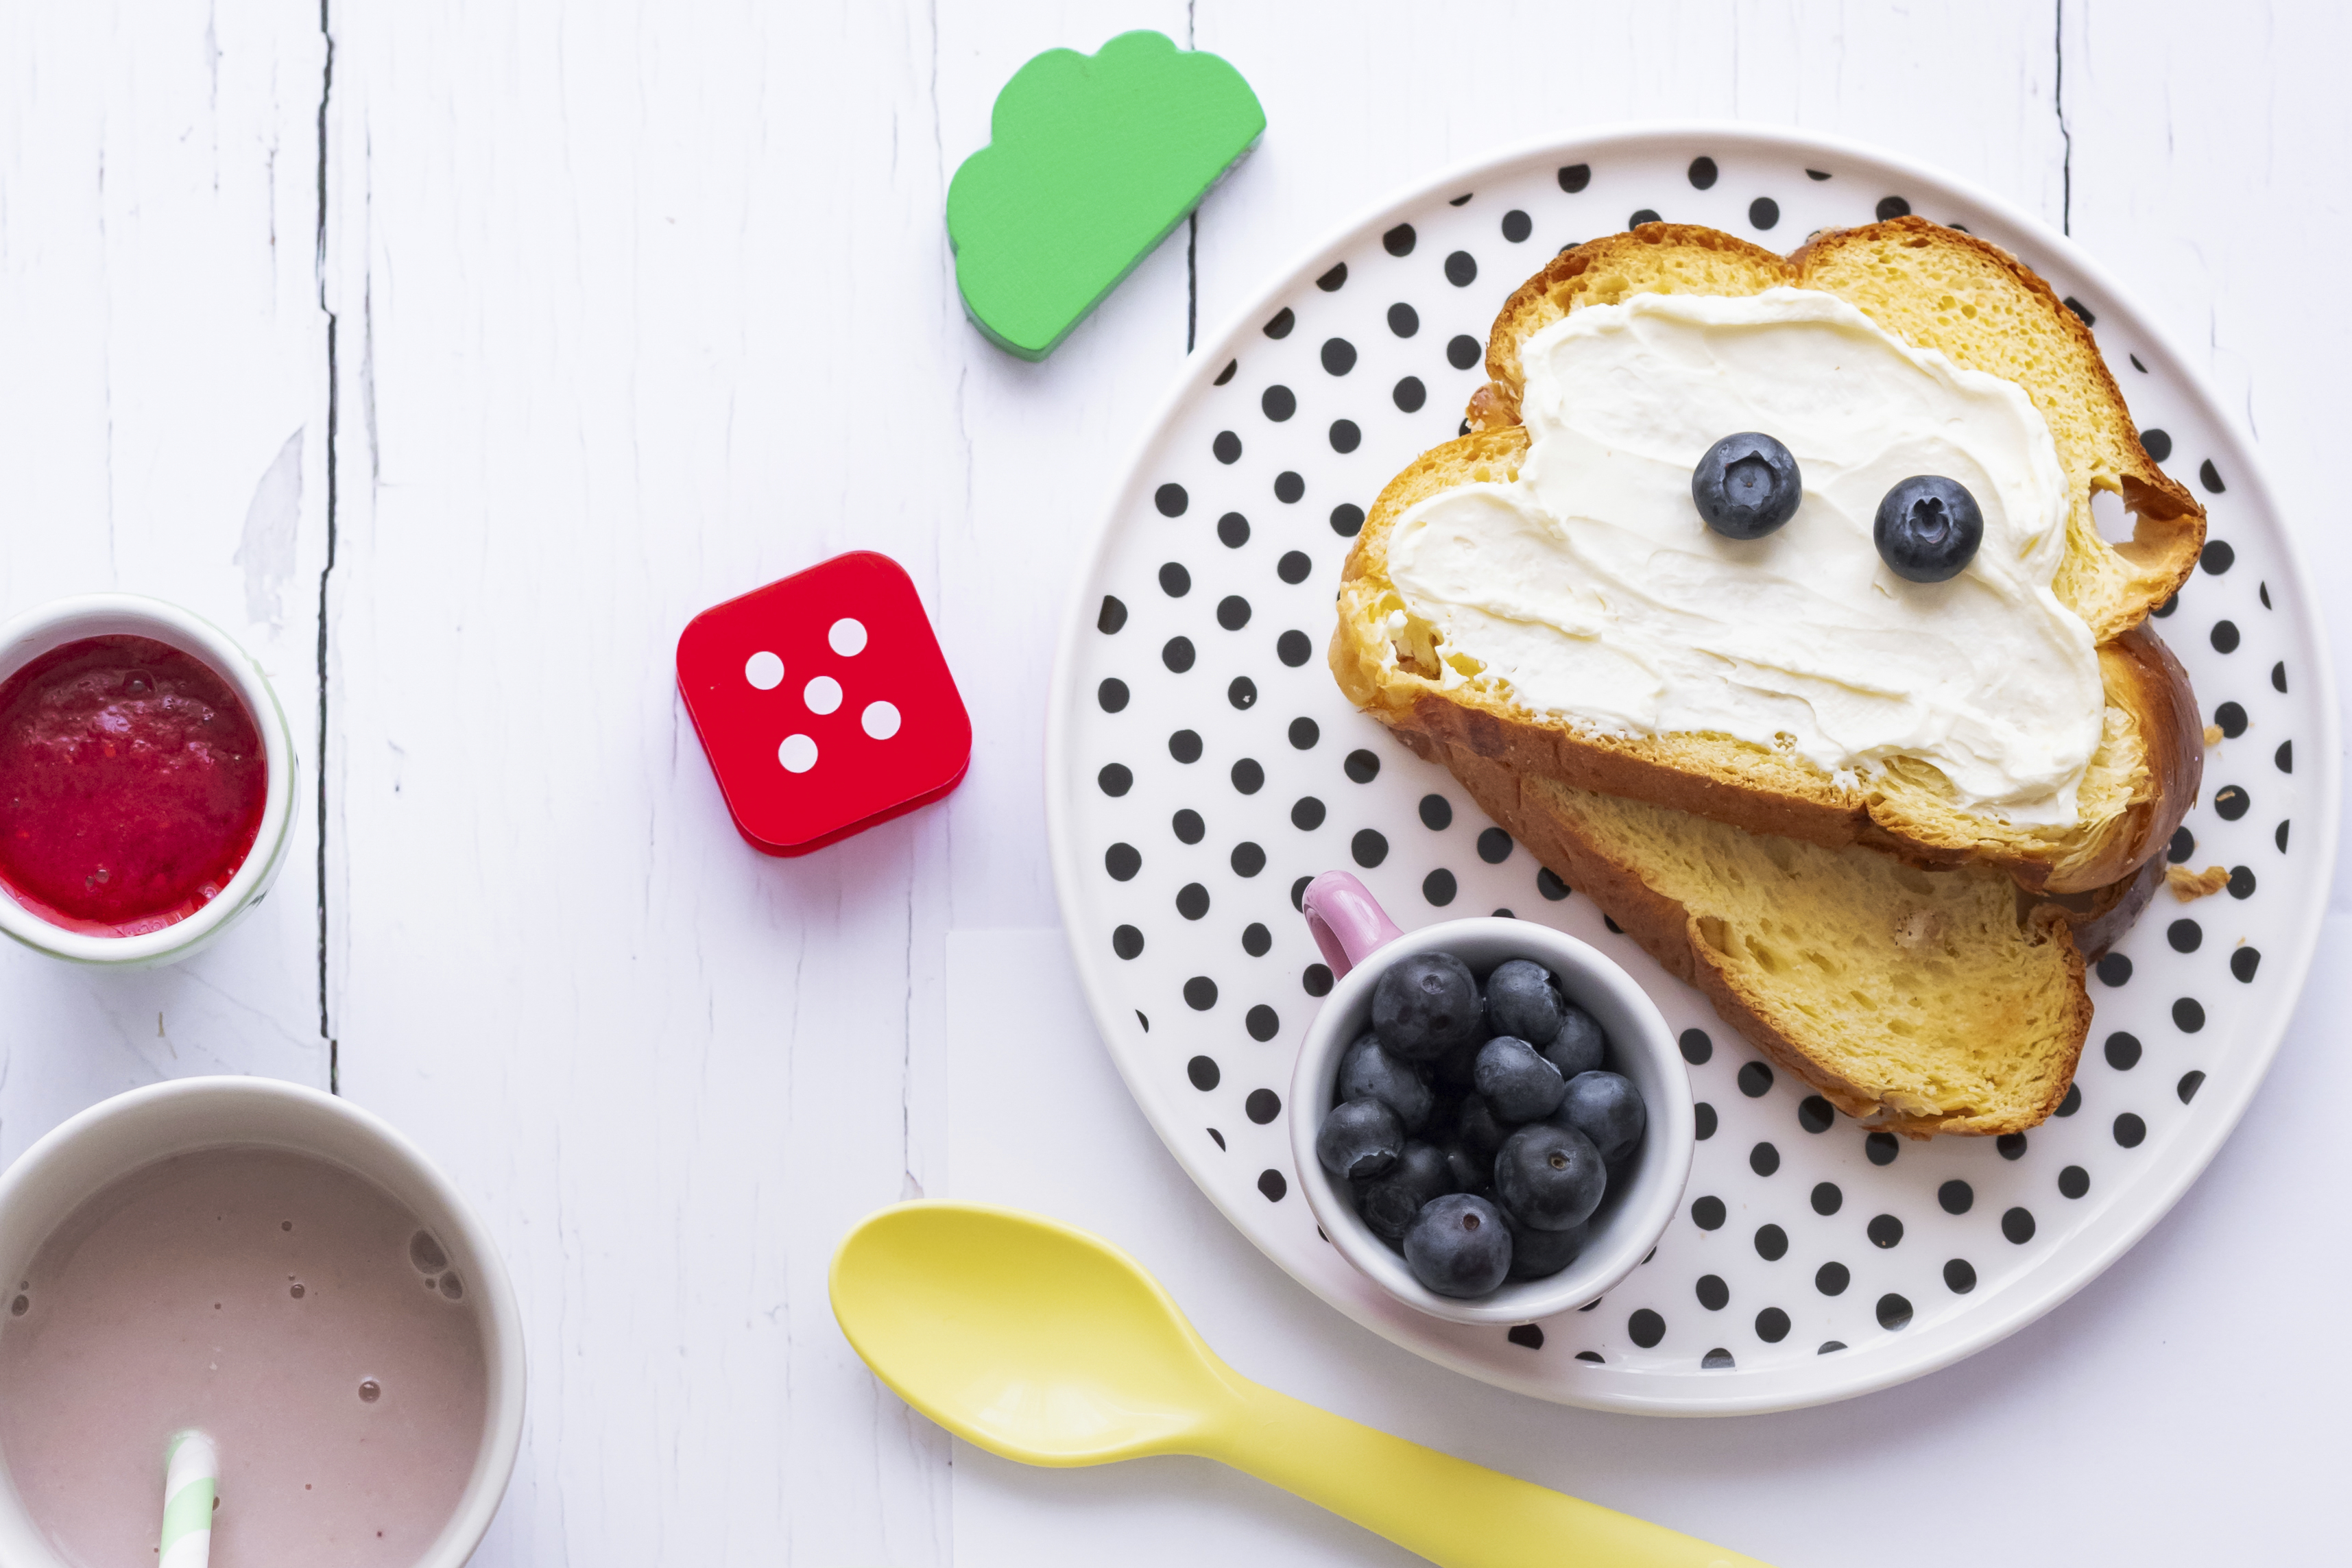
Start the Day With This Delicious Chocolate Porridge For Kids
If you’ve ever wished breakfasts came with fewer battles and more smiles, chocolate porridge might just be your new best friend. Yes, it’s chocolate for brekkie… but stay with me. When made with oats, milk and a sensible amount of cocoa, chocolate porridge can be a surprisingly nutritious, kid-friendly option. Oats may support better digestion, improve satiety and provide long-lasting energy for children, thanks to their high fibre content (especially beta-glucans), which help keep blood sugar steadier through the morning. A study found that kids (11-13 years old), who eat whole-grain breakfasts may have better concentration at school compared with those who skip breakfast.So if you want a meal that feels like a treat but fuels like a champion, this recipe ticks every box. Turn Breakfast Into a Family Wellness HabitStart every morning with meals that are both kid-approved and nourishing. Healthy Parents, Healthy Kids shows you how to create simple, balanced breakfasts that make mornings fun, stress-free, and full of energy for the whole family.Grab your copy of Healthy Parents, Healthy Kids today and make healthy, happy mornings a reality for your family.Why Make Chocolate Porridge?Chocolate porridge is a simple way to give kids a nutritious start to the day. Oats are rich in fibre, slow-release carbs and essential minerals like iron, magnesium and zinc. A review on oat composition notes that oats also contain high-quality protein, unsaturated fats and unique antioxidants, along with β-glucan, a soluble fibre linked to healthy cholesterol and blood-sugar control. In short, oats offer far more than most cereals on a nutritional level.Add cocoa powder and you bring in even more antioxidants. Pair it with milk or a fortified dairy alternative and you get a boost of calcium, which is crucial for growing bones.In addition, research suggests that familiar tastes, like chocolate, may help picky eaters feel more comfortable trying foods they usually reject. Serving a well-loved chocolate flavour on a wholesome oat base can make breakfast easier, gentler and more enjoyable for selective eaters.How to Make Chocolate PorridgeMaking chocolate porridge is ridiculously easy and perfect for busy school mornings. Here’s a simple method:1. Heat the oats and milkCombine rolled oats and your choice of milk in a saucepan. Simmer on medium heat, stirring occasionally.2. Add cocoa powder and sweetenerMix in unsweetened cocoa powder. Add a small drizzle of honey or maple syrup if your kid prefers a sweeter flavour.3. Stir until creamyLet it thicken until you reach a velvety, pudding-like texture.4. Adjust and serveTaste, adjust sweetness and finish with your favourite toppings.Easy Topping Ideas for Chocolate PorridgeA fun bowl topping can make breakfast feel more like dessert, minus the sugar rush. These additions add texture, colour and nutrients to your child’s morning bowl.Sliced bananas and strawberriesBananas add natural sweetness while strawberries bring a fresh, juicy contrast. Both fruits are rich in vitamin C and potassium, helping support immunity and energy.Drizzle of honey or peanut butterHoney adds a gentle sweetness, while peanut butter gives a creamy, protein-rich boost. Peanut butter also contains healthy fats which help kids stay fuller for longer.Sprinkle of chia seeds or crushed nutsChia seeds offer omega-3s and fibre, while nuts contribute healthy fats and crunch. They’re great for texture and nutrition all in one sprinkle.Mini chocolate chips for a treatA few mini chips on top go a long way—kids feel like they’re having dessert, but you’re still in control of the sugar levels. It’s the perfect compromise.Fresh berries and yoghurt swirlBerries add antioxidants and colour, while a swirl of yoghurt brings creaminess and gut-friendly probiotics. It also balances the chocolate flavour beautifully.Make breakfast both nutritious and delicious! Try our Breakfast For Fussy Eaters: Recipes That Actually Work for simple, kid-friendly ideas.The Bottom LineChocolate porridge proves you don’t have to choose between nutritious and delicious. With wholesome oats, antioxidant-rich cocoa and kid-approved toppings, it’s a breakfast that fuels the day without the fuss. Try different toppings, adjust the sweetness and make it your own. You might even find yourself sneaking a spoonful too.Stay informed with fresh tips, expert guidance, unique deals, and tailored support!Click HereMeet Dr Nick FullerMy StoryAs a father, I know first-hand that raising healthy and happy children is tricky. Children are fussy, particularly at the end of the day when they are shattered. We also live in a society where companies seek to profit from what we feed our kids; incorrect and damaging advice is pushed on us and marketed towards our children, and we have no time.But with these recipes and resources, you and your children can enjoy simple and well-founded food and lifestyle choices for lifelong health.
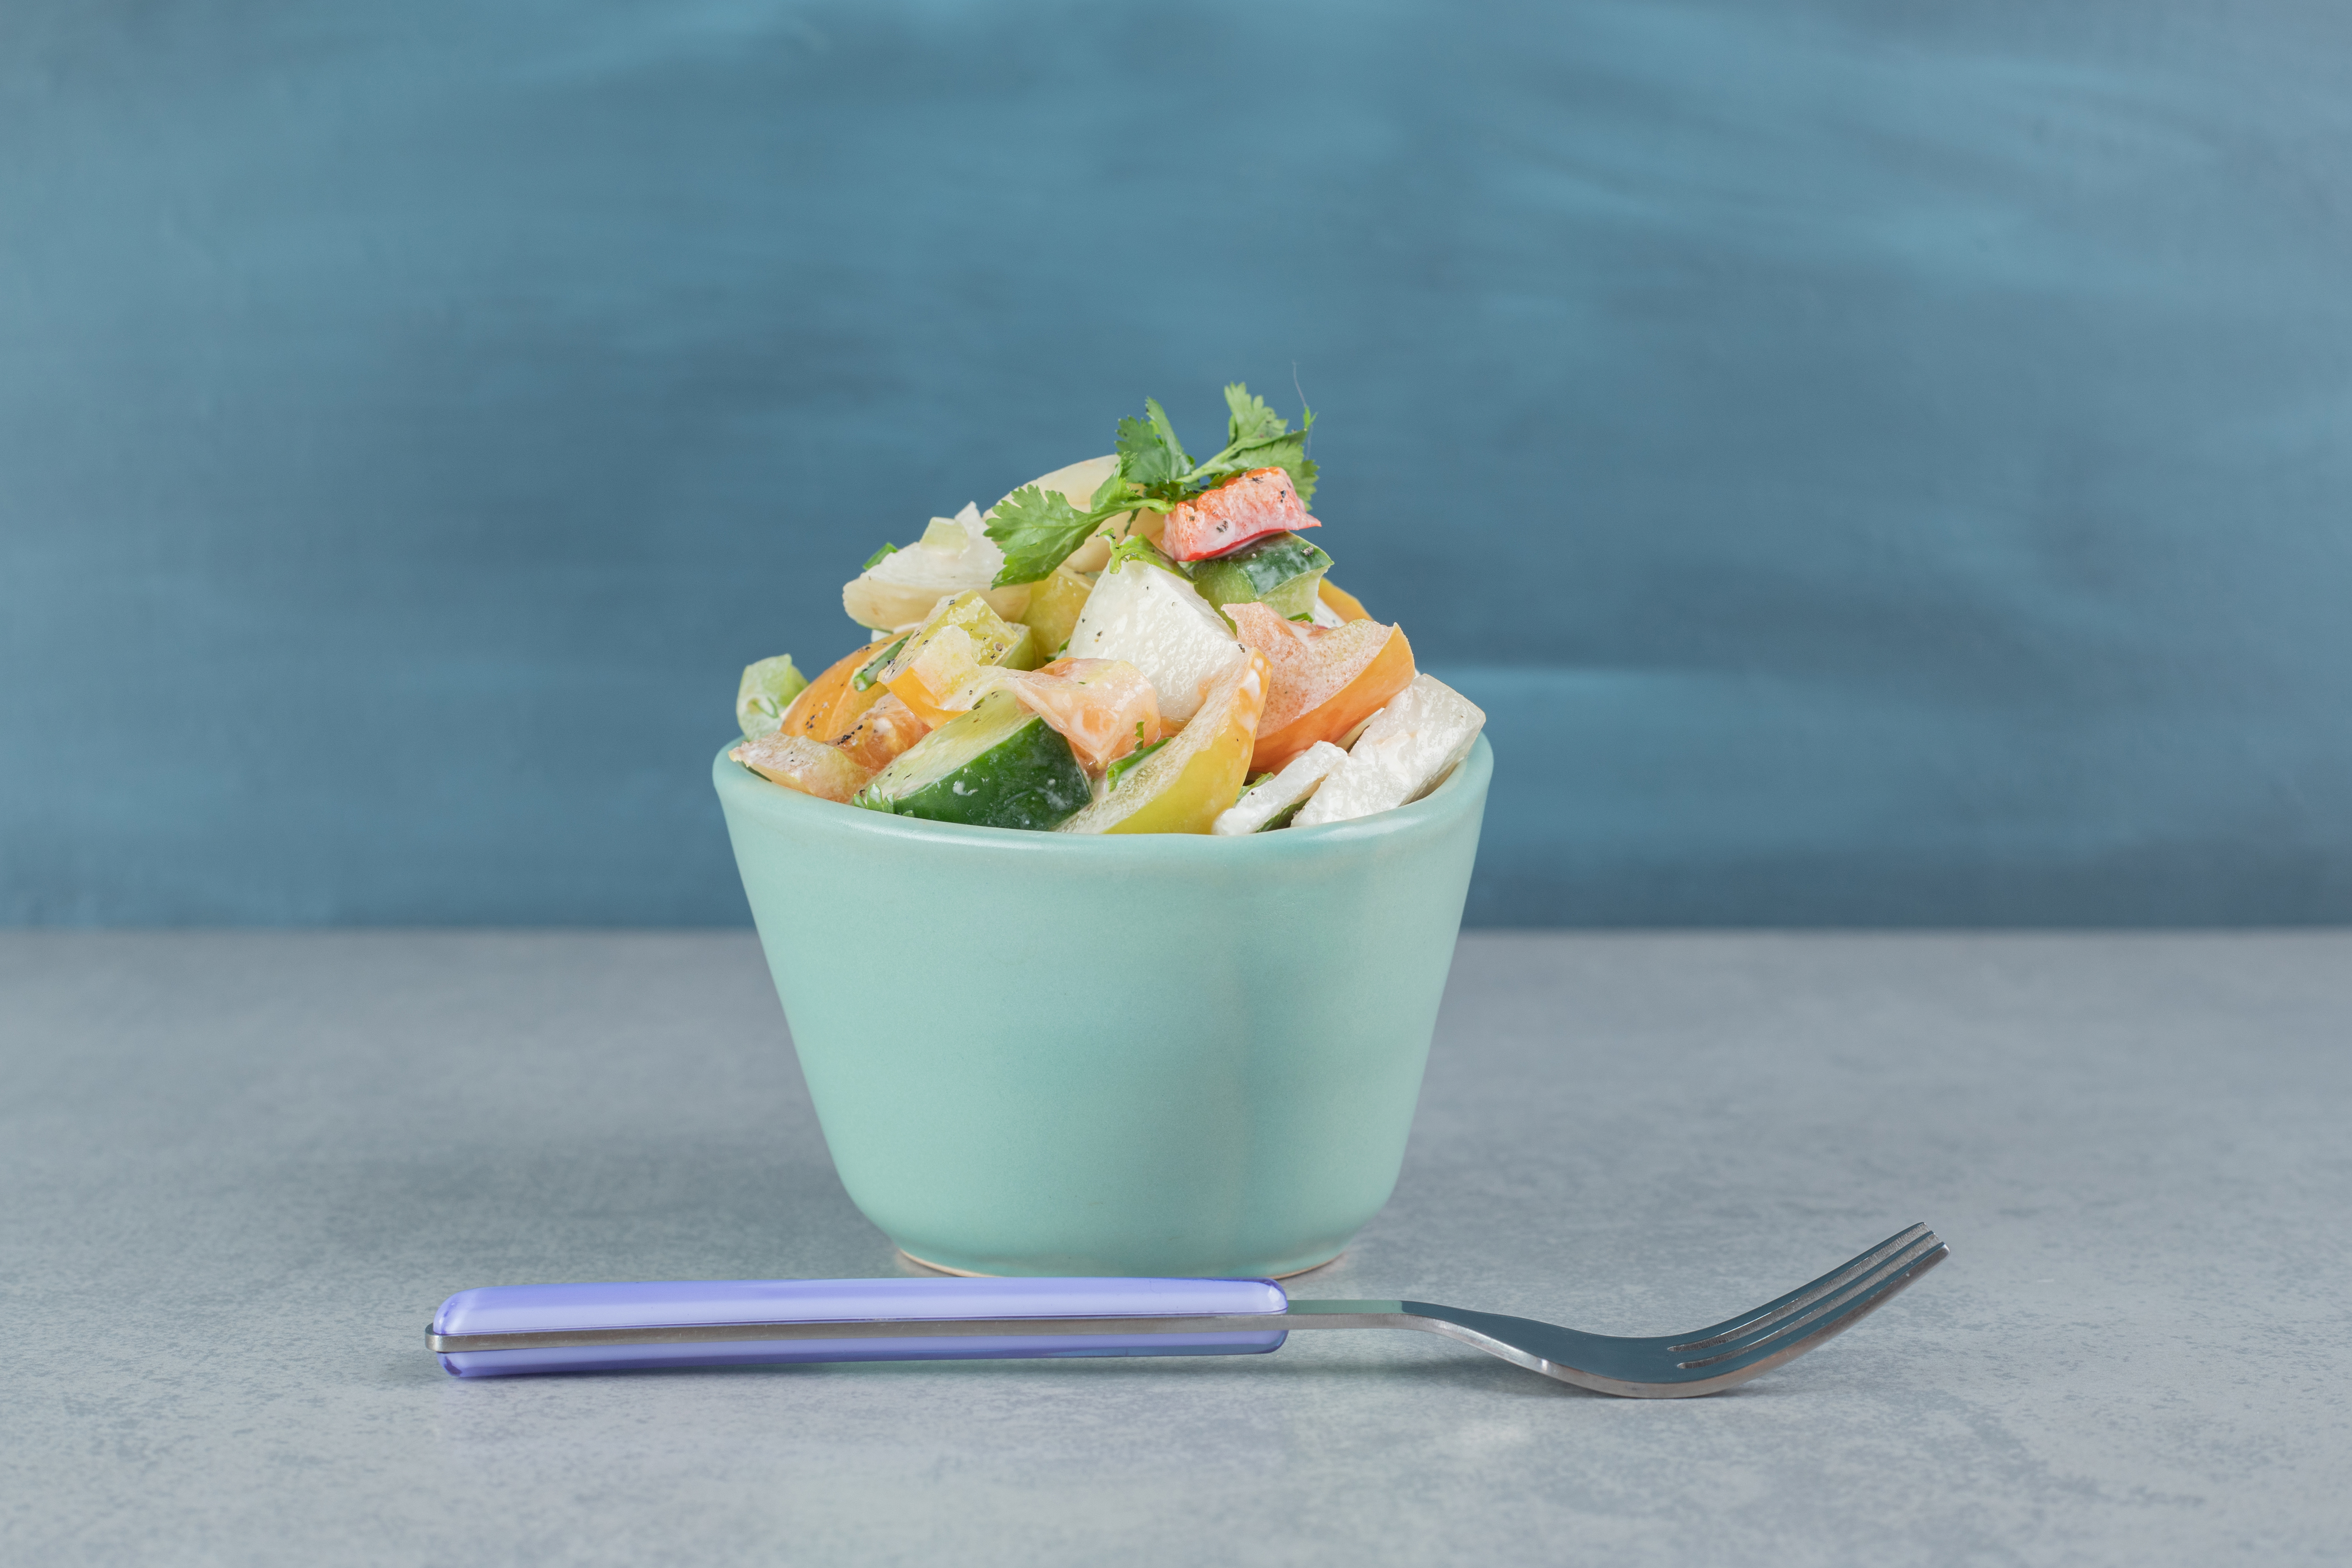
How to Make Salad Cups For Kids That Keep Veggies Fun
If you’ve ever tried to serve your child a traditional salad only to be met with that face—the one that screams ‘nope, not happening’—you’re not alone. Many kids are sensitive to textures. One study indicates that roughly 16%–22% of young children may display some degree of sensitivity to food textures. This makes crunchy veggies or leafy greens a bit of a challenge. But here’s the fun twist: salad cups flip the script entirely.These cute, colourful, snack-style cups make veggies feel more like a treat than a chore. Because they’re bite-sized, layered, and easy for small hands to hold, they tick the boxes for fun presentation, simple eating and portion-controlled nutrition. Ready to make salads that are actually exciting for kids? Read on!Help Your Kids Love Healthy Food!Healthy meals don’t have to be a battle. In Healthy Parents, Healthy Kids, Dr Nick Fuller shares expert tips for turning colourful, playful dishes into fun, appealing, and nutrient-packed meals. His strategies help kids develop positive eating habits without stress at the table.Grab your copy of Healthy Parents, Healthy Kids today and make healthy meals enjoyable for the whole family.What to Add in a Salad CupThere’s no single ‘right’ way to build a salad cup: mix, match and play with textures, colours and flavours. Here’s a massive ingredient list to help you build the perfect kid-approved version:LettuceSpinachRomaineMixed greensCherry tomatoesCucumberSweet cornCarrotsBell peppersPeasBroccoliBoiled eggsGrilled chickenCheese cubesMozzarella ballsChickpeasBeansTofuApple cubesGrapesMandarin slicesStrawberriesBlueberriesCooked pastaCouscousBrown riceCroutonsSunflower seedsPumpkin seedsYogurt dressingOlive oilLemonHoney mustardRanch dressingCream dressingHow to Make Salad Cups for KidsLight, crunchy and colourful, these kid-friendly salad cups are made by baking tortillas or pitas into crisp cups, then filling them with fresh veggies. Perfect for snacks, lunchboxes or easy dinners.Type: Vegetarian, Nut-free, Can be made dairy-free and gluten-free (use GF wraps)Serves: 4–6 kids (makes 8–10 cups)Prep Time: 10 minutesCooking Time: 6–8 minutesIngredients2 large tortillas or 2 wholemeal pitas (use gluten-free if needed)1 cup shredded lettuce or baby spinach½ cup diced cucumber½ cup chopped cherry tomatoes¼ cup grated carrot¼ cup corn kernelsOptional add-ins: shredded chicken, chickpeas, cheese cubes or boiled egg slices2–3 tbsp dressing (yogurt dressing, ranch, honey mustard or lemon–olive oil)RecipeMake the Tortilla or Pita CupsPreheat the oven to 180°C.Spray a muffin tray lightly with oil.Cut each tortilla into 4 quarters.Press each quarter into a muffin slot.Bake for 6–8 minutes or until crisp and golden.Cool completely to set into cups.For pita cups:Split each pita into two thin rounds.Cut into quarters.Press each piece into a muffin tray.Bake for 5–7 minutes.Allow to cool before filling.Assemble the Salad CupsAdd lettuce or spinach first.Layer cucumber, tomatoes, carrot and corn.Add optional protein if using.Drizzle dressing just before serving, or pack it separately for lunchboxes.Want even more colourful, fun ways to get kids eating their greens? Check out our Innovative Salad Ideas for Kids That Make Veggies Fun.Why Kids Love Salad CupsKids don’t just enjoy salad cups because they’re healthy. They love them because they feel fun, hands-on and totally different from the usual ‘big bowl of greens’. Colourful and fun to look atKids are naturally drawn to colourful foods, and research shows that children are more likely to try foods when they’re visually appealing or arranged in playful ways. A study found that kids prefer plates with more colour variety, even up to six different colours. Salad cups deliver exactly that: a mini rainbow that feels exciting, not intimidating. The more colours they see, the more curious they become.Easy to eat without messChildren thrive on independence, and foods that reduce mess help them feel more in control. Parents often report that kids eat better when portions are bite-sized and easy to hold, which aligns with studies showing that simplifying food handling improves acceptance, especially in younger children. Salad cups remove the bulkiness of big salad bowls and let kids snack at their own pace without spills or stress. This simple format often leads to more confident eating.Customisable with favourite ingredientsGiving kids choices increases their likelihood of eating the food they helped create. Research has shown that children are significantly more willing to taste a food when they participate in its preparation, even if they don’t typically enjoy those ingredients. Salad cups support that freedom. Kids choose what goes in, how much, and how it’s layered. This sense of autonomy often reduces picky eating behaviours and boosts willingness to try new textures.Feels like a snack, not a saladPresentation plays a huge role in how children perceive food. Studies on food neophobia suggest that kids are more open to tasting new foods when they’re associated with fun, low-pressure contexts, like snacks rather than formal meals. Salad cups look like a treat: colourful, portioned and cute, which lowers the mental barrier that some kids have toward vegetables. The snack-style format also mimics foods they already enjoy, like fruit cups or yoghurt parfaits.Great for lunchboxes or on-the-goMost children eat better when their lunchbox is easy to open, easy to see and not overwhelming in portion size. Food presentations naturally grab children’s attention more than non-edible objects, and this attention helps them engage with what’s inside their lunchbox. Because unhealthy foods tend to be memorable even with little visual attention, it becomes even more important to present healthy options in a way that stands out.That’s exactly what salad cups can do. Their colourful, tidy and layered look makes them eye-catching in a lunchbox, helping kids recognise and enjoy what’s packed for them. Parents love them, and kids actually eat them.Crunchy and fresh in every biteMany kids prefer crunchy textures, and sensory studies confirm that crisp foods tend to be more appealing to children with texture sensitivity, compared to soft or mushy textures. Salad cups keep ingredients fresh and separate, preserving that crunch factor kids love. Every bite feels enjoyable rather than challenging, which makes veggies far more approachable for fussy eaters.Wrapping UpSalad cups are one of the easiest ways to get more colour, crunch and nutrition onto your child’s plate, without the usual mealtime battles. They’re versatile, fun to build together and perfect for busy families who want grab-and-go options. With the right ingredients and playful presentation, even the fussiest eaters just might surprise you. Want more kid-friendly ideas? Keep exploring our collection of simple recipes made for real families and real mealtimes.Stay informed with fresh tips, expert guidance, unique deals, and tailored support!Click HereMeet Dr Nick FullerMy StoryAs a father, I know first-hand that raising healthy and happy children is tricky. Children are fussy, particularly at the end of the day when they are shattered. We also live in a society where companies seek to profit from what we feed our kids; incorrect and damaging advice is pushed on us and marketed towards our children, and we have no time.But with these recipes and resources, you and your children can enjoy simple and well-founded food and lifestyle choices for lifelong health.
6 Simple Feta Cheese Recipes For Kids That Boost Veggie Intake
If you’ve got a little one who’s curious about new flavours or one who’s still a bit wary of anything ‘too cheesy’, feta cheese can be a fun, kid-friendly ingredient to experiment with. It’s mild, creamy, and salty enough to make meals more exciting without overwhelming sensitive palates.Research shows that giving kids early exposure to a variety of flavours can help reduce pickiness as they grow, especially when those flavours are introduced consistently and in small, manageable portions. Feta is perfect for this kind of gentle flavour exploration. It crumbles easily, blends into dishes, and adds a subtle tang that kids can gradually learn to enjoy. Its soft texture also makes it ideal for children who prefer smooth or mashed foods, and studies suggest that accepting different textures is just as important as taste when encouraging little ones to try something new.Make Feta Fun and Kid-Friendly!Adding healthy ingredients like feta to kids’ meals can be easy and enjoyable with the right approach. Healthy Parents, Healthy Kids by Dr Nick Fuller shows parents how to introduce new flavours confidently, make mealtimes engaging, and encourage children to try nutritious foods without fuss.Grab your copy of Healthy Parents, Healthy Kids today and discover simple ways to make balanced meals both tasty and fun.Importance of Feta Cheese for KidsFeta cheese isn’t just tasty; it can offer nutritional benefits that support your child’s growth and development:Rich in calcium: Calcium helps support strong bones and teeth, which is important during early childhood when growth is rapid.Contains protein: Protein helps children feel fuller for longer and supports muscle growth. A study on feta-type cheese produced from micellar casein concentrate (MCC) found that increasing protein levels improved cheese yield without affecting texture, demonstrating that feta is a protein-rich option for meals and snacks.Good source of B vitamins: Feta includes riboflavin and B12, nutrients that support energy production and cognitive development.Easier to digest than some other cheeses: Because feta is made from sheep’s milk, or a mix of sheep and goat, it may be easier on little tummies compared to cheeses made only from cow’s milk.Adds flavour without heavy sauces: A little feta goes a long way, helping parents reduce added salt or overly processed seasonings.Remember: feta is salty, so portion control is key. Most kids only need a small sprinkle added to their meals.Tips to Cook Feta CheeseBefore diving into recipes, here are parent-friendly tips to help you cook feta in a way kids will actually enjoy. Each tip improves flavour, texture, or kid-friendly appeal, especially for fussy eaters.Choose good-quality fetaOpt for feta stored in brine rather than pre-crumbled varieties. Brined feta stays moist, creamy and more flavourful.Pro tip: Look for PDO Greek Feta when available. A study examining 81 Greek feta products found that PDO varieties generally have a consistent nutritional profile, offering good protein levels (13–21 g per 100 g) but also naturally higher salt and saturated fat.Rinse to reduce saltinessKids can be sensitive to strong salty flavours. A quick rinse under cold water tones down the salt without losing that creamy feta taste.Crumble before adding to dishesCrumbling feta into small, soft bits makes it easier for children to eat and spreads the flavour evenly through meals like pasta, toasties, or veggie bowls.Add near the end of cookingFeta doesn't need much heat. Adding it at the last minute keeps its texture soft and prevents it from becoming rubbery.Use olive oil for better flavourExtra-virgin olive oil mellows out feta’s tang and creates a richer, smoother taste that kids usually prefer.Pair with mild ingredientsBalance feta’s saltiness by pairing it with gentle flavours like:cucumberspastaavocadoeggssweet cherry tomatoesmild herbs like basil or parsleyAvoid overheatingHigh heat can dry out feta and intensify the saltiness, which is not ideal for kids. A warm, gentle fold-through at the end works best.Bake or grill for a creamy textureA few minutes in the oven transforms feta into a soft, spreadable cheese. Perfect for:baked feta pastawarm veggie dipsmini pita pizzas for kidsMix with yoghurt for a smooth sauceBlend feta with Greek yoghurt to create a creamy, mild dip or pasta sauce. This makes the flavour lighter and more kid-friendly.If you’re not sure which yoghurt to buy, here’s a quick guide to make it easier.Store properly in brine for freshnessKeep leftover feta submerged in brine to maintain freshness and prevent it from drying out. A fresh texture makes a big difference for kids who are picky about mouthfeel.6 Best Feta Cheese Recipes for KidsHere are the 6 best feta cheese recipes for kids to get you started. These simple dishes make it easy to introduce tangy, mild feta in a way that feels familiar and fun. Mini feta veggie muffinsSoft, fluffy and packed with colourful veggies, these mini feta muffins are the ultimate grab-and-go snack for little hands. They’re savoury, naturally flavourful and perfect for lunchboxes, picky eaters or after-school munching.Type: Vegetarian, Nut free, FreezableMakes 12 mini muffinsPrep Time: 10 minutesCook Time: 12–15 minutesIngredients1 cup self-raising flour1 egg½ cup milk¼ cup olive oil½ cup crumbled feta cheese½ cup finely grated zucchini (squeeze out excess moisture)¼ cup finely chopped capsicum¼ cup grated carrot1–2 tbsp chopped spring onions (optional)Pinch of salt and pepper (optional, adjust depending on feta saltiness)RecipePreheat your oven to 180°C and line a mini muffin tray with paper cases or lightly grease it.In a large bowl, whisk together the egg, milk and olive oil until smooth.Add the flour and gently fold through until just combined. Don’t overmix or the muffins turn dense.Stir in the feta, zucchini, capsicum, carrot and spring onions. The batter will be thick, that’s perfect.Spoon the mixture into the muffin holes, filling each about ¾ full.Bake for 12–15 minutes or until the tops are lightly golden and a skewer comes out clean.Cool slightly before serving to kids. These muffins are softest when warm.Creamy feta pasta twirlsA super creamy, tangy and kid-approved pasta that comes together in minutes. These feta pasta twirls are perfect for busy weeknights, lunchboxes or fussy eaters who love smooth, comforting flavours.Type: VegetarianServes: 2–3 kidsPrep Time: 5 minutesCook Time: 10 minutesIngredients200 g pasta twirls (fusilli)½ cup crumbled feta½ cup Greek yoghurt1 tbsp olive oil1 small clove garlic, minced (optional for younger kids)¼ cup pasta water (reserve from pot)½ cup finely chopped baby spinach (optional)Salt and pepper to taste (adjust due to feta saltiness)RecipeCook pasta according to packet instructions until tender. Reserve ¼ cup of the pasta water before draining.In a large bowl, whisk together the feta, Greek yoghurt, olive oil and garlic until creamy.Add a splash of pasta water and mix to loosen the sauce to your preferred texture.Stir in the baby spinach if using.Add the cooked pasta and toss until everything is coated in that silky, creamy feta sauce.Serve warm and watch it disappear fast.Feta and chicken quesadillasCrispy on the outside, cheesy and flavour-packed on the inside, these feta and chicken quesadillas are a guaranteed kid fave. They’re quick to whip up, great for lunchboxes and perfect for using leftover chicken.Type: High proteinServes: 2–3 kidsPrep Time: 5 minutesCook Time: 8 minutesIngredients2 large tortillas1 cup cooked shredded chicken½ cup crumbled feta½ cup grated mozzarella or tasty cheese¼ cup finely chopped capsicum2 tbsp corn kernels (optional)1 tbsp olive oil or butter for cookingMild salsa or yoghurt for dipping (optional)RecipeHeat a pan over medium and lightly brush with olive oil or butter.Lay one tortilla in the pan and sprinkle evenly with chicken, feta, mozzarella, capsicum and corn.Top with the second tortilla and gently press down.Cook for 3–4 minutes until the bottom is golden, then flip carefully and cook the other side.Remove from the pan, slice into wedges and serve warm with salsa or yoghurt.Feta watermelon bitesFresh, juicy and totally snack-worthy, these feta watermelon bites are a fun, colourful way to introduce kids to new flavour combos. They’re sweet, salty, hydrating and perfect for warm days or party platters.Type: Vegetarian, gluten freeServes: 3–4 kidsPrep Time: 10 minutesCook Time: 0 minutesIngredients2 cups seedless watermelon, cut into small cubes½ cup crumbled feta1–2 tbsp chopped mint (optional for kids)Drizzle of honey or maple syrup (optional)Toothpicks for assembling (optional)RecipeCut the watermelon into small, kid-friendly cubes and place on a plate.Top each piece with a pinch of crumbled feta.Add a small mint leaf if your kids enjoy herbs.Drizzle lightly with honey or maple syrup for extra sweetness (optional).Thread onto toothpicks for easy eating or serve as is.Baked feta friesCrispy on the outside, fluffy on the inside and sprinkled with tangy feta, these baked fries are a fun twist on a classic kid favourite. They’re lighter than deep-fried versions and super easy to make at home.Type: Vegetarian, gluten free (if using GF seasoning)Serves: 2–3 kidsPrep Time: 10 minutesCook Time: 25–30 minutesIngredients3 large potatoes, peeled and sliced into fries2 tbsp olive oil½ tsp paprika (optional)Salt and pepper to taste½ cup crumbled feta1 tbsp chopped parsley or spring onions (optional)RecipePreheat your oven to 200°C and line a baking tray with baking paper.Toss the sliced potatoes with olive oil, paprika, salt and pepper until well coated.Spread the fries out on the tray in a single layer.Bake for 25–30 minutes, flipping halfway, until the edges are golden and crisp.Once out of the oven, sprinkle generously with crumbled feta.Garnish with parsley or spring onions if your kids enjoy herbs, then serve warm.Feta egg cupsThese fluffy feta egg cups are the perfect protein-packed breakfast or lunchbox addition. They’re quick, customisable and ideal for little hands. Plus, they freeze and reheat beautifully for busy mornings.Type: High protein, gluten free, vegetarian (if no ham added)Serves: 6 mini cupsPrep Time: 5 minutesCook Time: 12–15 minutesIngredients4 eggs2 tbsp milk¼ cup crumbled feta¼ cup grated carrot¼ cup finely chopped spinach1 tbsp chopped spring onions (optional)Pinch of salt and pepper (adjust based on feta)RecipePreheat the oven to 180°C and lightly grease a mini muffin tray.Whisk the eggs and milk in a bowl until smooth.Stir in the feta, carrot, spinach and spring onions.Season lightly with salt and pepper.Pour the mixture into the muffin holes, filling each about ¾ full.Bake for 12–15 minutes, or until the tops are set and lightly golden.Let them cool slightly before removing from the tray. Serve warm or chilled.Looking for more creative ways to use feta in kid-friendly meals? Check out our 6 Non-Sandwich Lunch Ideas For Picky Eaters — easy, tasty, and perfect for little taste buds.Summing UpFeta isn’t just a tangy topping; it’s a flavour booster that can make everyday kid meals way more exciting. From crispy baked fries to creamy pasta twirls and colourful watermelon bites, these feta-filled recipes show just how versatile this cheese can be for little eaters. Whether you’re sneaking extra veggies into muffins or whipping up a quick after-school snack, feta adds that salty, creamy kick kids often enjoy.The best part? Most of these recipes come together in minutes, use simple pantry staples and can be easily customised for fussy phases. So next time you’ve got a block of feta in the fridge, you’ll know exactly what to do with it. Give a few of these dishes a try and watch your kids discover new favourites, one cheesy bite at a time.Stay informed with fresh tips, expert guidance, unique deals, and tailored support!Click HereMeet Dr Nick FullerMy StoryAs a father, I know first-hand that raising healthy and happy children is tricky. Children are fussy, particularly at the end of the day when they are shattered. We also live in a society where companies seek to profit from what we feed our kids; incorrect and damaging advice is pushed on us and marketed towards our children, and we have no time.But with these recipes and resources, you and your children can enjoy simple and well-founded food and lifestyle choices for lifelong health.
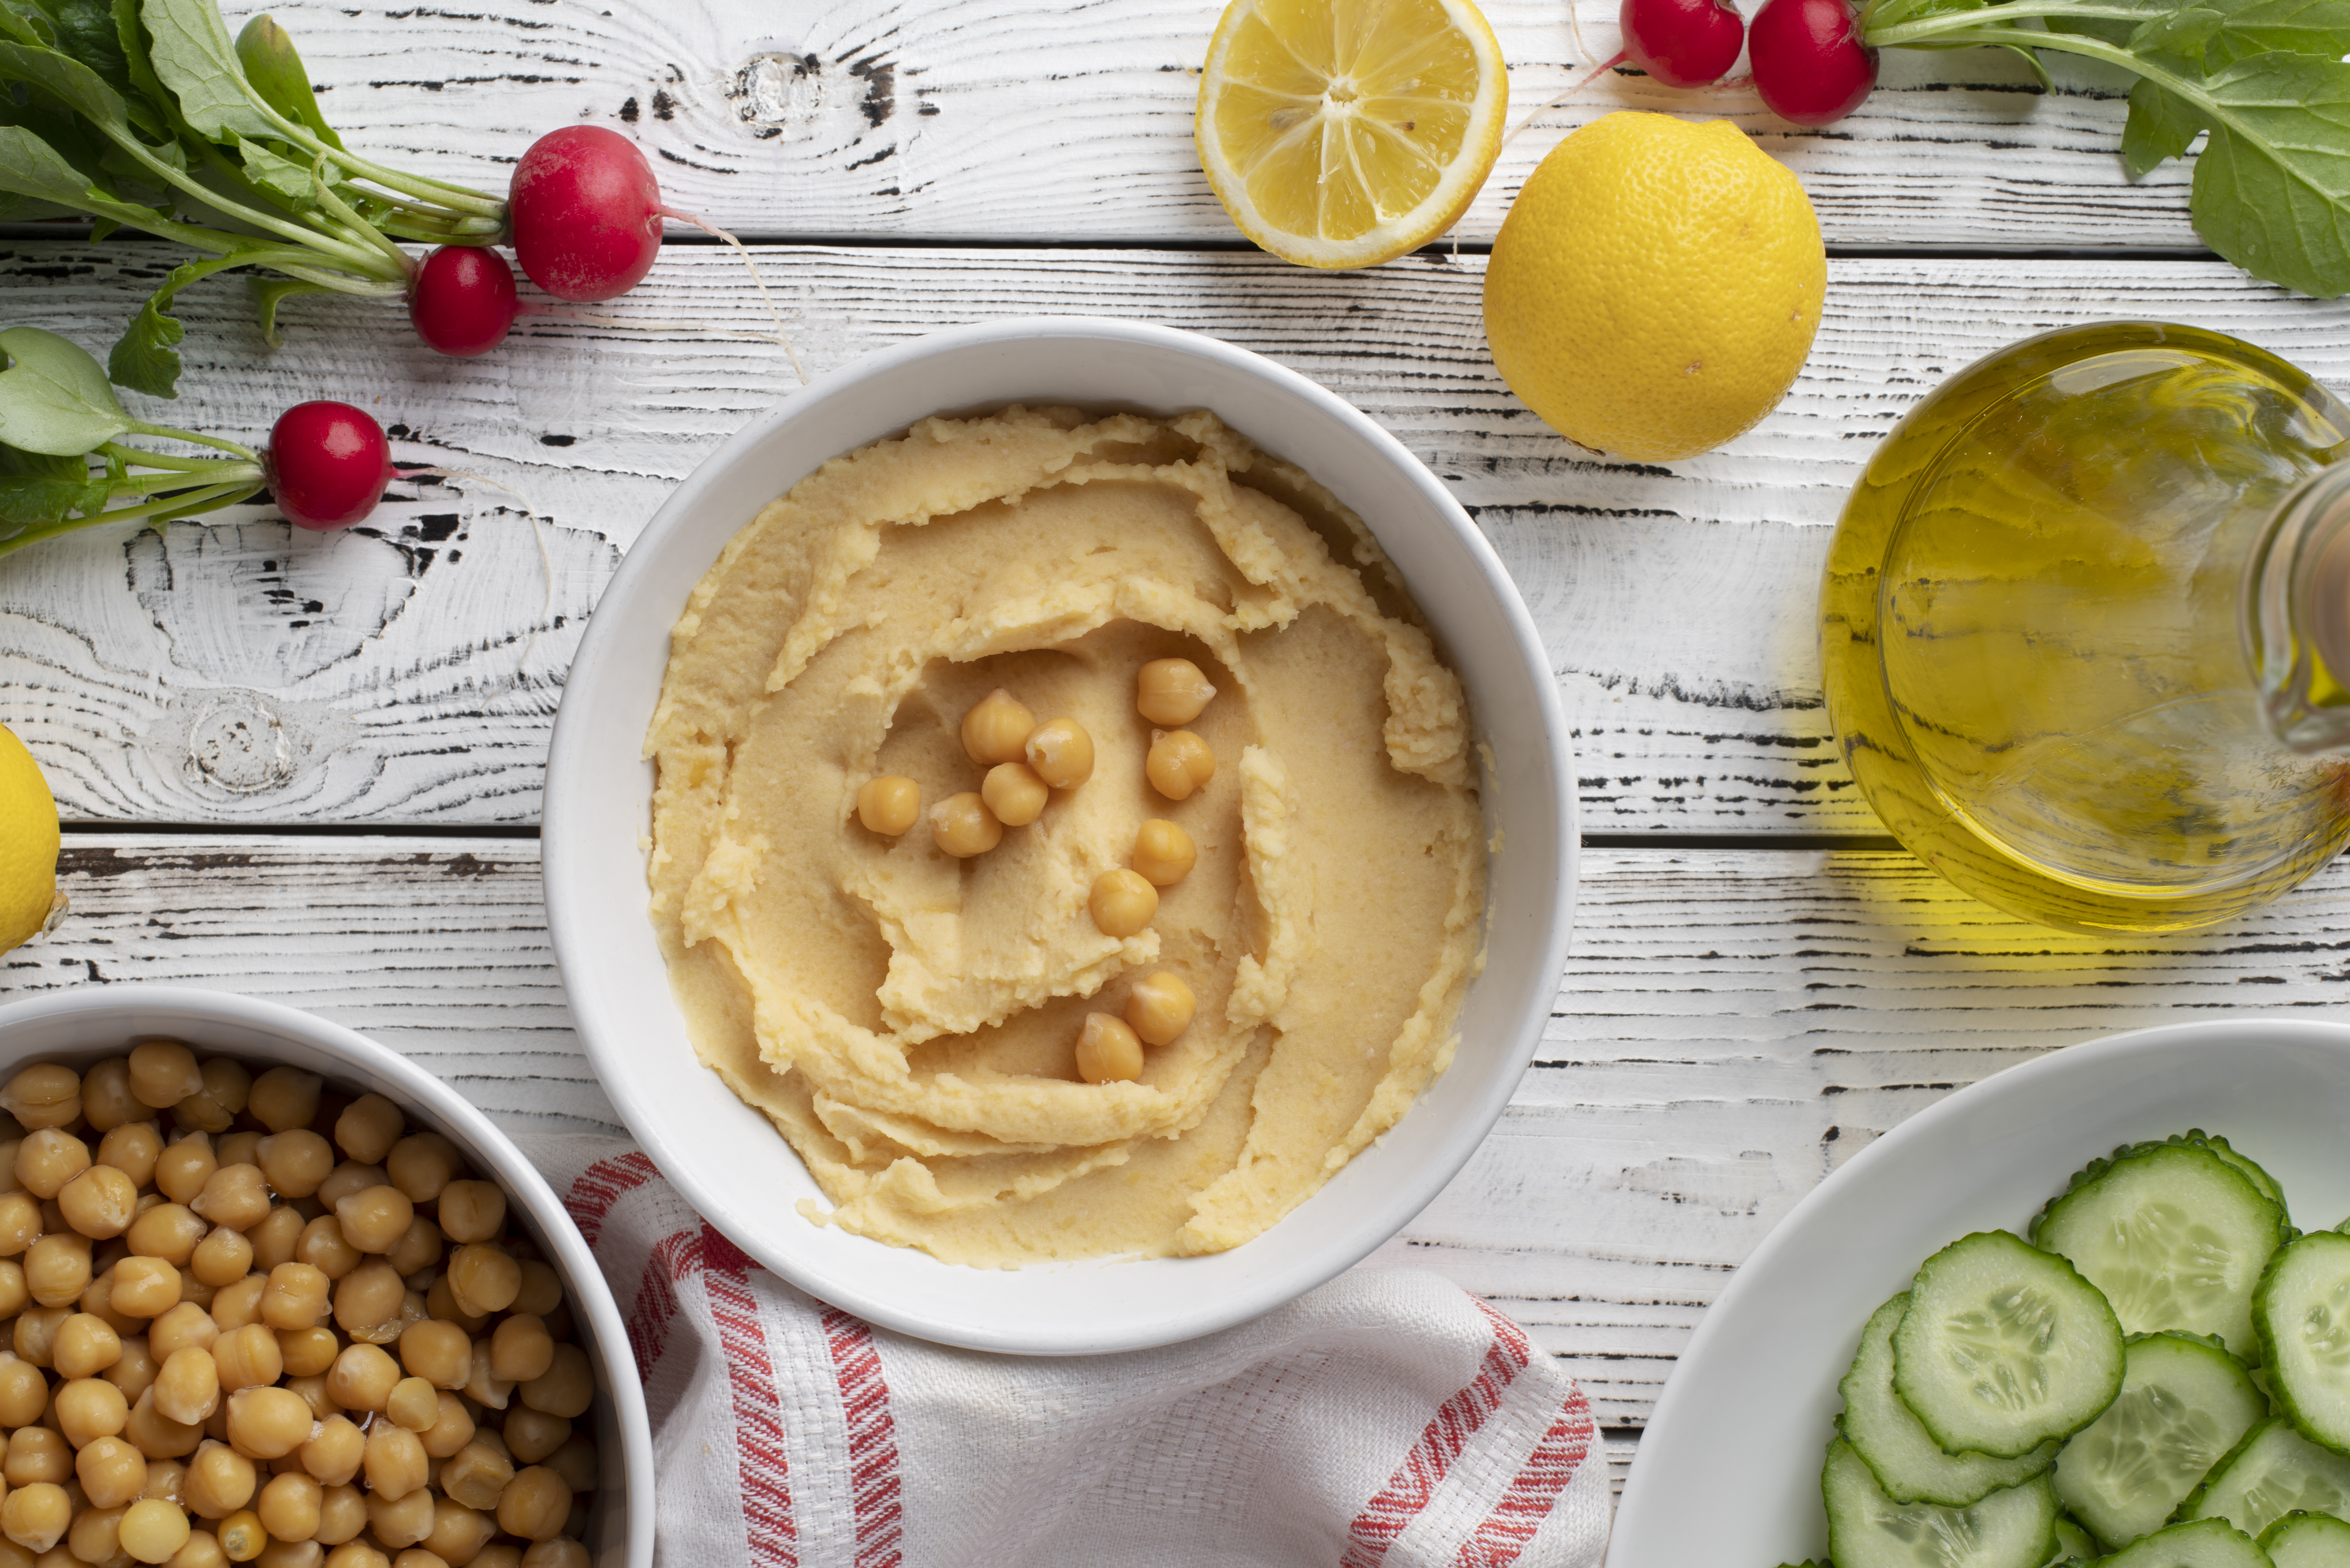
Why Pea Hummus For Kids Works So Well For Picky Eaters
Most kids have a ‘no way’ zone when it comes to green foods. Pea hummus sneaks in protein, fibre, and vitamins in a way that tastes familiar, and suddenly, those little green scoops disappear fast.Research shows that children are highly sensitive to food textures, often preferring smooth, creamy foods over lumpy or crunchy options, which can influence their willingness to try new foods. The naturally silky texture of pea hummus makes it ideal for picky eaters, while its mild, slightly sweet flavour appeals to younger tastebuds. Making pea hummus together is a fun way to introduce kids to new flavours and colours. It’s also versatile, which makes it ideal for sandwiches, wraps, dips, or snacks that the whole family can enjoy.Turn Peas into a Snack Kids Will Love!Even picky eaters can learn to enjoy nutritious foods with a little creativity. Dr Nick Fuller’s Healthy Parents, Healthy Kids is full of effective strategies and practical tips to make healthy dips and snacks, like pea hummus, appealing and delicious for children.Grab your copy of Healthy Parents, Healthy Kids today and discover how to make mealtimes fun, stress-free, and full of healthy options.What Is Pea Hummus?Pea hummus is a variation of traditional hummus, swapping chickpeas for green peas while keeping all the creamy, smooth goodness. The bright green colour is naturally appealing to kids, making it feel fun and exciting on the plate. Like regular hummus, it’s blended with olive oil, lemon juice, and a hint of garlic for flavour, but it’s milder and slightly sweeter, perfect for younger tastebuds.Easy Steps to Make Pea Hummus at HomeMaking pea hummus at home is quicker than you think, and it gives you full control over flavour and nutrition. Even kids can get involved in simple tasks like pressing the blender button or stirring ingredients, making it a fun kitchen activity.Ingredients You’ll Need1 ½ cups cooked or frozen peas2–3 tablespoons tahini (or sunflower seed butter for a milder taste)2 tablespoons olive oil1–2 tablespoons lemon juice1 small garlic clove (optional)Salt to tasteWater as needed for smoothnessStep 1: Blend the peasAdd the peas to a food processor or blender. Pulse until they’re roughly broken down and soft. This makes it easier to get a creamy texture in the next steps.Step 2: Add flavour ingredientsAdd tahini, olive oil, lemon juice, garlic (if using) and a pinch of salt. Blend until smooth. Scrape down the sides as needed to ensure everything is evenly mixed.Step 3: Adjust textureIf the hummus is too thick, add water, one tablespoon at a time, until it reaches a creamy, spreadable consistency that’s easy for little fingers to scoop.Step 4: Taste and adjustGive it a taste! Add a little more lemon juice, salt or olive oil if needed. This is a great moment to let kids try a small spoonful — they often love tasting their own creation.Step 5: Serve and storeServe immediately with toast, crackers, veggie sticks or wraps. Store leftovers in an airtight container in the fridge for up to 3–4 days.Homemade pea hummus is simple, versatile, and a fun way to involve kids in the kitchen while adding a nutritious boost to their snacks and meals.Healthy Reasons to Serve Pea Hummus to KidsPea hummus is a small dip with big nutrition perks. Here’s why it could earn a spot on your child’s plate.High in plant proteinPeas are naturally rich in plant-based protein, which supports the growth and repair of muscles, tissues and cells during childhood’s rapid development. They provide a meaningful amount of high-quality protein, making them an easy way to strengthen the nutrient profile of everyday meals without relying solely on animal sources.Rich in fibrePea hummus contains fibre that helps keep digestion moving comfortably, a big help for kids who experience occasional constipation or tummy discomfort. Dietary fibre from legumes has been shown to improve stool bulk and support regular bowel movements, contributing to overall digestive health in children and adults alike.Packed with vitamins and mineralsPeas offer a wide range of micronutrients, including folate, vitamin C, vitamin K, iron, magnesium and zinc. These vitamins and minerals support key functions such as immunity, bone development and healthy blood formation. Research on legumes highlights their role in improving nutrient intake and supporting overall growth in young populations.Supports healthy digestionBeyond fibre, peas contain prebiotic components that can help nourish beneficial gut bacteria. Studies suggest that the resistant starch and oligosaccharides found in legumes may support gut microbiota diversity, which in turn contributes to smoother digestion and improved gut function over time.Great source of steady energyBecause pea hummus combines complex carbohydrates, protein and fibre, it provides a more stable energy release than snacks high in refined sugars. The slow-digesting carbohydrates in legumes help maintain more consistent energy levels and healthier blood-sugar responses — helpful for active, growing kids.Kid-friendly flavourPea hummus has a naturally mild and slightly sweet flavour that makes it easier for picky eaters to accept compared to stronger-tasting vegetables or legumes. Offering these flavours in a smooth, familiar dip can increase a child’s willingness to try pulses, gradually expanding food variety, a known strategy for improving acceptance in fussy eating research.Helps build healthy eating habitsRepeated, low-pressure exposure to nutrient-dense foods helps children expand their food preferences over time. Introducing legumes in simple, enjoyable forms, such as hummus, aligns with evidence showing that regular exposure supports healthier long-term eating patterns and reduces resistance to new foods.Pea Hummus Serving Tips for Fussy KidsPea hummus works in more ways than you might expect. From quick breakfasts to fun snacks, these ideas make it easy to add flavour and nutrition to your child’s day.Spread on toast: Thin layer on wholegrain toast, optionally topped with avocado or cherry tomatoes.Veggie dip: Serve with carrot sticks, cucumber slices, or bell pepper strips for a fun snack.Side for meals: Add a small scoop alongside grilled chicken, fish, or tofu.Wrap or sandwich filling: Spread under turkey, cheese, or roasted veggies for an easy-to-hold meal.Cracker topping: Use on wholegrain crackers or rice cakes, with cucumber or seeds for variety.Snack jars: Layer with veggies, grains, or lentils for a colourful, ready-to-go snack.Mini pita pizzas: Spread on mini pitas, add toppings like cheese or tomatoes, and grill briefly for a tasty, nutrient-packed treat.Wrapping UpPea hummus is a simple, versatile way to introduce protein, fibre, vitamins, and fun into your child’s meals. Whether spread on toast, used as a dip, layered in jars, or turned into mini pita pizzas, it’s a kid-friendly option that even fussy eaters can enjoy.For more practical strategies and expert guidance on raising healthy eaters, explore Dr Nick Fuller’s Healthy Parents, Healthy Kids, your go-to resource for simple, evidence-based ways to make healthy eating enjoyable for the whole family.Looking for more sneaky ways to get veggies into your child’s diet? Check out our Top Hidden Vegetable Recipes For Picky Eaters — fun, tasty, and kid-approved.Stay informed with fresh tips, expert guidance, unique deals, and tailored support!Click HereMeet Dr Nick FullerMy StoryAs a father, I know first-hand that raising healthy and happy children is tricky. Children are fussy, particularly at the end of the day when they are shattered. We also live in a society where companies seek to profit from what we feed our kids; incorrect and damaging advice is pushed on us and marketed towards our children, and we have no time.But with these recipes and resources, you and your children can enjoy simple and well-founded food and lifestyle choices for lifelong health.
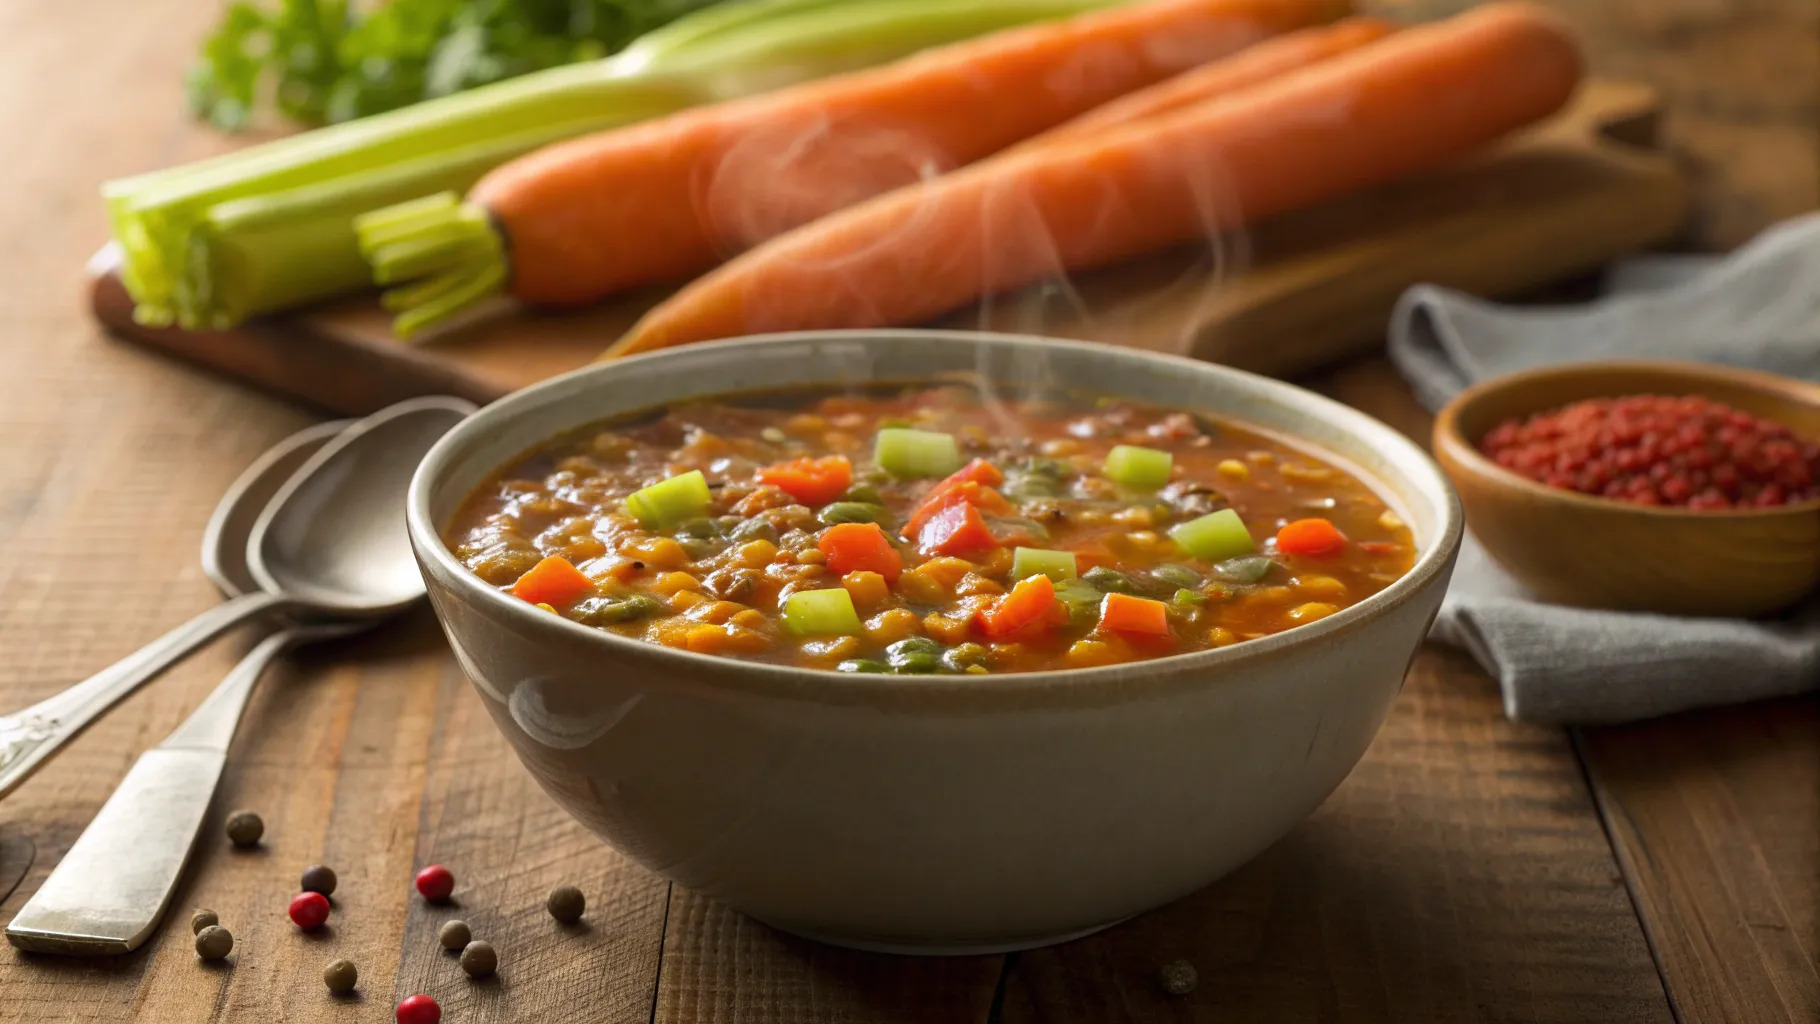
13 Veggie-Packed Kid-Friendly Lentil Recipes Kids Won’t Notice
Looking for easy, healthy meals that your kids will actually eat? Lentils might just be your new best friend in the kitchen. These little legumes are packed with protein, fibre, and essential nutrients that support your child’s growth and energy. And the best part? They’re incredibly versatile. From warming soups to hidden-in-the-sauce favourites, lentils can slip seamlessly into family meals without complaints from fussy eaters. In this guide, we’ll share our top kid-friendly lentil recipes that are both nutritious and delicious, so you can feel confident your little ones are getting the goodness they need.Make Family Meals Easier with Expert TipsLentils are full of nutrition, but convincing kids to enjoy them isn’t always easy. Dr Nick Fuller’s Healthy Parents, Healthy Kids offers practical advice on how to make healthy eating more appealing for children. From playful mealtime strategies to stress-free tips that work for the whole family, his approach helps parents encourage kids to explore nutritious foods like lentils with ease.Grab your copy of Healthy Parents, Healthy Kids to discover more ways to make healthy eating fun, positive, and delicious for kids.13 Delicious Lentil Recipes For KidsTo help you get started, we’ve rounded up 13 delicious lentil recipes that are not only packed with goodness but also designed to win over little taste buds.Lovely Lentil SaladWho says salads are boring? This Lovely Lentil Salad is packed with colour, crunch and goodness that even kids will enjoy. Lentils bring the protein punch, while pearl barley adds a nutty, chewy texture that makes the dish extra satisfying. Toss in some bright green edamame (you can grab them frozen at most Asian grocers, and they cook in minutes), and you’ve got a fresh, wholesome meal that’s hearty enough for lunch or dinner. It’s a great way to get kids tasting new textures while still keeping things fun and delicious.Type: Vegetarian, Vegan, Lactose FreeServes 4Prep Time: 10 minutesCooking Time: 0 minutesIngredients1 cup pearl barley, cooked according to packet instructions (similarly to brown rice, you can cook up a large batch of pearl barley to store in the fridge and use throughout the week)1x 400g tin brown lentils, drained and rinsed1 cup Edamame, cooked according to packet instructions¼ of a red onion, finely slicedHandful of cooked kale or fresh baby spinach2 tablespoons pepitas½ a pomegranate (optional)Zest and juice of 1 lemon1 tablespoon olive oil1 tablespoon balsamic vinegar (or whatever you have in the cupboard eg. Apple cider vinegar, red wine vinegar)1 teaspoon Dijon mustardSprinkle of salt and pepperRecipe1. To a large bowl, add the pearl barley, lentils, edamame, red onion, kale/baby spinach and pepitas. Stir gently to combine. 2. Hold the pomegranate over the salad, cut side down and skin side up. Using a wooden spoon in your other hand, firmly whack the pomegranate over the top of the salad, so that the seeds fall out and into the salad. Remove any of the white pith that may have also fallen in. 3. To make the dressing, combine the lemon juice, olive oil, vinegar, mustard and salt and pepper in a small jar. Shake to combine, then pour over the salad. Stir the salad again to make sure everything is coated in the dressing before serving. Enjoy!Chicken and Lentil Green CurryThis quick and tasty curry is perfect for busy weeknights when you want something healthy on the table fast. The lentils add a creamy texture and extra goodness, while the chicken keeps it hearty enough for the whole family. We’ve kept it simple with a cheat’s curry paste (no grinding spices for hours!), but you can always make your own if you’re feeling adventurous. Mild and nourishing, it’s a great way to introduce kids to new flavours without overwhelming their taste buds. Type: Contains Chicken, Gluten Free, Lactose Free, Nut FreeServes 4Prep Time: 5 minutesCooking Time: 20 minutesIngredients1 cup brown rice4 tablespoons good quality store-bought green curry paste1x 400g can light coconut milk200g chicken breast, sliced into bite sized pieces¼ butternut pumpkin, sliced into small pieces1 zucchini, chopped½ red capsicum, chopped1 carrot, sliced into small pieces1x 400g tin lentils, drained and rinsed100g shelled edamame Recipe1. Cook the brown rice according to the packet directions.2. Whilst the rice is cooking, heat a large pot or saucepan over high heat and add the green curry paste. Fry for a couple of minutes until fragrant, then add the coconut milk and bring to a boil.3. Add in the chicken breast and allow to cook for 3-4 minutes until white. Return the heat to medium and add in all vegetables. Cover the pot and allow it to cook for 5 minutes. Add in the lentils and edamame and cook for another 5 minutes. Ensure the vegetables are cooked through.4. Serve the curry with the brown rice and enjoy!Roast Eggplant and Lentil SaladRoasting eggplant gives it that rich, smoky flavour kids might actually go for once it’s paired with hearty lentils. The combo makes this salad filling enough to enjoy on its own, while still being light and fresh. It’s also a great make-ahead option, perfect for lunchboxes or quick family meals. Just keep the yoghurt dressing in a little container on the side and drizzle it over when you’re ready to dig in. Nutritious, delicious and surprisingly kid-approved. Type: Vegetarian, Contains NutsServes 4Prep Time: 10 minutesCooking Time: 15 minutesIngredients1 medium eggplant, sliced into thin rounds1 tablespoon olive oil1 garlic clove, crushed1 cup wholemeal couscous 2 cups mixed lettuce leaves1 x 400g tin lentils, drained and rinsed½ large cucumber, choppedHandful fresh corianderHandful fresh mint¼ cup toasted pine nutsYoghurt dressing:½ cup plain thick yoghurt1 teaspoon paprikaZest and juice of 1 lemonSprinkle salt and pepperRecipe1. Preheat the oven to 200°C and line a baking tray with baking paper. Arrange eggplant slices lying flat on the tray. Combine the olive oil and crushed garlic, then use a pastry brush to spread evenly over the eggplant. Roast in the oven for 15 minutes until soft, then set aside to cool slightly. 2. Meanwhile, add dry couscous to a small bowl and cover with 1 cup of boiled water. Cover and allow to sit for 5 minutes to absorb the water. Once ready, use a fork to fluff the grains apart. 3. To make the yoghurt dressing: combine the yoghurt, paprika, lemon zest, lemon juice, salt and pepper, then mix well to combine. 4. Arrange the lettuce leaves in a large salad bowl. Top with the roasted eggplant, couscous, lentils, cucumber and fresh herbs. Sprinkle the pine nuts over the top. Serve salad with the yoghurt dressing on the side. Enjoy!Beef and Lentil BologneseA classic pasta night favourite with a healthy twist! This bolognese blends beef with lentils for extra goodness, extra fibre, and a little less meat. But trust us, the kids won’t even notice. The lentils make the sauce rich and hearty, while still keeping it budget-friendly. Want to sneak in even more veg? Toss in mushrooms, zucchini, or whatever’s in the fridge. Serve it over your favourite pasta and watch it become a regular in your family’s meal rotation.Type: Contains Meat, Lactose FreeServes 4Prep Time: 5 minutesCooking Time: 30 minutesIngredients300g wholemeal fusilli pasta 1 tablespoon olive oil1 clove garlic, minced1 onion, finely diced1 carrot, finely diced1 teaspoon cumin1 teaspoon oregano250g lean beef mince1 tablespoon tomato paste1x 400g tin crushed tomatoes½ cup vegetable stock1x 400g tin lentils, drained and rinsedSprinkle of salt and pepperHandful of basil leaves, to serveRecipe1. Bring a large saucepan of water to the boil over high heat. Add the fusilli pasta and cook for approximately 12 minutes until al dente. Drain. 2. Meanwhile, heat the olive oil in a large pan over medium heat. Add garlic clove and onion, and sauté for 5-10 minutes until soft. Add carrot, cumin and oregano and cook for another 5 minutes, stirring occasionally. 3. Add in the beef mince and use a spoon to break it apart whilst cooking. Once the meat has browned, stir in the tomato paste and pour the crushed tomatoes over. Add in the stock, then allow the sauce to simmer for 10-15 minutes until thickened. 4. Once the sauce has thickened, stir through the lentils and a sprinkle of salt and pepper, and leave on the heat for a couple more minutes until the lentils have heated through. 5. To serve, divide the pasta between 4 serving bowls and top with the Bolognese sauce. Top with torn basil leaves and enjoy!Herby Lentil SaladFresh, zesty and packed with goodness, this Herby Lentil Salad is proof that simple ingredients can go a long way. Lentils keep it filling and budget-friendly, while loads of fresh herbs make every bite bright and tasty. Serve it as a side with grilled chicken or fish, or pop it into lunchboxes for an easy, nutritious win. It’s the kind of dish that’s light enough for kids but satisfying enough for the whole family.Type: Vegetarian, Gluten FreeServes 6 as a side saladPrep Time: 10 minutesCooking Time: 0 minutesIngredients2 large tomatoes, thinly sliced1 red onion, thinly sliced 1 punnet red cherry tomatoes, halved 1 punnet yellow cherry tomatoes, halved ½ cup parsley leaves ½ cup mint leaves 1x 400g tin lentils, drained and rinsed 100g cottage cheeseFor the dressing:2 tablespoons olive oil1 tablespoon lemon juice2 tablespoons balsamic vinegar Recipe1. Assemble the sliced tomato and red onion over the base of a large serving plate. Top with the cherry tomatoes, parsley, mint and lentils. Dollop the cottage cheese over the top. 2. To make the dressing, combine the olive oil, lemon juice and balsamic vinegar in a small jar. Shake well to combine. 3. Pour the dressing over the salad and serve. Enjoy!Lentil DhalComfort food at its best! This lentil dhal is creamy, nourishing, and packed with plant-based protein and fibre to keep little bellies full. Using dried lentils (easy to find at most supermarkets or health food shops), you can whip up a hearty meal that’s both budget-friendly and wholesome. Keep the spice level mild for kids, then add a dollop of plain yoghurt on top to balance out any extra heat. Perfect served with rice or warm flatbread for a cosy family dinner.Type: Vegetarian, Vegan, Gluten Free, Lactose FreeServes 6Prep Time: 5 minutesCooking Time: 30 minutesIngredients1 ½ cups dried brown lentils, rinsed1 tablespoon olive oil1 onion, diced1 tablespoon cumin1 tablespoon turmeric powder1 tablespoon curry powder1 teaspoon chilli powder1 tablespoon garlic, minced1 tablespoon ginger, minced1x 400g tin diced tomatoesCooked basmati rice, to serveCoriander, to serveRecipe1. Add the lentils to a large pot and cover with cold water. Bring to the boil, then reduce heat and simmer for 10 minutes. Drain the lentils and set aside. 2. Return the pot to the stove over a medium heat. Add the olive oil and onion and cook for a couple of minutes. Add all the spices, garlic and ginger and cook for another 5 minutes, stirring occasionally. 3. Pour in the tomatoes and ½ cup water. Bring to a simmer and cook for a further 15 minutes, stirring occasionally. If the mixture becomes too dry, stir through a bit more water and continue simmering. The liquid should be absorbed, and the lentils should be soft. 4. Serve the dhal with basmati rice, and sprinkle with coriander to serve. Enjoy!Mushroom and Lentil SoupHearty, comforting and full of rich flavour, this mushroom and lentil soup is the perfect cosy bowl for cooler days. The lentils make it extra filling, while the caramelised onions give it that irresistible savoury depth. So don’t rush them, they’re worth the wait! Pair it with some crusty bread and you’ve got a nourishing meal that will warm up the whole family.Type: Vegetarian, Vegan, Lactose Free, Gluten FreeServes 4-6Prep Time: 5 minutes Cooking Time: 1 hour 5 minutesIngredients3 tablespoons olive oil3 brown onions, diced400g brown mushrooms, sliced1 teaspoon dried thyme1 teaspoon dried rosemary1 lemon1 cup white wine¾ cup dried lentils, rinsed with water1 tablespoon gluten free soy sauce2 tablespoons Dijon mustardCracked black pepperGarlic chives, choppedRecipe1. Heat olive oil in a large saucepan over medium heat. Add the onions and cook for 20 minutes, stirring regularly until softened and slightly caramelised. 2. Add in the mushrooms, thyme, and rosemary. Stir to combine and allow to cook for another 5 minutes. Use a vegetable peeler to remove the lemon peel in large strips and add to the pot. Cover with the wine and 1 ½ litres of water, then bring to the boil. Reduce heat, so the mixture is simmering, cover with a lid and simmer for 25 minutes. 3. Add in the dried lentils and continue to simmer the soup for another 15 minutes until the lentils are softened. 4. Once the lentils are cooked, stir in the soy sauce, Dijon mustard and black pepper. Spoon the soup into bowls, top with garlic chives and enjoy!Quick Lentil and Chickpea DhalWarm, creamy and oh-so-comforting, this speedy dhal is perfect for chilly weeknights when you need dinner on the table fast. Lentils and chickpeas team up for a protein-packed, budget-friendly meal that stores beautifully in the fridge or freezer, making it a great make-ahead option for busy families. Add a swirl of yoghurt for extra creaminess (or skip it to keep things vegan) and serve with rice or flatbread for a hearty dish everyone will love.Type: Vegetarian, Gluten FreeServes 4-6Prep Time: 5 minutesCooking Time: 35-40 minutesIngredients2 tablespoons olive oil1 brown onion, chopped1 heaped tablespoon curry powder½ yellow capsicum, chopped1 Litre vegetable stock1x400g tin chickpeas, drained and rinsed1 cup dried lentils2 cups spinach, finely choppedGreek yoghurt, to serveParsley leaves, chopped, to serveRecipe1. Heat a large pot or saucepan over medium heat. Add the olive oil and onions and cook for 5-10 minutes until softened. Add in the curry powder and cook for a couple more minutes. 2. Stir through the yellow capsicum and cook for 1-2 minutes. Pour in the vegetable stock, then add the chickpeas. Stir to combine. 3. Turn up the heat to high, cover the pot and bring to the boil. Once boiling, reduce the heat to medium and pour in the dried lentils. Stir to combine, then cover and simmer for 20 minutes until the lentils are cooked. 4. Add in the spinach and stir through. Cover the pot to allow the spinach to cook for 2-3 minutes. 5. Remove the dhal from the heat and divide between serving bowls. Top with a large dollop of yoghurt to stir through, and a sprinkle of parsley. Enjoy!Lentil MoussakaThis veggie twist on the classic Greek dish is a total crowd-pleaser. Instead of lamb, hearty lentils take centre stage, layered with soft roasted eggplant and topped with creamy béchamel. It’s rich, comforting, and packed with flavour, perfect for a family dinner. Here’s a tip: make it the day before! Letting it sit overnight helps the flavours meld together and makes slicing so much easier. Store it in the fridge and simply reheat before serving for a wholesome, warming meal.Type: Vegetarian, Gluten FreeServes 6Prep Time: 15 minutes Cooking Time: 60 minutesIngredients2 eggplants, sliced into thin circular rounds2 tablespoons olive oil1 garlic clove, crushed1 brown onion, finely chopped1 red capsicum, finely chopped 2 tablespoons tomato paste2x 400g tins of cherry tomatoes2x 400g tins of brown lentils, drained and rinsed 1 cup smooth ricotta cheese2 eggs1 cup Greek yoghurtSprinkle of black pepperSprinkle of nutmeg ½ cup parmesan cheese, gratedRecipe1. Preheat the oven to 180°C.2. Heat a large non-stick frying pan over medium heat. Fry the eggplant rounds for 2 minutes on each side until slightly softened, then transfer the cooked eggplant to a plate and set aside. Continue to fry the remaining eggplant slices in batches. 3. Meanwhile, heat a large saucepan over medium heat. Add in the olive oil and garlic, and cook for a couple of minutes until fragrant.4. Add in the onion and red capsicum and fry for 3-4 minutes. Stir in the tomato paste, tinned tomatoes and lentils. Continue to cook for 10 minutes, uncovered, until the sauce is slightly thickened. 5. Whilst the lentil sauce is cooking, prepare the topping. In a bowl, whisk together the ricotta, eggs and Greek yoghurt until smooth. Whisk in the black pepper and nutmeg, then set aside. 6. Once the lentil sauce is thickened, remove from the heat. Add a small amount of the sauce to a rectangular ovenproof dish – enough just to cover the bottom of the dish. 7. Top with 1/3 of the fried eggplant slices, overlapping them to form a layer of eggplant. Now top with 1/3 of the lentil sauce. Continue layering until all of the eggplant slices and lentil sauce is used up, finishing with a layer of lentil sauce on the top. 8. Spread the ricotta mixture over the top of the lentil sauce, spreading as evenly as possible. Sprinkle the Parmesan cheese over the top. 9. Place into the oven to bake for 25-30 minutes, until the sauce is bubbling in the edges of the dish and the topping is set and golden brown. Serve immediately and enjoy!Harissa Tofu Lentil BowlsSpicy, savoury and packed with goodness, these Harissa Tofu Lentil Bowls are a warming weeknight winner. The harissa gives the tofu a gentle kick (mild enough to be kid-friendly if you adjust the spice), while lentils add protein and fibre to keep everyone full. Quick to prep and perfect for leftovers, you can even make extra for lunch the next day. Top with fresh coriander and crumbled feta for a burst of flavour, and enjoy a vibrant, wholesome meal that’s as colourful as it is tasty.Type: Vegetarian, Gluten Free, Winter WarmerServes 4Prep Time: 5 minutes Cooking Time: 20 minutes Ingredients2 tablespoons olive oil1x 400g block firm tofu, cut into cubes2 tablespoons harissa paste1 brown onion, finely chopped1 carrot, finely chopped1 stick celery, finely chopped1 clove garlic, crushed2x 400g tin brown lentils, drained and rinsed1 cup vegetable stock2 tablespoons tomato paste1 cup fresh coriander leaves 100g feta cheeseRecipe1. Heat 1 tablespoon of olive oil in a large frying pan over medium-high heat. Mix the tofu with 1 tablespoon of the harissa paste, and mix well to ensure the tofu is coated. 2. Place the tofu into the frying pan and fry for 1-2 minutes on each side until crispy and golden. Remove from the pan and set aside. 3. Add the remaining 1 tablespoon of olive oil to the frying pan. Add in the onion, carrot, celery and garlic. Cook for 5 minutes, stirring occasionally until the vegetables are softened. 4. Add in the lentils, vegetable stock, tomato paste and the remaining 1 tablespoon of harissa paste. Mix to combine. 5. Allow the mixture to bubble, then reduce the heat to medium. Simmer, uncovered, for a further 10 minutes until the mixture has thickened. At this stage, you can add the tofu back in to heat through.6. Divide the lentil mixture between serving bowls. Top with the fried tofu, fresh coriander, and crumble the feta on top. Serve immediately and enjoy!Lentil Cottage PieComfort food that the whole family can enjoy! This Lentil Cottage Pie is hearty, wholesome, and easily adapted for babies and kids by softening the veg and keeping the seasoning mild. Lentils make it filling and nutritious, while the creamy mashed potato topping is always a hit with little ones. Make a big batch. It stores well in the fridge for a few days, making it perfect for busy weeknights. For adults, serve alongside a fresh rocket, shaved parmesan and balsamic salad to add a bit of zing.Type: Vegetarian, Gluten Free, Kid Friendly, Baby FriendlyServes 4Prep Time: 10 minutesCooking Time: 45 minutes Ingredients2 tablespoons olive oil1 brown onion, finely chopped1 carrot, finely chopped1 stick celery, finely chopped2x 400g tins brown lentils, drained and rinsed250ml vegetable stock2 tablespoons tomato paste1 teaspoon Harissa paste2 medium sweet potato, peeled and chopped½ cup milkRecipe1. Preheat the oven to 180°C. Add the olive oil to a large saucepan over medium-high heat. 2. Add in the onion, carrot and celery. Cook over medium-high heat for 5 minutes until softened, stirring every few minutes. Add in the lentils and reduce the heat to low. 3. Baby Friendly: If you are preparing this recipe for a baby, remove a small amount of the mixture and set aside. Blend to a puree or mash the mixture in a bowl, depending on the age of your baby and what weaning stage they are at. 4. Add the vegetable stock, tomato paste and Harissa paste into the saucepan with the lentil mixture. Allow mixture to simmer for 5-10 minutes, uncovered, to absorb the liquid. 5. Meanwhile, heat a small saucepan over high heat. Add in the chopped sweet potato and cover with water. Bring to the boil and cook for 5-10 minutes until the sweet potatoes are softened. 6. Drain the sweet potatoes and return to the saucepan. Add in the milk and mash until smooth. 7. Transfer the lentil mixture into a square baking dish. Top with the mashed sweet potato. Use a fork to create ridges in the sweet potato, as this will allow it to crisp up in the oven.8. Place into the oven for 20-25 minutes, until the lentils are heated through and the sweet potato is crispy and slightly golden. 9. Serve immediately and enjoy!10. Kid-friendly: If you are preparing this recipe for young children, you could use small oven-proof ramekins to bake miniature lentil cottage pies. Transfer the lentil mixture between 6 ceramic ramekins, then top each with the sweet potato mash. Place into the oven for 10-15 minutes. Allow to cool slightly before serving. Lentil Beetroot SaladBright, colourful and full of flavour, this Lentil Beetroot Salad is a winner for summer weeknights. Roasting the beetroot brings out its natural sweetness, and paired with hearty lentils, it makes a filling, nutritious meal. A little prep at the start of the week goes a long way. A roasted veg can be used for lunches or dinners all week. Quick to assemble, fresh, and packed with goodness, this salad is as kid-friendly as it is adult-approved.Type: Vegetarian, Gluten FreeServes 4Prep Time: 10 minutesCooking Time: 0 minutes Ingredients1 bag rocket leaves1x400g tin lentils, drained and rinsed2 whole roasted beetroots, choppedHandful fresh mint leaves2 tablespoons olive oil1 teaspoon red wine vinegar 100g Greek fetaRecipe1. In a large salad bowl, combine the rocket, lentils, beetroot and mint leaves. 2. In a small bowl, add the olive oil and red wine vinegar and stir to combine. 3. Add the olive oil dressing to the salad. 4. Crumble the feta over the top of the salad. Serve immediately and enjoy! Lentil Salad with TunaQuick, tasty and packed with protein, this Lentil Salad with Tuna is perfect for busy weeknights or lunchboxes on the go. Hearty lentils meet flaky tuna for a satisfying combo that keeps little tummies full, while a simple dressing adds just the right amount of flavour. Easy to prep in advance and toss together, it’s a smart, wholesome option for families looking for a nutritious, fuss-free meal.Type: Contains Fish, Gluten Free, Lactose FreeServes 4Prep Time: 10 minutesCooking Time: 0 minutes Ingredients1 bag rocket leaves1x400g tin lentils, drained and rinsed1 punnet cherry tomatoes, halvedHandful fresh dill leavesHandful fresh parsley250g tin of tuna, drainedFor the dressing:Juice of 1 lemon¼ cup olive oil2 tablespoons Dijon mustardcracked black pepper Recipe1. To prepare the dressing: add the lemon juice, olive oil, Dijon mustard, and cracked black pepper to a small bowl. Whisk well to combine, then set aside. 2. Arrange the rocket leaves to cover the base of a large salad bowl. Top with the lentils, cherry tomatoes, and a sprinkle of fresh dill and parsley. 3. Add the tuna on top, followed by another sprinkle of fresh dill and parsley. 4. Drizzle the dressing on top of the salad. Serve immediately and enjoy!Summing UpLentils are a quietly powerful ingredient, loaded with protein, fibre and nutrients. They’re a great way to make family meals healthier without sacrificing flavour. From hearty curries and bolognese to colourful salads and comforting pies, there’s a lentil recipe here to suit every taste and mealtime. With some simple strategies, you can sneak in extra veggies, prep meals in advance, and even win over fussy eaters along the way. So grab a bag of lentils, pick a recipe (or two!) from this list, and get cooking. Your kids might just ask for seconds.Keep on top of things with expert tips, top strategies, exclusive offers, and personalised support!Click HereMeet Dr Nick FullerMy StoryAs a father, I know first-hand that raising healthy and happy children is tricky. Children are fussy, particularly at the end of the day when they are shattered. We also live in a society where companies seek to profit from what we feed our kids; incorrect and damaging advice is pushed on us and marketed towards our children, and we have no time.But with these recipes and resources, you and your children can enjoy simple and well-founded food and lifestyle choices for lifelong health.

How to Prepare Rainbow Pizza For Kids in Under 30 Minutes
If you’re looking for a fun way to get kids excited about cooking and eating more colourful veggies, rainbow pizza is your new best mate. It’s bright, it’s creative, and yes, it actually gets kids reaching for capsicum instead of chips. Studies suggest that kids are more likely to try new foods when they help prepare them, especially when there’s colour involved, so rainbow pizza is pretty much a parenting hack disguised as dinner.The best part? You can make it with simple ingredients, no fancy chef skills needed. Ready to turn your kitchen into a mini pizzeria? Let’s dive in.Make Kids Excited About Healthy FoodGetting kids to eat colourful veggies doesn’t have to be a challenge. Healthy Parents, Healthy Kids by Dr Nick Fuller shares practical tips to make mealtimes engaging, balanced, and stress-free. His strategies help children enjoy fun meals like rainbow pizza while developing a positive attitude towards healthy eating.Grab your copy of Healthy Parents, Healthy Kids today and turn creative meals into joyful, nourishing experiences.What’s the Idea Behind Rainbow Pizza?The whole idea behind rainbow pizza is to turn a kid-favourite classic into an edible art project. Instead of tossing on random toppings, we line them up by colour to create a bright, eye-catching rainbow. Each colour brings its own little nutritional bonus, from vitamin-packed capsicum to antioxidant-rich purple cabbage.This fun, colourful twist turns veggies from ‘boring' to ‘cool’ in a matter of minutes, making even picky eaters curious enough to give them a try. It’s an easy way to make dinner feel special and creative without adding extra effort.A Step-by-Step Guide to Make Rainbow Pizza for KidsRainbow pizza is a fun, hands-on way to turn dinner into a mini kitchen adventure. With bright veggies lined up in rainbow order, kids get to explore new flavours while creating their very own edible artwork.Serves: 2 large or 4 mini pizzasPrep Time: 15–20 minutes (longer if kids help with toppings)Cooking Time: 10–12 minutesIngredientsPizza bases: Homemade, store-bought, wholemeal, mini rounds or gluten-free basesSauce: Mild tomato sauce, BBQ sauce, or light garlic butterCheese: Grated mozzarella or plant-based melting cheeseRainbow toppings:Red: Cherry tomatoes, red capsicum, pepperoni circlesOrange: Grated carrot, orange capsicumYellow: Corn, pineappleGreen: Spinach, peas, basil, broccoli floretsBlue/Purple: Purple cabbage, red onion, beetrootSteps1. Start with a pizza base. Homemade, store-bought, wholemeal or mini rounds all work.2. Spread a mild sauce. Consider tomato, BBQ or even a light garlic butter for fussier eaters.3. Arrange your rainbow toppings in this order:Red: Cherry tomatoes, capsicum, pepperoni circlesOrange: Carrots, orange capsicumYellow: Corn, pineappleGreen: Spinach, peas, basil, broccoliBlue/Purple: Purple cabbage, red onion, beetroot4. Bake at 200°C for about 10–12 minutes, or until the cheese is bubbly and edges are golden.5. Serve and let the kids admire their masterpiece before devouring it.Tips for Cooking with KidsCooking with kids can be a mix of chaos and giggles, but with a few simple tricks, it turns into a stress-free, confidence-boosting adventure. These tips help keep things safe, organised, and fun, while letting kids explore and get creative.Prep ingredients ahead of timeSlice, grate, and measure everything before the kids hit the kitchen. It keeps the activity flowing, avoids long waits, and reduces risks with knives and heat, so you can supervise without stress.Let kids pick their own toppingsGive them the freedom to choose! When kids design their own pizza, they’re more likely to add colours and flavours they’re curious about. Bonus: it builds confidence and independence.Use mini or personal pizza basesLittle hands, little pizzas! Individual bases make portioning easy, reduce squabbles over slices, and give each child a chance to make their own masterpiece.Keep sauces mild and simpleYoung tastebuds prefer gentle flavours, often favouring sweet and gentle tastes over anything bitter or strong. Tomato, garlic butter, or a light olive oil base keeps things tasty but kid-friendly. This keeps the focus on decorating and having fun.Pre-bake the crust slightlyA quick pre-bake keeps crusts from getting soggy and helps toppings cook evenly. You’ll get a pizza that’s crispy at the edges, soft in the middle, and easy for little hands to handle.Set up a colourful topping stationA rainbow-style topping station turns pizza night into an immersive, colourful experience. Organise the toppings in bowls by colour so kids can easily pick and choose. Kids are more likely to explore new veggies when they look fun and playful.Use safe, kid-friendly utensilsSilicone spatulas, plastic knives, and small ladles make it safe for kids to participate while giving them real control. Using the right tools boosts their confidence, helps them feel capable in the kitchen, and encourages positive attitudes towards cooking and healthy eating.Teach basic kitchen safetyCooking with kids is fun, but it’s also a great opportunity to teach them simple safety rules. Remind them about hot ovens, sharp tools and staying calm and steady in the kitchen. These small lessons help create safe habits that they’ll carry with them as they grow.Encourage creativity with colours and shapesRainbow pizza is already fun, but giving kids permission to get creative takes it to the next level. They can try stripes, spirals, smiley faces or even make patterns using vegetable shapes. This artistic freedom keeps them engaged and makes the final dish feel truly theirs.Make cleanup a shared activityTurn cleanup into part of the fun. Kids can wipe benches, put toppings away, or handle other simple tasks. When it’s a shared activity, tidying up feels quick, easy, and even a little satisfying.Wrapping UpRainbow pizza is a colourful, creative, and kid-approved way to make dinner fun. It’s easy to prep, encourages kids to explore new flavours, and doubles as a bonding activity in the kitchen. Whether you’re dealing with picky eaters or simply looking for a bright, cheerful meal, this recipe is a winner for family night. Ready to cook up some colour? Time to roll the dough and let the rainbow magic begin.Want to add even more colour and fun to your child’s plate? Pair your rainbow pizza with our Innovative Salad Ideas for Kids That Make Veggies Fun for extra veggie-packed goodness.Stay informed with fresh tips, expert guidance, unique deals, and tailored support!Click HereMeet Dr Nick FullerMy StoryAs a father, I know first-hand that raising healthy and happy children is tricky. Children are fussy, particularly at the end of the day when they are shattered. We also live in a society where companies seek to profit from what we feed our kids; incorrect and damaging advice is pushed on us and marketed towards our children, and we have no time.But with these recipes and resources, you and your children can enjoy simple and well-founded food and lifestyle choices for lifelong health.

3 Easy Frozen Meals for Kids You Can Prep Ahead
If you’ve ever wished dinner could magically appear after a long day, frozen meals might just be the next best thing. Having a freezer stocked with kid-approved meals means fewer ‘What’s for dinner?’ meltdowns and more time for, well… anything else.And here’s the kicker: freezing food doesn’t mean losing nutrition. Studies have shown that frozen fruits and veggies can be just as nutritious (and sometimes even more so) than fresh ones. So yes, those frozen bolognese muffins or veggie-packed pasta bakes still pack a healthy punch.So, whether you’re juggling school lunches, weeknight dinners, or snack attacks, frozen meals for kids are your secret weapon for stress-free, nutritious eating, all while keeping those little taste buds smiling.Healthy Frozen Meals That Work for Busy FamiliesBetween school runs, sports and work, mealtime can feel like a race. Healthy Parents, Healthy Kids by Dr Nick Fuller helps families find balance with practical tips for planning, prepping and storing nutritious frozen meals kids will enjoy. It’s all about making healthy eating realistic, without the pressure.Simplify your week and keep mealtimes calm. Grab your copy of Healthy Parents, Healthy Kids today and make frozen meals a fresh, healthy win.Do Frozen Meals Work for Kids?Absolutely! Frozen meals can work wonders for kids, especially when they’re made with nutritious ingredients and a bit of planning. Here’s why:1. Freezing keeps the goodness in. As mentioned earlier, frozen fruits and veggies often have equal or even higher nutrient levels than ‘fresh’ produce that’s been sitting around for a few days. Freezing helps lock in vitamins, minerals, and flavour right after harvest, meaning your frozen peas and berries are still nutrient-rich by the time they hit the plate.2. Kids are more open to frozen favourites. A survey found that nearly half of parents said their families genuinely enjoy pre-packaged or ready-made (commonly frozen) meals. Many parents also liked that kids could help heat and serve meals, a small act that boosts food acceptance, especially for fussy eaters who like a bit of control.3. They make balanced eating easier. Frozen foods help families serve veggies and proteins more often, even on those chaotic weeknights. Having healthy, freezer-ready meals means you’re less likely to rely on takeaway or snacks when time’s tight.Quick tip: When possible, go for homemade frozen meals instead of ultra-processed options. You’ll still save time, cut waste, and keep the nutrition (and calm) intact.Before you load up your trolley, here’s the truth about fresh vs frozen fruits and veggies. The answer might just change your grocery routine.3 Kid-Approved Frozen Meal IdeasTime to put those freezer tips to work. Here are three delicious, kid-approved meals you can make ahead and serve anytime.Fish PieThis creamy, comforting fish pie is a family favourite and perfect for freezing. It’s packed with protein and omega-3s to support growing brains, making it a smart choice for both kids and babies. The recipe can be easily modified for little ones by using gentle seasonings and mashing the filling to a smoother texture. Serve it with a side of peas or steamed greens for extra colour and nutrition.Freezer tip: Portion it into small containers before freezing so you can defrost exactly what you need for quick, no-fuss weeknight dinners. Type: Contains Fish, Kid Friendly, Baby FriendlyServes 6-8Prep Time: 10 minutesCooking Time: 45 minutes Ingredients2 tablespoons olive oil1 brown onion, finely chopped1 carrot, finely chopped4 large potatoes, peeled and chopped½ cup frozen peas, carrots and corn mix2 tablespoons plain wholemeal flour1 heaped tablespoon Dijon or English mustard2 cups (500mls) milk, plus a splash extra1 cup baby spinach400g fillet fresh skinless barramundi, or other white fish, chopped into 3cm piecesA few sprigs fresh dill, choppedRecipe1. Preheat the oven to 190°C. Heat the olive oil in a large saucepan or pot over medium-high heat. 2. Add in the onion and carrot. Cook for 5 minutes until softened, stirring every few minutes. 3. Meanwhile, add the potatoes to a large saucepan and cover with water. Bring to a boil over high heat, and cook for 5-10 minutes until the potatoes are soft.4. Drain the potatoes and return to the saucepan. Add in a splash of the milk and mash until smooth. Set aside. 5. Add the frozen veggies to the pan with the onion and carrot. Sprinkle over the flour and cook, stirring, for 1 minute. 6. Add in the mustard, then slowly add in the milk whilst stirring. Simmer for 4-5 minutes, then remove from the heat. Once removed from the heat, gently stir in the baby spinach, fish pieces, and dill. 7. Transfer the fish mixture into a large rectangular baking dish. Top with the mashed potatoes. Use a fork to create ridges in the mashed potatoes as this will allow them to crisp up in the oven.8. Place into the oven and bake for 20-25 minutes, until the liquid is bubbling up at the edges and the potato topping is crispy and slightly golden. Serve immediately and enjoy!9. Baby Friendly: Scoop some of the pie and blend or mash together depending on your child’s stage of weaning. Allow to cool before serving. 10. Kid Friendly: If you are preparing this dish for kids, you could make this recipe into individual fish pies. Divide the fish mixture between 8 ceramic ramekins, and top each with mashed potato. Place into the oven for 10-15 minutes. Allow to cool slightly before serving. Alternatively, if you are serving kids from the large family sized pie, allow it to cool slightly before serving. Lentil Cottage PieThis cosy lentil cottage pie is comfort food made easy — hearty, wholesome, and perfect for the freezer. It’s packed with plant-based protein and veggies, making it a sneaky way to get more goodness into little tummies. You can easily tweak the texture for babies or younger kids, and it reheats beautifully for quick weeknight meals. For the grown-ups, serve it with a fresh rocket salad topped with shaved parmesan and a drizzle of balsamic, because you deserve a little fancy too.Freezer tip: Make a big batch and freeze in single portions for fuss-free lunches or last-minute dinners that everyone will love.Type: Vegetarian, Gluten Free, Kid Friendly, Baby FriendlyServes 4Prep Time: 10 minutesCooking Time: 45 minutes Ingredients2 tablespoons olive oil1 brown onion, finely chopped1 carrot, finely chopped1 stick celery, finely chopped2x 400g tins brown lentils, drained and rinsed250ml vegetable stock2 tablespoons tomato paste1 teaspoon Harissa paste2 medium sweet potato, peeled and chopped½ cup milkRecipe1. Preheat the oven to 180°C. Add the olive oil to a large saucepan over medium-high heat. 2. Add in the onion, carrot and celery. Cook over medium-high heat for 5 minutes until softened, stirring every few minutes. Add in the lentils and reduce the heat to low. 3. Baby Friendly: If you are preparing this recipe for a baby, remove a small amount of the mixture and set aside. Blend to a puree or mash the mixture in a bowl, depending on the age of your baby and what weaning stage they are at.4. Add the vegetable stock, tomato paste and Harissa paste into the saucepan with the lentil mixture. Allow mixture to simmer for 5-10 minutes uncovered to absorb the liquid. 5. Meanwhile, heat a small saucepan over high heat. Add in the chopped sweet potato and cover with water. Bring to the boil and cook for 5-10 minutes until the sweet potatoes are softened. 6. Drain the sweet potatoes and return to the saucepan. Add in the milk and mash until smooth. 7. Transfer the lentil mixture into a square baking dish. Top with the mashed sweet potato. Use a fork to create ridges in the sweet potato, as this will allow it to crisp up in the oven.8. Place into the oven for 20-25 minutes, until the lentils are heated through and the sweet potato is crispy and slightly golden. 9. Serve immediately and enjoy.10. Kid friendly: If you are preparing this recipe for young children, you could use small oven proof ramekins to bake miniature lentil cottage pies. Transfer the lentil mixture between 6 ceramic ramekins, then top each with the sweet potato mash. Place into the oven for 10-15 minutes. Allow to cool slightly before serving. Cottage PieYou can’t go wrong with a classic cottage pie: hearty, wholesome, and freezer-friendly. It’s the ultimate comfort meal that keeps everyone happy, from babies to big kids (and yes, the adults too). We’ve added simple tweaks to make it baby- and kid-friendly, so you can serve up the same meal for the whole family without extra fuss.Pair it with a side of peas and some steamed green veggies for a balanced, no-stress dinner that freezes beautifully for another night. Type: Contains Beef, Kid Friendly, Baby FriendlyServes 6Prep Time: 10 minutesCooking Time: 45 minutes Ingredients2 tablespoons olive oil1 brown onion, finely chopped1 carrot, finely chopped1 stick celery, finely chopped500g lean beef mince2 tablespoons flour2 tablespoons tomato paste2 cups beef stock1 tablespoon Worcestershire sauce4 potatoes, peeled and chopped½ cup milkRecipe1. Preheat the oven to 180°C. Heat the olive oil in a large wide saucepan or pot over medium-high heat. 2. Add in the onion, carrot and celery. Cook for 5 minutes until softened, stirring every few minutes. 3. Add in the beef mince and cook for a further 5 minutes, stirring regularly, until browned. 4. Baby Friendly: remove some of the beef and veggie mixture. Allow to cool slightly, then blend or mash depending on your child’s weaning stage. You could also add in some of the potatoes once boiled, and mash them into the beef mixture. 5. Add in the flour, tomato paste, beef stock, and Worcestershire sauce and stir to combine. Reduce the heat to medium and allow the mixture to simmer for 20 minutes, stirring occasionally, until the liquid has reduced and the sauce has thickened. 6. Meanwhile, add the potatoes to a saucepan and cover with water. Bring to a boil over high heat, and cook for 5-10 minutes until the potatoes are soft.7. Drain the potatoes and return to the saucepan. Add in the milk and mash until smooth. 8. Transfer the beef mixture into a large rectangular baking dish. Top with the mashed potatoes. Use a fork to create ridges in the mashed potatoes as this will allow them to crisp up in the oven. 9. Place into the oven and bake for 20-25 minutes, until the liquid is bubbling up at the edges and the potato topping is crispy and slightly golden. Serve immediately and enjoy!10. Kid Friendly: If you are preparing this dish for kids, you can cook it into individual miniature cottage pies. Divide the beef mixture between 8 ceramic ramekins, and top each with mashed potato. Place into the oven for 10-15 minutes. Allow to cool slightly before serving. Tips to Freeze and Reheat MealsFreezing kids’ meals doesn’t have to be complicated. Here’s how to make sure every meal comes out just as good as the day you made it.Portion into kid-sized containersFreeze meals in small, single-serve portions to make mealtime quick and stress-free. It saves you from thawing a huge batch when your little one only needs a small serve. Plus, smaller portions freeze and reheat more evenly, so no more half-cold, half-steaming meals.Label with name and dateAlways label your containers with what’s inside and when you made it. Your future self will thank you! It’s an easy way to avoid the classic ‘mystery meal’ moment when you’re digging through the freezer. Try adding reheating instructions too, especially for mixed dishes like pasta bakes or stews.Freeze meals flat for easier stackingLay your freezer bags flat before they harden, then stack them upright like books. It saves loads of space and makes it easier to find what you need. This trick also helps food freeze faster, which keeps texture and flavour intact.Use airtight containers or freezer bagsAir is the enemy of frozen food. It causes freezer burn and dulls flavour. Choose airtight containers or sturdy freezer bags to keep everything fresh and tasty. Silicone pouches or BPA-free plastic containers are eco-friendly options that work beautifully for kids’ meals.Cool food before freezingLet your meals cool completely before freezing to prevent soggy textures and ice build-up. Hot food creates steam, which turns into unwanted ice crystals that can change how your meal tastes later. A quick cool-down on the counter or in the fridge does the trick perfectly.Reheat thoroughly and stir for even warmthAlways heat frozen meals until they’re piping hot all the way through, especially for dishes with meat, rice, or sauce. Give everything a good stir halfway through reheating to make sure there are no cold spots. This helps keep both taste and safety in check.Avoid refreezing once thawedOnce you’ve thawed a meal, try not to pop it back in the freezer. Refreezing can affect the texture and quality (and isn’t great for food safety). Instead, refrigerate leftovers and use them within a day or two.Wrapping UpFreezer meals can be a real game changer for families. They make it easier to feed kids wholesome, satisfying food without the daily kitchen rush. Think comforting pies, cheesy pasta bakes, and veggie-loaded casseroles that go straight from freezer to plate in minutes.The trick is to build your stash slowly. Freeze a few extra servings each week, and soon you’ll have a line-up of homemade meals ready for those ‘what’s for dinner?’ moments. It’s a small effort now that pays off big when hunger strikes.Stay informed with fresh tips, expert guidance, unique deals, and tailored support!Click HereMeet Dr Nick FullerMy StoryAs a father, I know first-hand that raising healthy and happy children is tricky. Children are fussy, particularly at the end of the day when they are shattered. We also live in a society where companies seek to profit from what we feed our kids; incorrect and damaging advice is pushed on us and marketed towards our children, and we have no time.But with these recipes and resources, you and your children can enjoy simple and well-founded food and lifestyle choices for lifelong health.
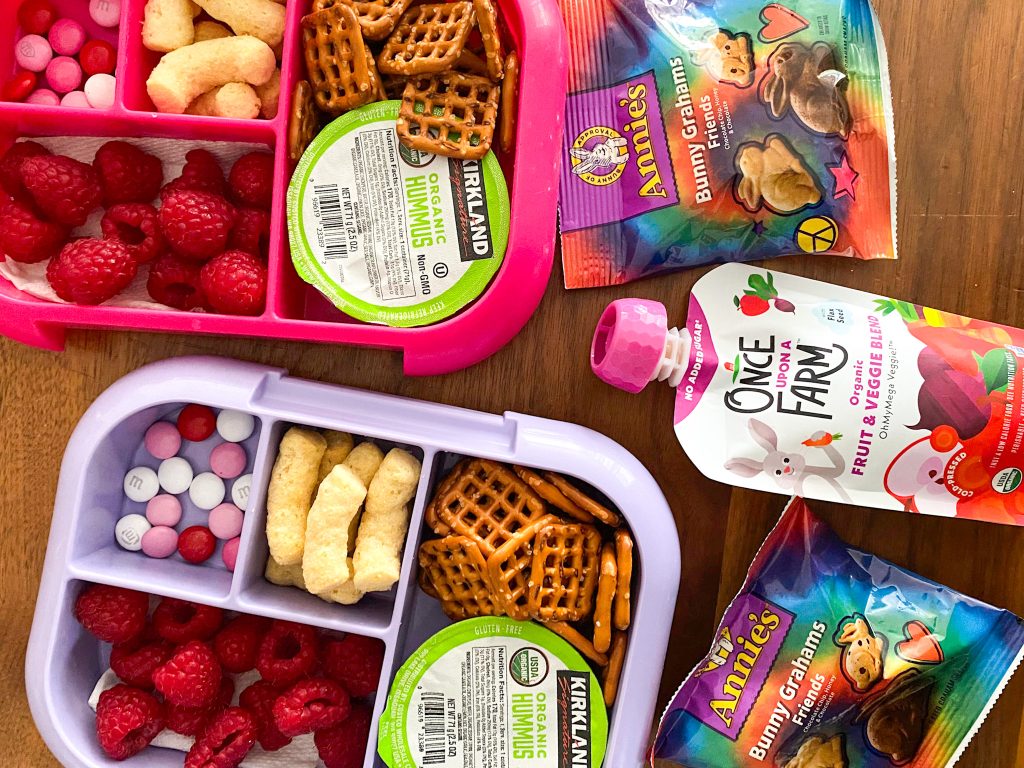
8 School Snacks For Kids That Upgrade Boring Lunchboxes
Did you know that kids get roughly one-third to half of their daily calories from what they eat at school? That means what goes into their lunchbox matters a lot. Yet research shows that most Aussie kids still reach for discretionary foods like biscuits, processed snacks and sweet bars during school time.The key is finding that sweet spot between healthy and yummy. With the right mix of whole grains, fruits, protein and healthy fats, school snacks can fuel growing bodies and hungry minds, without any lunchbox leftovers coming home.In this guide, we’ve rounded up school snack ideas that tick all the boxes: easy to prep, nutritious and totally kid-approved. Ready to make snack time the smartest part of the school day? Let’s dig in!Say Goodbye to Lunchbox Stress!Tired of half-eaten school snacks coming home? Dr Nick Fuller’s Healthy Parents, Healthy Kids shows how to create balanced, appealing options that kids actually want to eat. With expert insights and easy-to-follow strategies, this guide helps make school-day nutrition simple and stress-free.Wave goodbye to lunchbox battles. Grab your copy of Healthy Parents, Healthy Kids today and pack snacks that kids love and parents trust.8 Healthy School Snacks Ideas for KidsSchool days run smoother with the right snacks! These 8 healthy school snack ideas are easy to pack, nourishing, and guaranteed to keep kids fuelled and focused.Mini Baked Oat CupsThese mini baked oat cups make the ultimate school snack for kids: wholesome, filling and naturally sweet without the sugar rush. Made with simple ingredients like oats, milk and fruit, they’re packed with fibre and slow-release energy to keep kids focused through the school day. Bake a batch on the weekend, store a few in the fridge for the week ahead and freeze the rest for busy mornings. Just pop one into the lunchbox, and by recess, it’ll be soft, tasty and ready to eat, no prep needed.Type: Vegetarian, Gluten Free, Dairy Free, Kid Friendly, Baby Friendly, SnacksMakes 18 mini muffinsPrep Time: 5 minutesCooking Time: 15 minutes IngredientsOlive oil spray, for greasing2 overripe bananas1 egg½ cup milk2 cups rolled oatsPinch of cinnamon¾ cup frozen raspberries, thawedRecipe1. Preheat the oven to 180°C. Use the olive oil spray to grease two 12-hole mini muffin trays. 2. Add the bananas to a mixing bowl and use a fork to mash. Add in the egg and mash to combine with the banana. 3. Add in the milk and the rolled oats. Stir until all ingredients are combined. 4. Add in the cinnamon and the raspberries, and thoroughly stir through the oat mixture. 5. Use a tablespoon to scoop the oat mixture into the muffin trays. Ensure that the oat mixture fills each muffin tray hole to the top. 6. Place into the oven and bake for 15 minutes until the oat cups have risen and are slightly golden on top. 7. Let the oat cups sit in the tray for 5 minutes, then remove from the mini muffin tray and allow the oat cups to cool. Enjoy!Spinach MuffinsThese savoury spinach muffins are a smart and tasty school snack for kids, sneaking in extra greens without any fuss. Soft, cheesy and mild in flavour, they’re gentle on little tummies and perfect for lunchboxes. Packed with goodness from spinach and protein-rich cheese, they make a satisfying bite that keeps kids fuelled and focused through their school day.Type: Vegetarian, Kid Friendly, Baby Friendly, SnacksMakes 16 muffinsPrep Time: 10 minutesCooking Time: 20 minutes IngredientsOlive oil spray, for greasing150-200g baby spinach leaves2 eggs¾ cup Greek yoghurt½ cup milk½ cup cheddar or mozzarella cheese, grated 2 cups wholemeal self-raising flourRecipe1. Preheat the oven to 180°C. Use the olive oil spray to grease two 12-hole muffin trays. 2. Add the baby spinach to a large mixing bowl. Use scissors to roughly chop the spinach into small pieces. 3. Add in the eggs, and mix well to combine. Stir through the Greek yoghurt, milk, and cheese. 4. Gently mix in the flour. Try to mix until only just combined, as over-mixing will result in a tough textured muffin. 5. Scoop the muffin mixture into the prepared muffin trays. 6. Place into the oven and bake for 20 minutes until the muffins have risen and are slightly golden. 7. Allow to cool for 5 minutes before removing the muffins from the tray. Allow to cool completely, then serve and enjoy!Baby Banana MuffinsSoft, naturally sweet and perfectly sized for little hands, these baby banana muffins make an ideal school snack for kids. Packed with goodness from ripe bananas and other wholesome ingredients, they’re a tasty and nourishing treat that fits easily into any lunchbox. Light, fluffy and full of natural flavour, they’re sure to be a hit at recess time.Type: Vegetarian, Kid Friendly, Baby Friendly, SnacksMakes 24 mini muffinsPrep Time: 5 minutesCooking Time: 15 minutes IngredientsOlive oil spray½ cup milkJuice of ½ a lemon2 large overripe bananas2 eggs¼ cup Greek yoghurt1/3 cup olive oil1 ¾ cups wholemeal self-raising flourSprinkle of cinnamon Recipe1. Preheat the oven to 160°C. Grease two 12-hole mini muffin trays with olive oil spray, then set aside. 2. Add the lemon juice to the milk and set aside.3. Place the bananas into a mixing bowl. Use a fork to mash the bananas until smooth.4. Add in the eggs and mash into the banana until well combined. It is ok if a few small lumps remain.5. Add the Greek yoghurt and olive oil to the banana mixture. Pour in the milk and lemon juice mixture. Mix until well combined. 6. Add in the flour and cinnamon, then mix gently until just combined. Mixing gently and avoiding overmixing the muffin batter will result in a light and spongey muffin texture. 7. Spoon the muffin batter evenly into the mini muffin tins. Place into the oven and bake for 15 minutes, until risen and lightly golden brown. 8. Remove the muffins from the oven. Allow to cool for 5 minutes before removing the muffins from the trays. Allow the muffins to cool completely, then serve and enjoy!Berry Frozen Yoghurt DropsThese berry yoghurt drops are a fun and fruity school snack for kids, bursting with natural sweetness and a hit of protein and calcium. Made with creamy yoghurt and colourful berries, they’re light, refreshing and perfect for adding a pop of colour to any lunchbox. You can mix in your kids’ favourite fruits for endless flavour combos that are as tasty as they are nutritious.Type: Vegetarian, Kid Friendly, Baby Friendly, SnacksMakes approx. 30 Prep Time: 5 minutes (+ 2 hours freezing time)Cooking Time: 0 minutes Ingredients½ cup mixed berries (strawberries, blueberries, raspberries – frozen also works, just allow to defrost slightly)1 cup Greek yoghurtRecipe1. Prepare 2 flat baking trays by lining with baking paper. 2. Add the berries and the yoghurt to a small blender. Blend well until smooth.3. Use a teaspoon to dollop spoonful’s of the yoghurt mixture onto the baking trays. Continue until all the yoghurt mixture has been used. 4. Carefully transfer the trays into your freezer, ensuring that they are sitting flat and level. 5. Allow to freeze for at least a couple of hours. Once frozen, remove the yoghurt drops from the trays and place into a container, then return to the freezer. 6. Serve the yoghurt drops frozen and enjoy!Banana Oat BarsThese chewy banana oat bars are a naturally sweet and satisfying school snack for kids (and parents too!). Made with wholesome ingredients like oats and bananas, they’re packed with slow-release energy to keep kids fuelled and focused throughout the school day. Soft, chewy and delicious, they’re the perfect lunchbox treat that feels like a dessert but delivers real nourishment.Type: Vegetarian, Dairy Free, Kid Friendly, Baby Friendly, SnacksMakes 15 barsPrep Time: 10 minutesCooking Time: 30 minutes Ingredients2 overripe bananas1 egg1/3 cup olive oil2 tablespoons honey, plus extra to serve (optional)1 heaped tablespoon natural 100% peanut or almond butter1 cup rolled oats½ cup wholemeal self-raising flour1 tablespoons pumpkin seeds (pepitas), plus extra to serve (optional)1 tablespoon sunflower seeds, plus extra to serve (optional)2 tablespoons goji berries, or other dried fruitRecipe1. Preheat the oven to 180°C. Line a square baking tin with baking paper. 2. Add the bananas to a mixing bowl and use a fork to mash. Add in the egg and mash to combine with the banana. 3. Add in the olive oil, honey and peanut butter, and mix well to combine. 4. Gently stir through the rolled oats, flour, pumpkin seeds, sunflower seeds and goji berries. 5. Pour the batter into your square baking tin. Place into the oven and bake for 30 minutes, until golden and firm to the touch. 6. Remove from the oven and allow to cool completely in the tin. Once cool, remove from the tin and slice into 15 bars. 7. Optional: drizzle with honey and sprinkle with extra pumpkin seeds and sunflower seeds before serving. Enjoy!Date Choc Bars These chocolate-stuffed dates are a fun and wholesome school snack for kids, offering a naturally sweet twist on a classic treat. Soft, chewy and full of fibre and healthy fats, they provide a steady energy boost to keep kids going strong through the school day. Pop a couple into the lunchbox for a delicious bite that feels like dessert but packs real nourishment.Type: Vegetarian, Gluten Free, Lactose Free, Contains Nuts, Snacks, Kid FriendlyMakes 10 datesPrep Time: 10 minutesCooking Time: 0 minutes (+2hrs refrigeration) Ingredients10 Medjool dates10 almonds, roasted10 teaspoons 100% natural peanut butter120g 80% dark chocolate¼ cup slivered almonds, roasted and choppedRecipe1. Use a small knife to slice each date open length wise and remove the pit. You don’t want to cut all the way through the date, just along one side so that you can remove the pit. 2. Stuff one roasted almond into each date, in place of the pit. 3. Add one teaspoon of peanut butter into each date, adding it into the middle cavity where you have stuffed the roasted almond. 4. Gently pinch each side of the date together to stick the edges together slightly. 5. Place the dates into the fridge whilst you melt the chocolate. 6. Break the chocolate into small pieces and place into a heatproof bowl. Place into the microwave and heat in 15 second increments. Remove the chocolate from the microwave and stir before heating again. 7. Once the chocolate is just melted, remove from the microwave and stir until smooth. Be careful not to overheat the chocolate as it will turn lumpy. 8. Remove the dates from the fridge. Use a fork to dip one date into the melted chocolate. Ensure the date is evenly coated in a thin layer of chocolate, and allow any excess to drip from the fork back into the bowl. 9. Place the date onto a plate lined with baking paper. Repeat steps 8 and 9 until all the dates are coated in chocolate. Sprinkle the dates with the slivered almonds. 10. Place the dates into the fridge for at least 2 hours until set. Once removed from the fridge, serve immediately and enjoy!Apple Slice DonutsThese colourful apple slice ‘donuts’ make a fun and healthy school snack for kids that’s as playful as it is nutritious. Crisp apple rings are topped with creamy peanut butter or yoghurt, then sprinkled with granola, seeds or a few dark chocolate chips for crunch. They’re cool, crunchy and naturally sweet, the kind of snack kids get excited to find in their lunchbox.Type: Vegetarian, Vegan, Dairy Free, Gluten Free, Contains Nuts, Kid FriendlyMakes 10 ‘donuts’Prep Time: 10 minutesCooking Time: 0 minutes Ingredients2 large pink lady apples3 tablespoons natural 100% peanut butter3 tablespoons of assorted toppingsRecipe1. Use an apple corer to remove the core of each apple. 2. Place the apple on its side so that the empty core is parallel to your chopping board. Trim off both ends of the apple, then slice the apple into 5 even slices. 3. Place the apple slices cut side facing up onto a flat chopping board or plate. 4. Spread the top of each slice with peanut butter. 5. Sprinkle the assorted toppings on top of the peanut butter. 6. Serve the apple ‘donuts’ immediately and enjoy!Banana Oat Cookies These soft and chewy banana oat cookies make a wholesome school snack for kids that’s naturally sweet and satisfying. Made with just four simple ingredients, they’re perfect for keeping little tummies happy between classes or during recess. You can swap the chocolate chips for chopped dark chocolate, almonds or walnuts for a fun twist, a tasty, fuss-free treat kids will love finding in their lunchbox.Type: Vegetarian, Contains Nuts, Snacks, Kid FriendlyMakes 15 cookiesPrep Time: 10 minutesCooking Time: 15 minutes Ingredients2 large overripe bananas½ cup natural 100% peanut butter1 cup rolled oats¼ cup dark chocolate chips Recipe1. Preheat the oven to 180°C. Line 2 baking trays with baking paper. 2. Add the bananas to a mixing bowl and use a fork to mash. 3. Add in the peanut butter and oats and mix well to combine. Leave the mixture to sit for 5 minutes to allow it to thicken.4. Scoop tablespoons of the mixture onto the prepared baking trays. Use a spoon to flatten and shape the mixture into a rough circle.5. Sprinkle the chocolate chips on top of the cookies. 6. Place the cookies into the oven and bake for 15 minutes, until set and slightly golden. 7. Allow to cool on the baking trays, then enjoy.Summing UpWhen it comes to school snacks for kids, a little planning goes a long way. Choosing snacks made from real, nourishing ingredients helps keep kids energised, focused and ready to learn, all while teaching healthy habits that can last a lifetime. From fruity bites to savoury muffins and chewy oat bars, these easy ideas prove that lunchbox snacks can be both fun and wholesome.If you’re looking for more inspiration, check out our other lunchbox-friendly ideas like Nutritious Lunchbox Meals for even more delicious, stress-free options.Stay informed with fresh tips, expert guidance, unique deals, and tailored support!Click HereMeet Dr Nick FullerMy StoryAs a father, I know first-hand that raising healthy and happy children is tricky. Children are fussy, particularly at the end of the day when they are shattered. We also live in a society where companies seek to profit from what we feed our kids; incorrect and damaging advice is pushed on us and marketed towards our children, and we have no time.But with these recipes and resources, you and your children can enjoy simple and well-founded food and lifestyle choices for lifelong health.